Figure
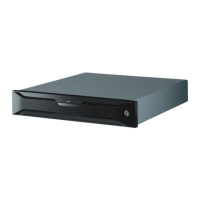
1-1
2-1
2-2
2-3
2-4
2-5
2-6
2-7
2-8
2-9
2-10
2-11
2-12
2-13
2-14
3-1
3-2
3-3
3-4
3-5
3-6
3-7
3-8
3-9
3-10
3-11
3-12
3-13
4-1
4-2
4-3
4-4
4-5
4-6
4-7
4-8
ILLUSTRATIONS
Title
FDl165
Flexible
Disk
Drive
••••••••••••••••••
Unpack
i ng
••••••••••••••••••••••••••••.••••••
Model
FDl165
Physical
Dimensions
••••••••••••
Vertical
Installation
.••••••••••••••••••.•••
Horizontal
Installation
•••••••••••••••••••••
On-End
Installation
•••••••••••••••••••••••••
Air
Flow
Requirements
for
Natural
Air
Cool
i ng
•••••••••••••••••••
'
••••••••••••••••••
Power
Connector
Location
••••••••••••••••••.•
Pin
and
Line
Assignments
for
the
Power
Connec
tor
•••••••••••••••••••••••••••••••••••
Contact
Arrangement
for
Edge
Connector
••••••
In
terf
ace
Connector
•••••••••••••••••••••••••
Terminator
Resistors
and
Jumper
Locations
on
the
PCB
•••••••••••••••.•••••••••••••.••••
Parallel
and
Series
Configurations
••••••••••
Closing
the
Door
of
the
FDl165
••••••••••••••
Unlocking
the
Door
and
Removing
the
Fle'xible
Disk
•••••••••••••••••••••••••••••••
Dr i ver
/R
ec
e i ver Ci r
cui
t s • • • • • • • • • • • • • • • • • • • •
Interface
Lines
•••••••••••••••••••.••••••••.
Step
Signal
Timing
••••••••••••••••••••••••••
WGT
Timing
••••••••••••••••••••••••••••••••••
Write
Data
Signal
Ximing
••••••••••••••••••••
Index
Signal
Timing
•••••
~
•••••••••••••••••.•
Read
Data
Signal
Timing
••••••••••••••••.•.••
Disk
Change
Signal
Timing
•.•••••••.•••••••••
Read
Data
and
Window
Signal
Timing
••••••••••
Step
and
Track
00
Timing
••••••••••••••••••••
Acce
ss
T
imi
ng
•••••••••••••••••••••••••••••••
Write
Timing
••••••••.••••••••••••••••••••.••
Read
T
imi
ng
••••••••••••••.••••••••••••••••••
Removing
the
Collet
Assembly
••••••••••••••••
Replacing
the
Collet
Assembly
•••••••••••••••
Head
Unload
Spring
in
Relation
to
Spring
Plate
.
Position
of
the
Spring
Plate
••••••••••••••••
Carriage
Assembly
position
on
the
Base
Frame
Removing
the
Head Load
Cam
••••••••••••••••••
Installing
the
Head Load
Cam
Assembly
•••••••
Write
Protect
or
Media-In
Sensor
Page
1-2
2-2
2-4
2-4
2-4
2-5
2-5
2-7
2-7
2-8
2-8
2-10
2-11
2-15
2-16
3-2
3-3
3-4
3-5
3-6
3-6
3-8
3-9
3-10
3-10
3-11
3-11
3-12
4-3
4-4
4-5
4-5
4-7
4-8
4-9
Connections.................................
4-10
4-9
Installing
the
Write
Protect
or
Media-In
Sensor......................................
4-10
4-10
Removing
the
Replacing
the
Optical
Tachometer
Sensor
•••••••••••••••••••••••••••
x
4-11