28
2. Projecting an Image (Basic Operation)
After Use
Preparation:Makesurethattheprojectoristurnedoff.
1. Unplugthepowercord.
2. Disconnectanyothercables.
• RemovetheUSBmemoryifitisinsertedintotheprojector.
3. Retractadjustabletiltfootifextended.
• Donottouchthelens.
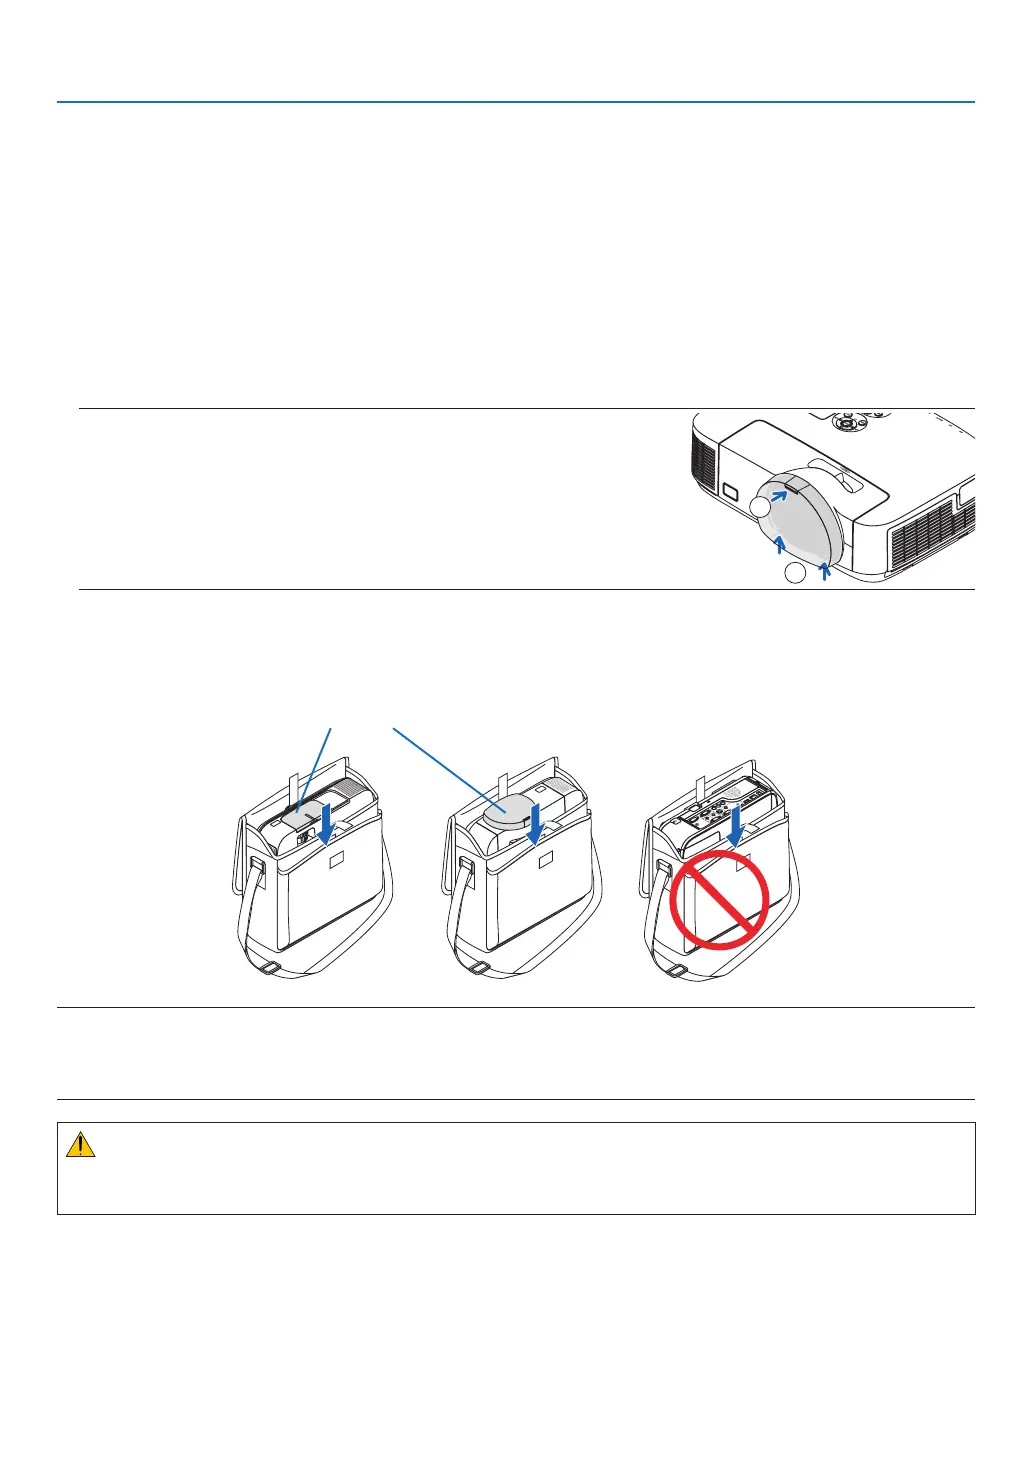
4. Slidethelenscovertotherighttocoverthelens.
Short-throw model (M350XS/M300XS/M260XS/M300WS/
M260WS)
①
Place each catch on the bottom of the lens cap into two grooves of
the projector.
②
Push the top of the lens cap to cover the lens.
5. Puttheprojectorandaccessoriesinthesuppliedsoftcase.
Place the projector in the soft case with the lens facing upward as shown below. This is to prevent the lens from
damage.
Insert the projector with the lens
facing upward
NOTE:
• Whenplacingtheprojectorinthesoftcase,retractthetiltfootandtherearfeet.Failuretodosomaycasedamagetotheprojec-
tor.
• TheM420X,M420XV,M350XS,M300XS,M260XS,M300WS,andM260WSdonotcomewithasoftcase.
CAUTION:
Usecautionwhenputtingtheprojectorinthesoftcaseimmediatelyaftertheprojectorhasbeenoperating.The
projectorcabinetishot.