106
6. Installation and Connections
Making Connections
NOTE:WhenusingwithanotebookPC,besuretoconnecttheprojectorandnotebookPCwhiletheprojectorisinstandbymode
andbeforeturningonthepowertothenotebookPC.
InmostcasestheoutputsignalfromthenotebookPCisnotturnedonunlessconnectedtotheprojectorbeforebeingpoweredup.
* Ifthescreengoesblankwhileusingyourremotecontrol,itmaybetheresultofthecomputer’sscreen-saverorpowermanage-
mentsoftware.
Enabling the computer’s external display
DisplayinganimageonthenotebookPC’sscreendoesnotnecessarilymeanitoutputsasignaltotheprojector.
WhenusingaPCcompatiblelaptop,acombinationoffunctionkeyswillenable/disabletheexternaldisplay.
Usually,thecombinationofthe“Fn”keyalongwithoneofthe12functionkeysgetstheexternaldisplaytocomeon
oroff.Forexample,NEClaptopsuseFn+F3,whileDelllaptopsuseFn+F8keycombinationstotogglethrough
externaldisplayselections.
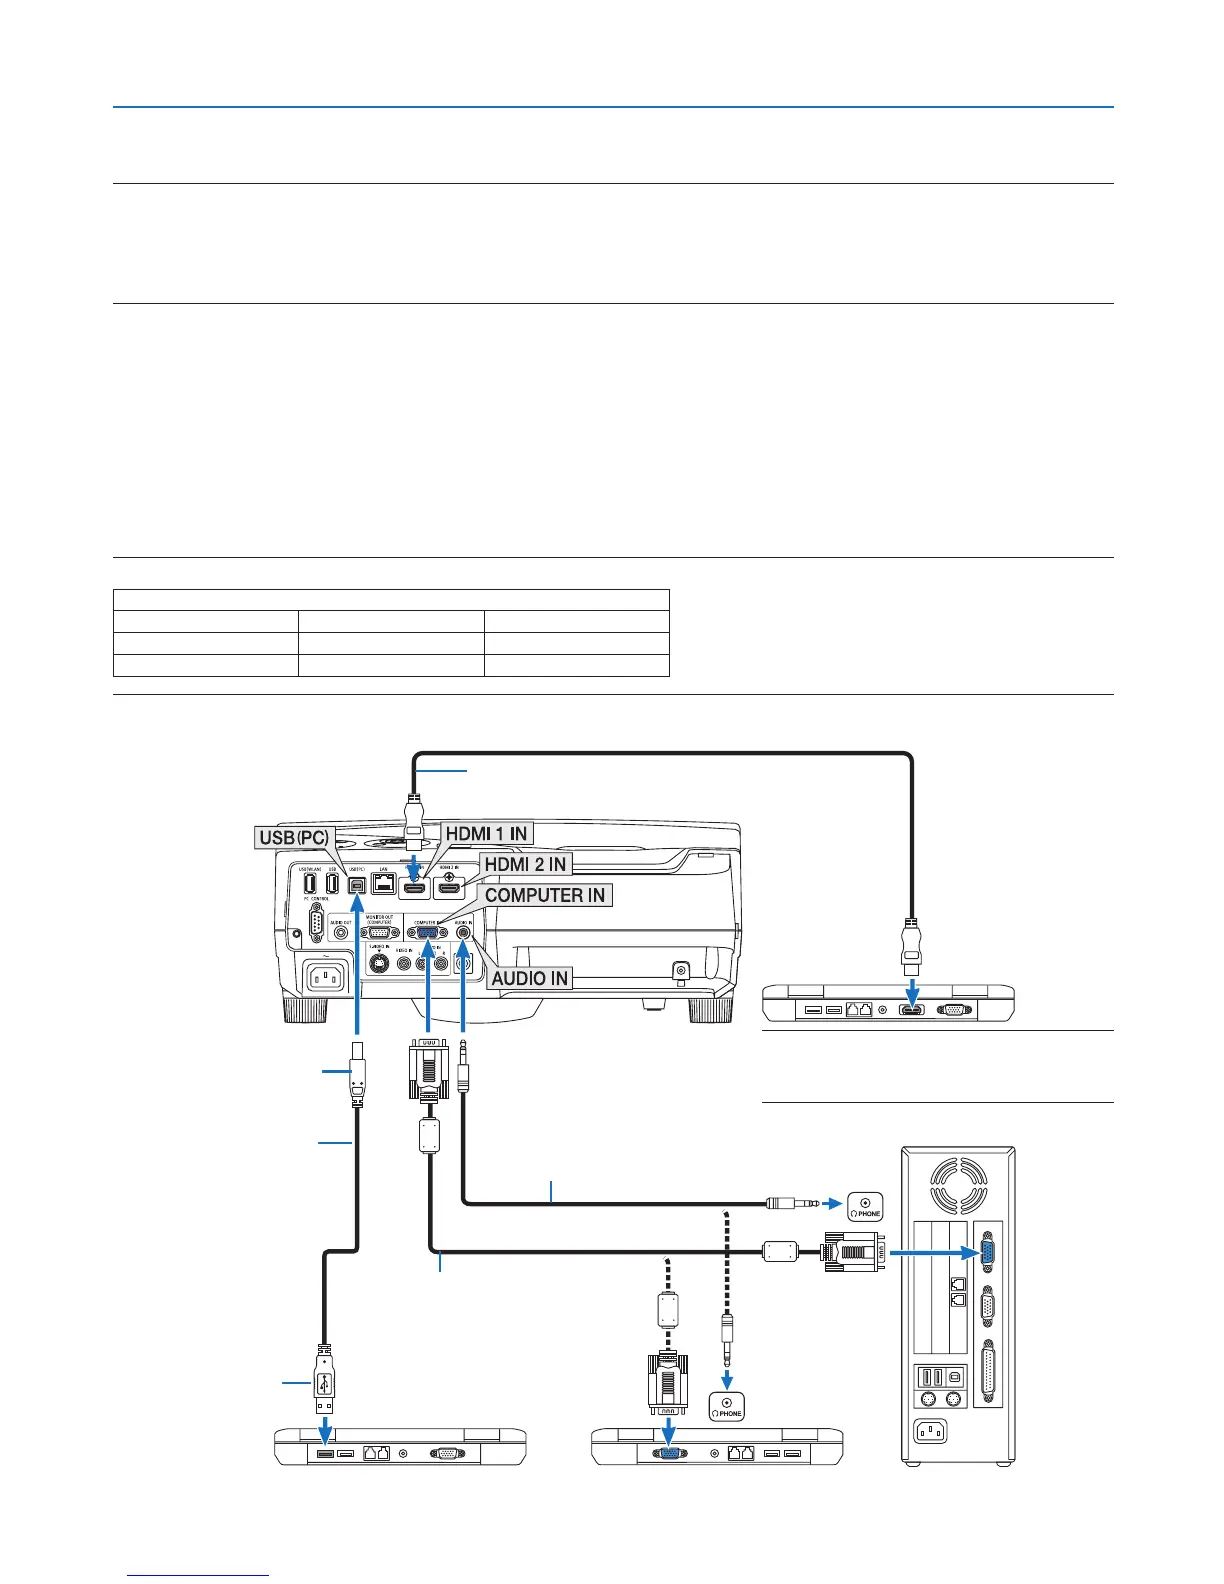
Connecting Your Computer
NOTE:SignalssupportedbyPlug&Play(DDC2)
INPUT
COMPUTER IN HDMI 1 IN HDMI 2 IN
analog digital digital
Yes Yes Yes
A commercially available
USB cable
(compatible with USB 2.0
specifications)
Computer cable (VGA) (supplied)
To mini D-Sub 15-pin connector on the
projector.Itisrecommendedthatyou
use a commercially available distribu-
tion amplifier if connecting a signal
cable longer than the cable supplied.
Type B
Type A
Stereo mini-plug audio cable (not supplied)
HDMIcable(notsupplied)
UseHighSpeedHDMI
®
Cable.
NOTE:ForMac,useacommerciallyavailable
pinadapter(notsupplied)toconnecttoyour
Mac’svideoport.

 Loading...