15
2. Projecting an Image (Basic Operation)
Connecting Your Computer/Connecting the Power Cord
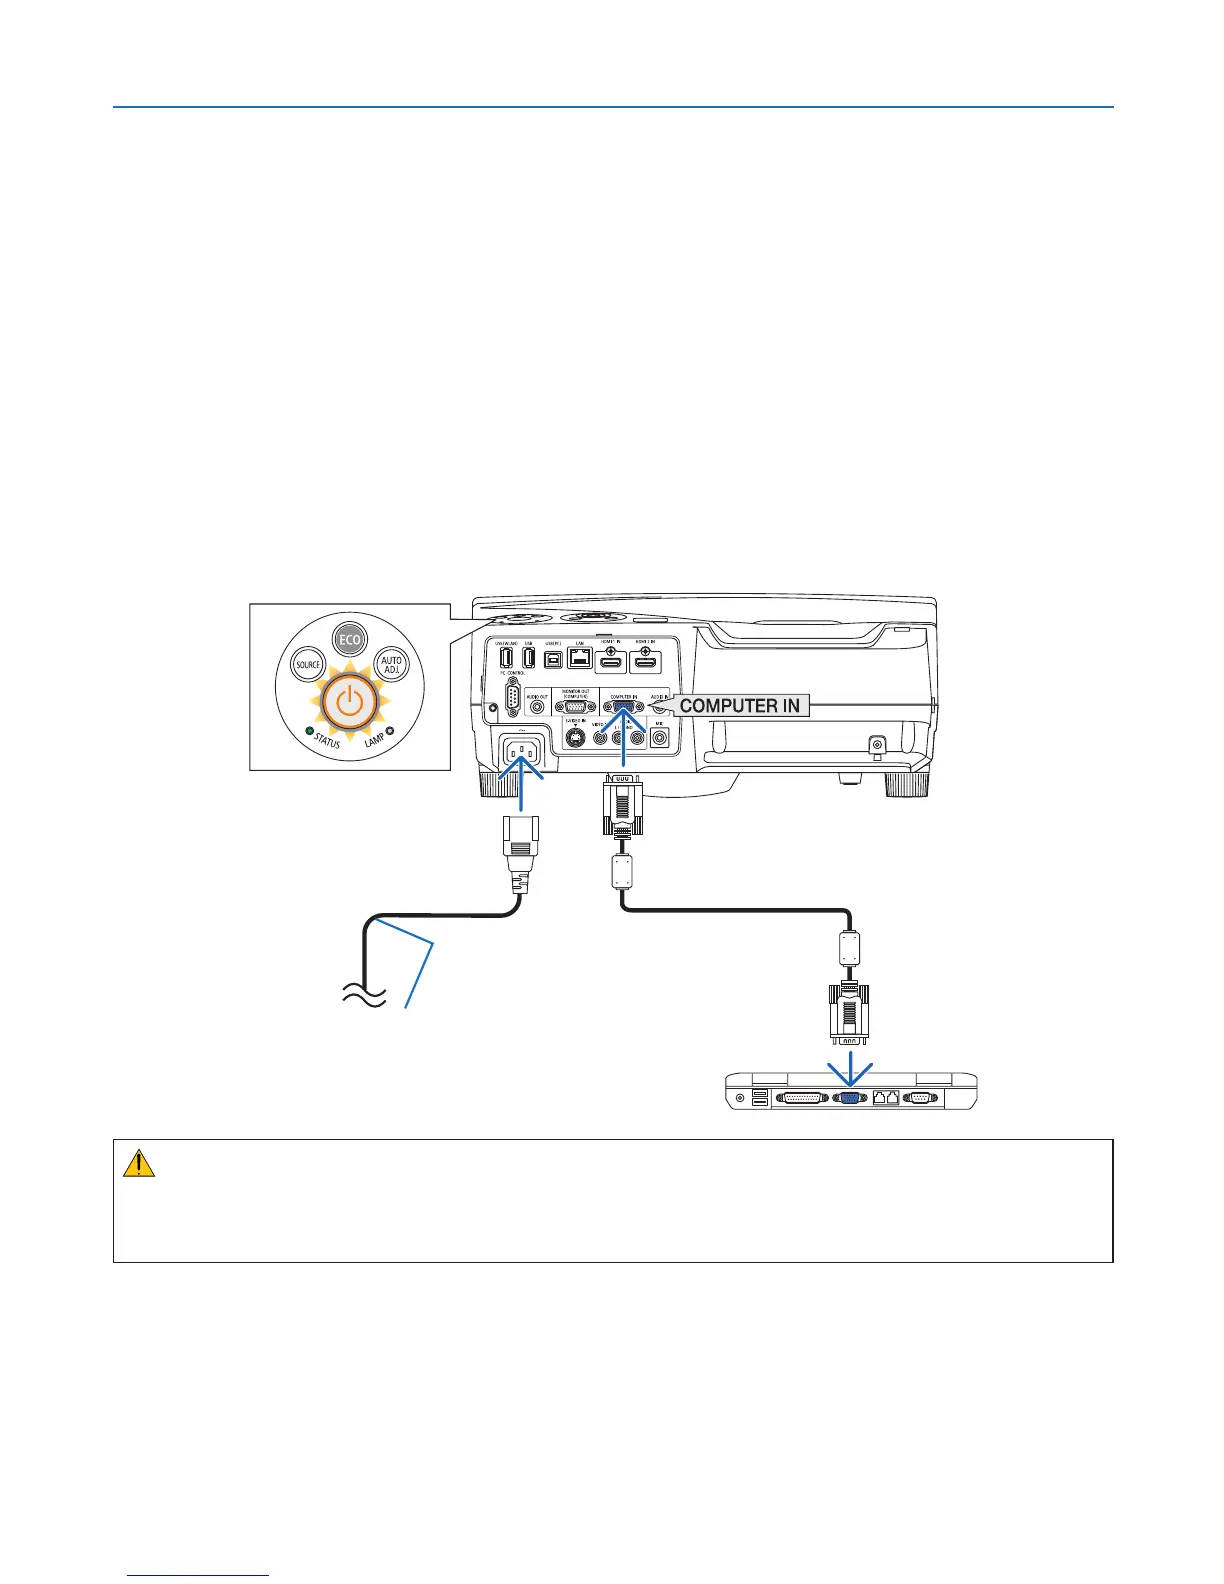
1. Connectyourcomputertotheprojector.
This section will show you a basic connection to a computer. For information about other connections, see “6.
InstallationandConnections”onpage106.
Connectthecomputercable(VGA)betweentheprojector’sCOMPUTERINconnectorandthecomputer’sport
(mini D-Sub 15 Pin). Turn two thumb screws of both connectors to fix the computer cable (VGA).
2. Connectthesuppliedpowercordtotheprojector.
Firstconnectthesuppliedpowercord’sthree-pinplugtotheACINoftheprojector,andthenconnecttheother
plug of the supplied power cord in the wall outlet.
The projector’s power indicator will flash for a few seconds and then will light orange* (standby mode).
The STATUS indicator will also light green*.
*Thiswillapplyforbothindicatorswhen[NORMAL]isselectedfor[STANDBYMODE].SeethePowerIndicator
section.(→ page 126)
Makesurethattheprongsarefullyinsertedinto
boththeACINandthewalloutlet.
To wall outlet ←
CAUTION:
PartsoftheprojectormaybecometemporarilyheatediftheprojectoristurnedoffwiththePOWERbuttonorifthe
ACpowersupplyisdisconnectedduringnormalprojectoroperation.
Usecautionwhenpickinguptheprojector.
 Loading...