3. Projectng an Image (Basc Operaton)
LAMP
STATUS
POWE
R
O
N
/
S
T
A
N
D
B
Y
S
O
U
R
C
E
A
UT
O
A
DJ
.
S
E
L
E
C
T
F
O
C
U
S
2
1
LAMP
STATUS
POWE
R
S
O
U
R
C
E
A
U
T
O
A
D
J
.
S
E
L
E
C
T
O
N
/
S
T
A
N
D
B
Y
F
O
C
U
S
V
I
D
E
O
I
N
C
O
M
P
U
T
E
R
I
N
P
C
C
O
N
T
R
O
L
A
U
D
I
O
I
N
S
-
V
I
D
E
O
I
N
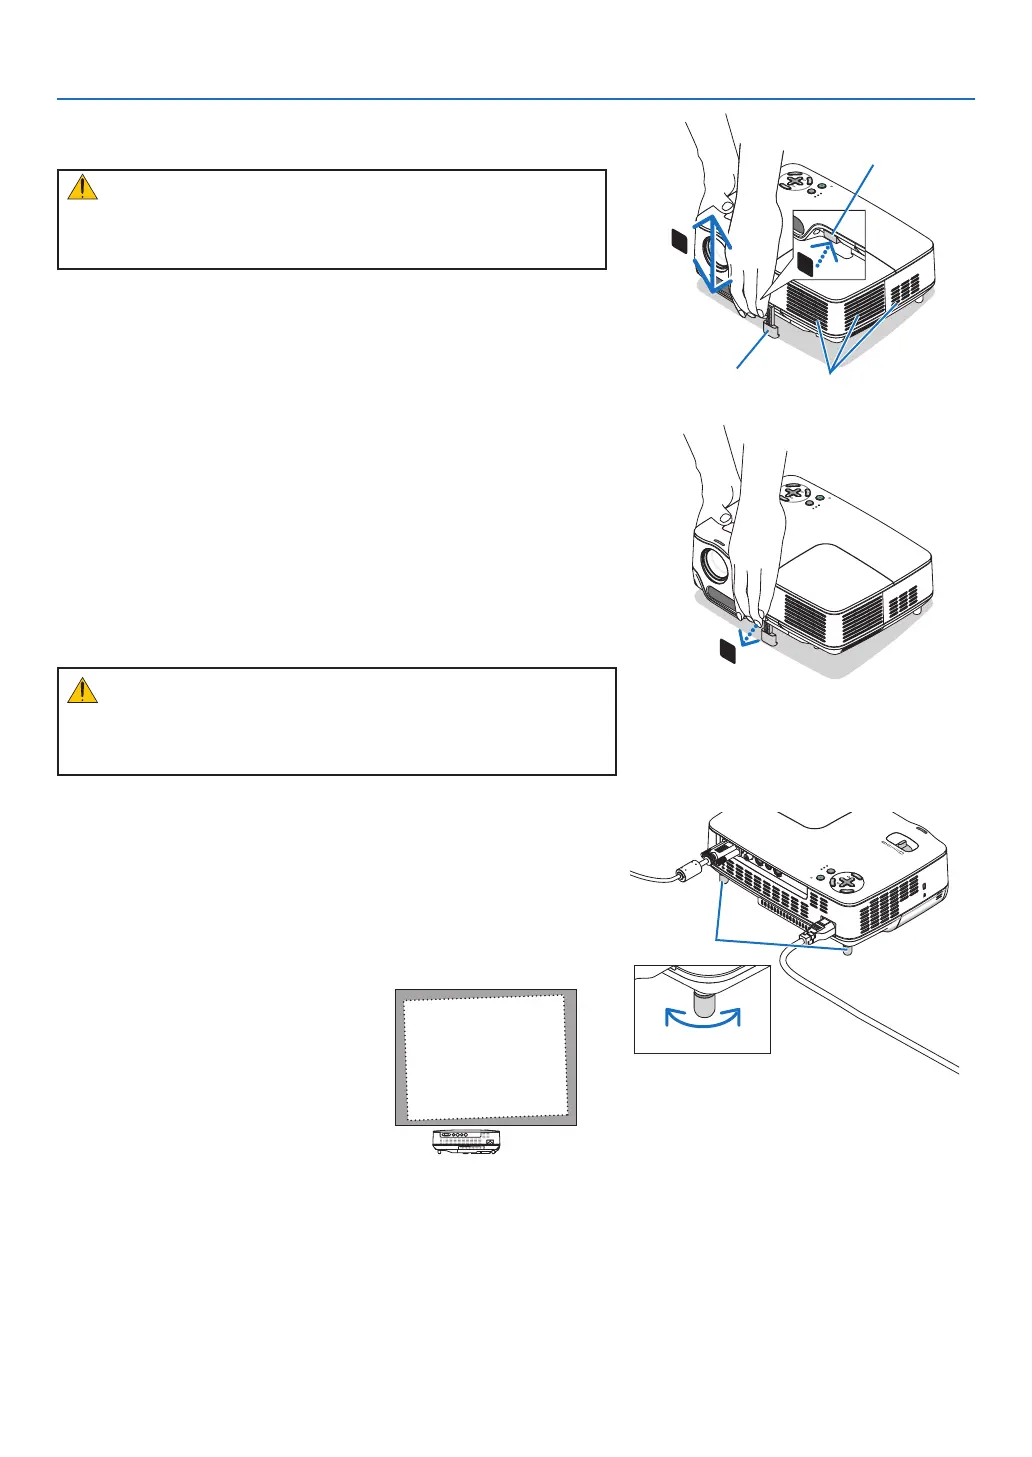
Adjust the Tlt Foot
CAUTION:
Do not try to touch the ventilation outlet during Tilt Foot adjust-
ment as it can become heated while the projector is turned on and
during its cool down period after it is turned off.
Adjusting the height of a projected image or changing the pro-
jection angle will result in the AUTO KEYSTONE function quickly
correcting the vertical distortion. (→ page 23)
The tilt foot can be extended up to 0.98 inch/25 mm.
There is approximately 10 degrees (up) of adjustment for the front
of the projector.
Adjustable Tilt Foot
Adjustable Tilt
Foot Button
Ventilation (outlet)
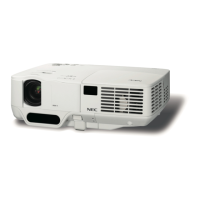
CAUTION:
Do not use the tilt-foot for purposes other than originally intended.
Misuses such as using the tilt foot to carry or hang (from the wall or
ceiling) the projector can cause damage to the projector.
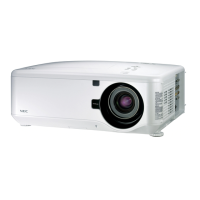
The rear foot height can be adjusted up to 0.16 inch/4 mm (1 de
-
gree of angle).
Do not extend the rear foot over 0.16" (4 mm). Doing so will cause
the rear foot to come free off the bottom.
Rear foot
Up Down
LAMP
STATUS
PO
W
ER
O
N
/
S
T
A
N
D
B
Y
S
O
U
R
C
E
A
U
TO
A
D
J.
S
E
L
E
C
T
F
O
C
U
S
3