3. Projectng an Image (Basc Operaton)
SELECT
AUTO
ADJ.
ON/STAND BY
FOCUS
LAMP
STATUS
POWER
SOURCE
[Poor picture]
[Normal picture]
➏
Optimizing RGB Picture Automatically
Adjustng the Image Usng Auto Adjust
This adjustment may be necessary when you connect your computer for the rst time.
Adjustng wth buttons on the cabnet
• Press the SELECT ◀ button with no menus displayed.
An RGB image will be optimized automatically after a few seconds.
Adjustng wth the remote control
• Press the AUTO ADJ. button to optimize an RGB image automatically.
NOTE:
Some signals may take time to display or may not be displayed correctly.
The Auto Adjust function does not work for component and video signals.
If the Auto Adjust operation cannot optimize the RGB signal, try to adjust HORIZONTAL/VERTICAL, CLOCK and PHASE manu-
ally. (→ page 43, 44)
If performing the Auto Adjust function does not correct image positioning, vertical stripes (banding) or horizontal noise, per-
form the [HORIZONTAL], [VERTICAL], [CLOCK] or [PHASE] function from the menu to optimize the image. (→ page 43, 44)
Performing the [HORIZONTAL], [VERTICAL], [CLOCK] or [PHASE] function will store the adjustment values of the currently
projected source into the projector’s memory.
The next time the same source (same resolution, horizontal and vertical frequencies) is projected; the projector will call up
from memory the stored values for the source.
To clear the stored adjustment values, select the [RESET] → [CURRENT SIGNAL] or [ALL DATA] from the menu to reset the
adjustment values.
•
•
•
•
•
•
VOLUME ASPECT HELP
FOCUS
L
-
MOUSE
-
R
FREEZE
PICTURE
LAMP MODE
VIDEO
AUTO ADJ.COMPUTER
S-VIDEO VIEWER
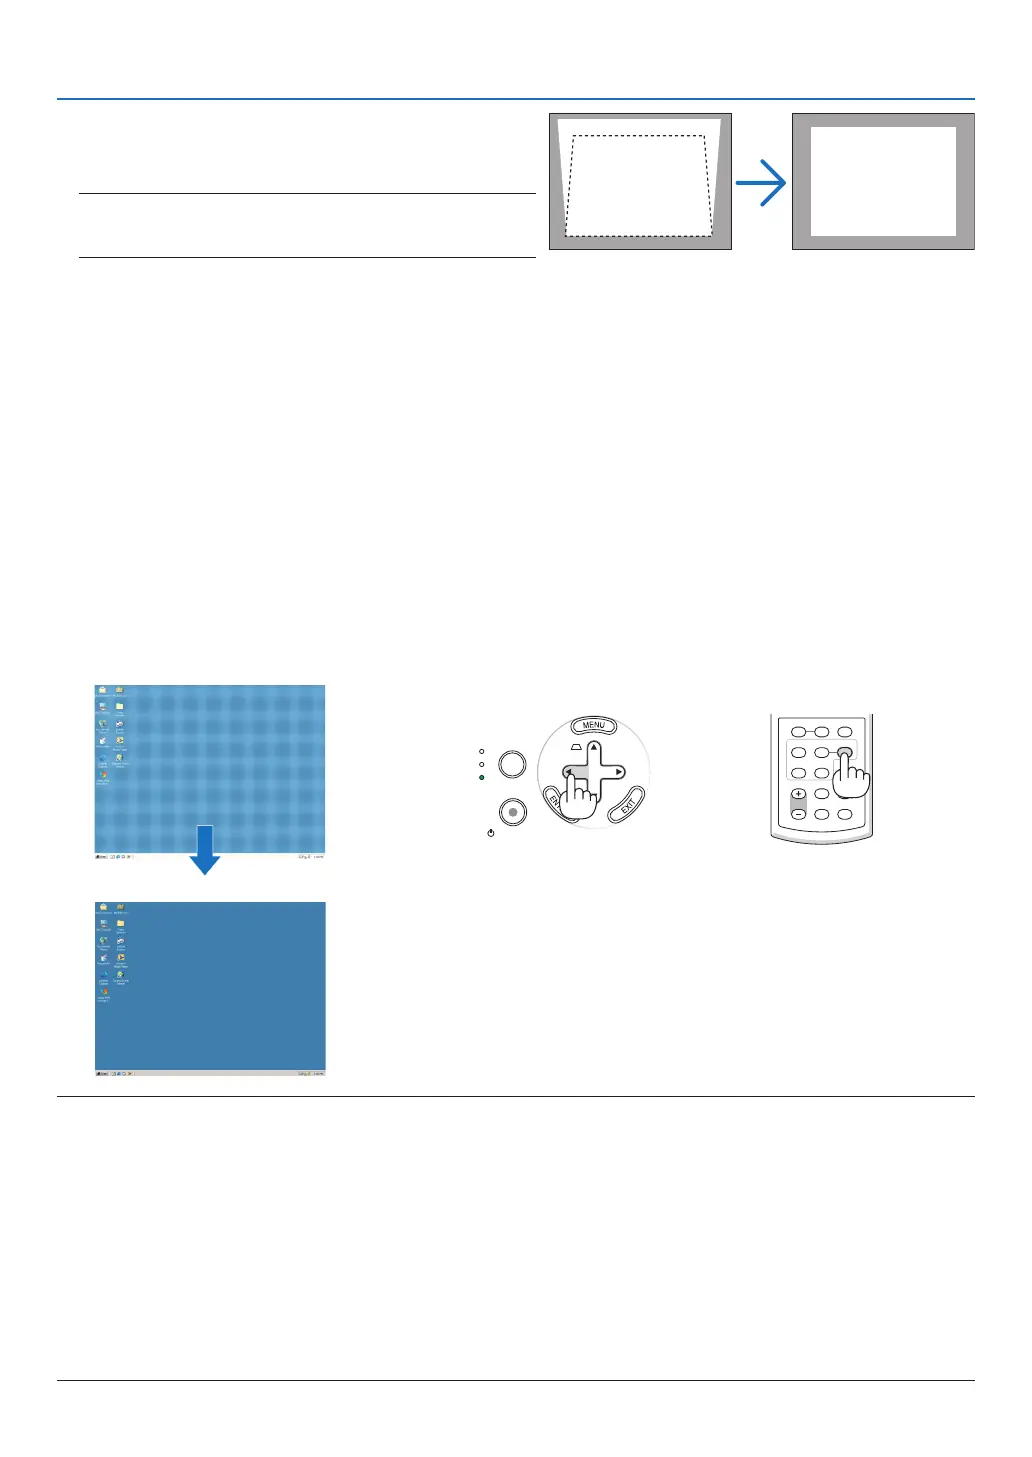
Use the SELECT
◀ or ▶ button to correct the vertical
keystone distortion.
NOTE: The KEYSTONE Correction feature can cause an image
to be slightly blurred because the correction is made electroni-
cally.
TIP: You can save the changes using the KEYSTONE SAVE fea-
ture when you turn off the projector. (→ page 47)