41
5. Using the Viewer (NP64/NP54)
❷
Projecting images stored in a USB memory device (Basic operation)
ThissectionexplainsthebasicoperationoftheViewer.
TheexplanationprovidestheoperationalprocedurewhentheViewer[OPTIONS]menu(→page45)issettothe
factorydefault.
-StartingtheViewer......................................................................below
-RemovingtheUSBmemoryfromtheprojector...................... page42
-ExitingtheViewer.................................................................... page43
Preparation:BeforestartingtheViewer,storeimagestotheUSBmemoryusingyourcomputer.
Starting the Viewer
1. Turn on the projector. (→ page 16)
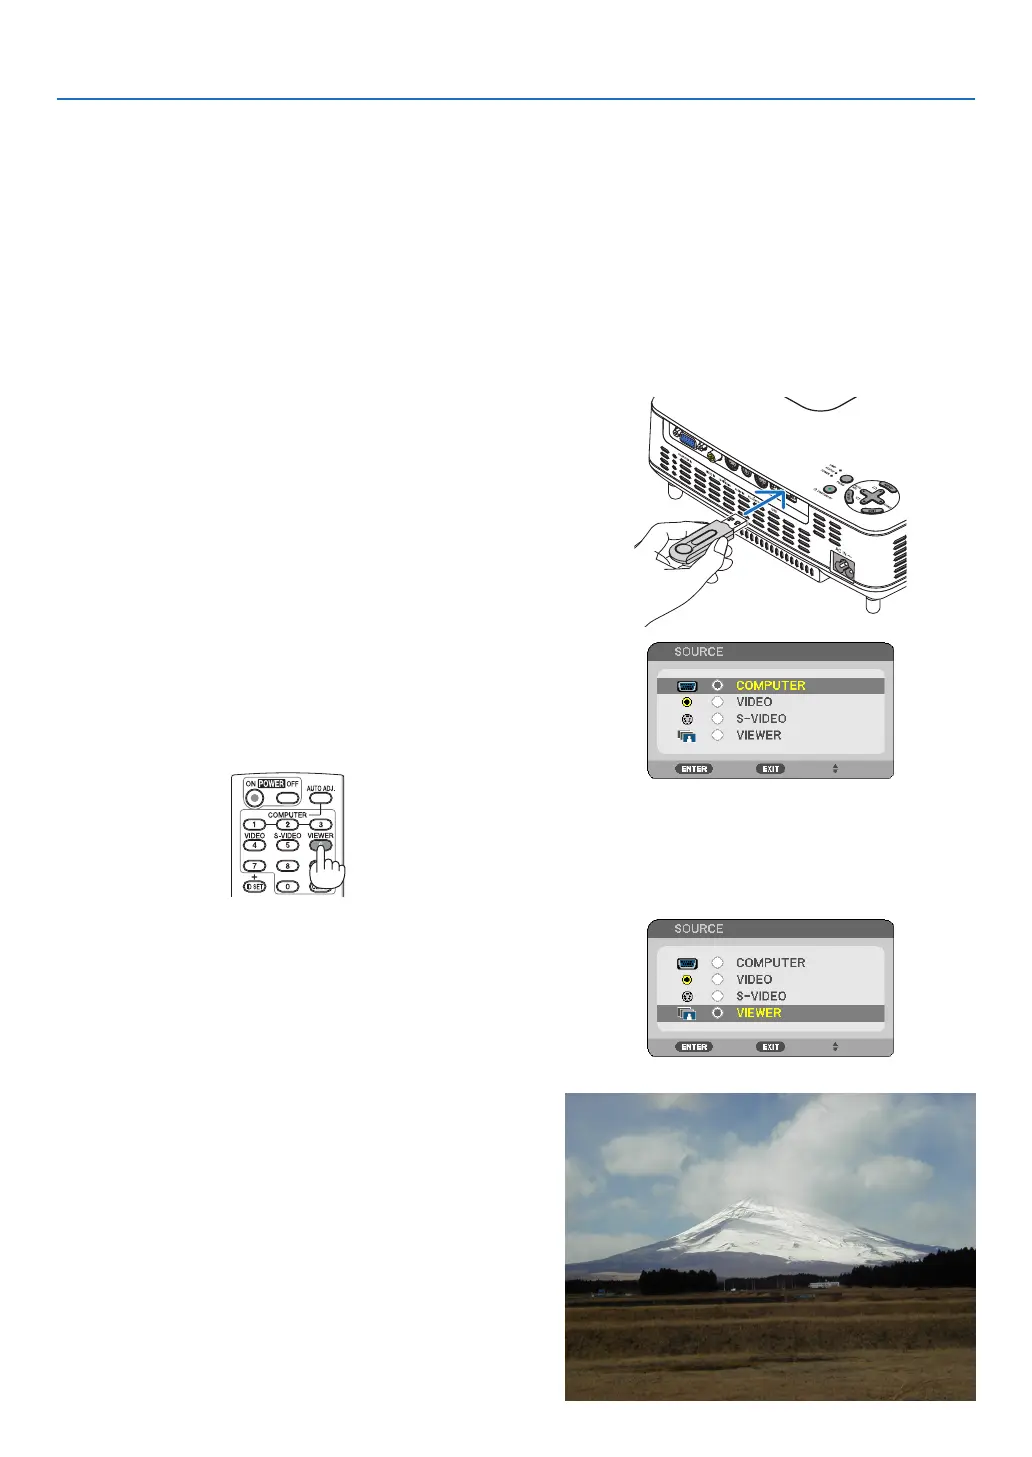
2. Insert the USB memory into the USB port of the pro-
jector.
- To remove the USB memory from the projector, select
“REMOVE USB DEVICE” from the OPTIONS menu. (→
Step 5 on page 43)
3. Press the ▶ (SOURCE) button.
The SOURCE list will be displayed.
• AnotherwaytodisplaytheSOURCElististopressthe
VIEWER button on the remote control. Go on to Step [5].
4. Press the ▶ (SOURCE) three times to select the cur-
sor to [VIEWER].
Each time the ▶ button is pressed quickly, the next
source will be highlighted.
• Duringthistime,donotpressandholdthe▶ button for
2 seconds or longer. Doing so will start the projector to
detect the signal automatically.
Highlighting [VIEWER] for a while will start the Viewer to
project images stored in the USB memory (slide screen).