2. Projecting an Image (Basic Operation)
24
NOTE:
• The dials can be turned more than one full turn, but the projection position cannot be moved more than the range indicated on
the following page. Do not force to turn the dials. Doing so may damage the dials.
• If the lens is shifted to the maximum in the diagonal direction, the edges of the screen will be dark or shaded.
• The vertical shift adjustment must be finished with an image shifted upward. If you finish the vertical shift adjustment with an
image shifted down, the zoom/focus adjustments or strong shaking may cause a projected image to slightly shift down.
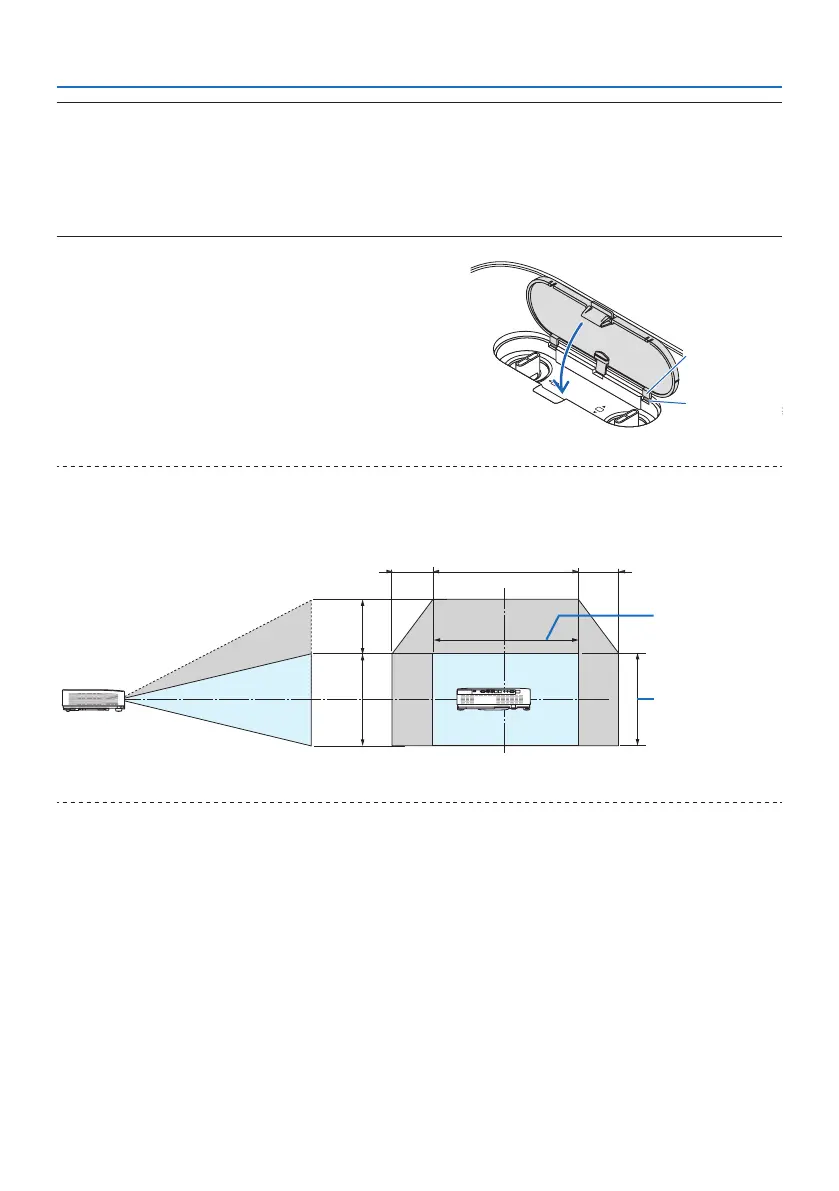
3. Close the lens shift cover.
Insert the cover’s 2 (two) hooks into the grooves
in the projector, then close the cover.
Hook
Groove
TIP:
• The diagram below shows the lens shift adjustment range ([ORIENTATION]: [DESKTOP FRONT]).
• For the lens shift adjustment range regarding the [CEILING FRONT] projection, see page 124.
100%V
60%V
100%H
29%H 29%H
Height of pro-
jected image
Width of projected
image
Description of symbols: V indicates vertical (height of the projected image), H indicates horizontal (width of the projected image).
 Loading...