3. Convenient Features
38
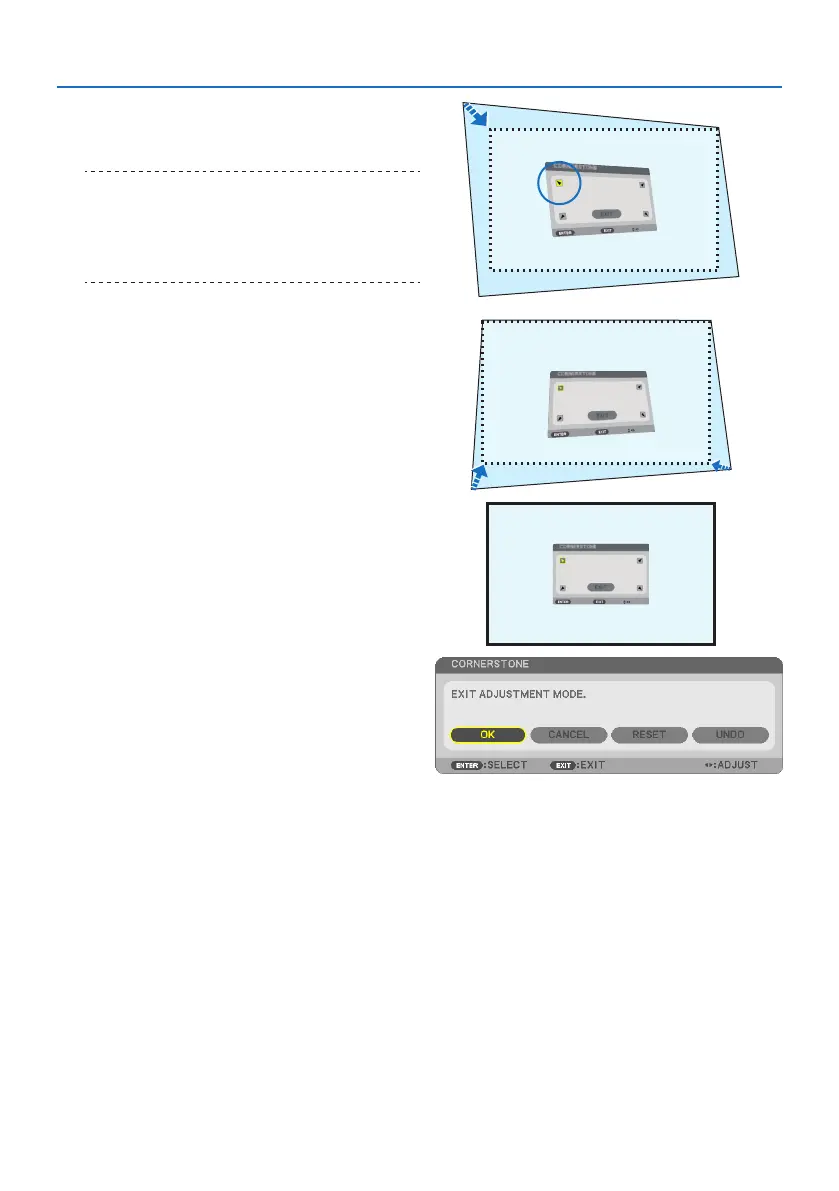
5. Use the ▲▼◀▶ button to select one icon
(▲) which points in the direction you wish
to move the projected image frame.
TIP:
• If either [CORNERSTONE] or [PINCUSHION] is adjusted, the
options [KEYSTONE VERTICAL] and [KEYSTONE HORIZON-
TAL] become unavailable. In this case, RESET the corrected
values and restart to correct distortion.
6. Press the ENTER button.
7. Use the ▲▼◀▶ button to move the project-
ed image frame as shown on the example.
8. Press the ENTER button.
9. Use the ▲▼◀▶ button to select another
icon which points in the direction.
On the Cornerstone adjustment screen, select
[EXIT] or press the EXIT button on the remote
control.
The confirmation screen is displayed.
10. Press the ◀ or ▶ button to highlight the
[OK] and press the ENTER button.
This completes the Cornerstone correction.
Selecting [CANCEL] will return to the adjustment screen without saving changes (Step 3).
Selecting [RESET] will return to the factory default.
Selecting [UNDO] will exit without saving changes.