VP1006-200PM-00 OEM ISO Reader Manual version 2.6 / Page 8
Tests and adjustments described in this chapter are not used for a standard startup and configuration
of the VP1006.
6.1 Testing inputs and outputs
There are two types of output tests. An output test to switch the output on and off, and an output test
especially for Nedap feed motors. There is also available an input test for checking connected
equipment like switches and sensors.
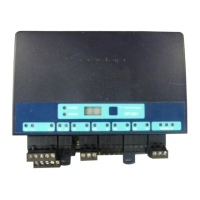
Use the display and push button for testing, see appendix B how to use it.
Feed motor test
Use the motor test o1, o2, o3 or o4 to test a feed motor.
This is a combination of an input and output test. When the test is finished the test results are shown
as code on the display (blinking). Test all outputs ”0A” will test all outputs one by one.
Description motor test results
No motor current measured
Motor current too high for too long
Current still measured after test has stopped
Output voltage is stopped due to motor safeguard function
Motor current too low while running
Example of a feed motor test (connected to output 1)
1. Short press on the button until “It” appears.
2. Now hold the button until the display starts blinking. “dE” will appear.
3. Short press on the button 2 times. “o1” will appear.
4. Now hold the button until the display starts blinking. Output 1 will be switched on. When ready
the test result are shown on the display.
Use the test L1, L2, .. L6 to test the connected equipment e.g. lights, valves or relays. This test will
switch on the selected output. The test is stopped by a short press on the button.
Example of a light test (connected to output 6)
1. Short press on the button until “It” appears.
2. Now hold the button until the display starts blinking. “dE” will appear.
3. Short press on the button until “L6” appears.
4. Now hold the button until the display starts blinking. Output 6 will be switched on. To switch off,
a short press on the button.
Input test
Use the test i1, i2, .. i6 to test the connected equipment e.g. switches and sensors. This test will read
the selected input. The results are indicated with a “0” or “1”. Open or closed depends on the settings
from the behavior component. The test is stopped by a short press on the button.
Example of a switch test (connected to output 5)
1. Short press on the button until “It” appears.
2. Now hold the button till the display starts blinking. “dE” will appear.
3. Short press on the button until “i5” appears.
4. Now hold the button until the display starts blinking. Input 5 will be read.
5. Activate the switch on and off. If ok, the display value will show zero and one
 Loading...