6.2 Basic Procedure
The process to begin welding using a Nelweld unit is very easy, once
the proper
electrical connections and gun connections are established:
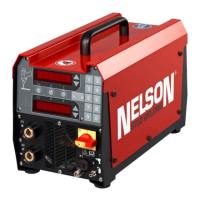
• Turn the main power switch on the front of the unit to the “on”
position. Wait for
the unit to complete its startup sequence.
• Set the desired current and time settings using one of the following 3 methods:
1. Push Time/Current Mode button (1 in the Front Panel section),
and up/down
buttons (4) to adjust time and current discretely.
2. Push Stud Expert (TM) Mode button (2 in the Front Panel section), and up/down
buttons (4) to adjust stud diameter and weld
position (or another process
condition) and the welder automatically sets the weld current and time using a
database.
3. Push one of the 10 preset buttons (5 in the Front Panel section) to
choose one
of the factory presets (see next section factory preset
table).
• Save any set points, if desired.
• Adjust other settings by accessing the proper function.
• Perform a lift check to verify proper gun lift.
• Lock the unit, if desired.
• Perform test welds to verify the correct welding settings.
• After establishing proper setup, production welding may
begin.
6.3 Weld Parameters
You can program this unit in 2 ways:
• directly setting the current and time values
• or use the Stud Expert (TM) mode based on stud diameter