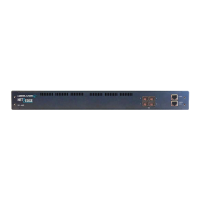
LIB-4400/4424 Installation Guide
| MANUAL Page 29 of 65
Fasten the AC Power Supply with the slotted retaining screw.
Insert the AC Power plug into the AC Power Block receptacle (power inlet).
Refer to the “Grounding the LIB-4xxx” section below.
Grounding the LIB-4xxx (Rack Mount)
C. GND (Chassis Ground) Note: a device bonded to metallic shelf that houses LIB-4xxx jacks
should be bonded directly by either 1) and independent conductor to the central office ground via
rack ground bar, or 2) connection to the rack itself, or 3) other metal-to-metal bond to ground. To
connect the LIB-4xxx to a ground point on the rack, follow your organization's or IT department's
standard procedure or the US NFPA 70
®
: National Electrical Code.
Connecting to the DC Power Supply
Use the procedure below to connect the LIB-4xxx to the provided DC power supply (see Figure 11
above).
Warning: Risk of electrical shock. CAUTION: When connecting DC power wires to the
terminal-block plug, pay close attention to the polarity markings shown near the terminal block of the
LIB-4xxx. Failure to observe this caution could result in damage to the switch.
Note: It is a good practice to turn OFF input and load power, and unplug the power terminal block
before making wire connections. Otherwise, your screwdriver blade can inadvertently short the
terminal connections to the grounded enclosure.
The range of suitable wire for the terminal block is 12 to 26 AWG.
The power source must be safety certified.
Remove the Terminal Block
Turn the external power source OFF.
Loosen the “2” mounting screws, attaching the “primary” Terminal Block to the switch chassis, and
then pull it from the chassis connector.
 Loading...