Page 3
1.3.3.2 Steps in the Hardware Setup Procedure
The steps you will follow to set up your Net2Phone MAX 410/420/430 are:
1. Install the MAX 410/420/430 unit in its location and connect the cabling.
2. Configure the LAN settings on the MAX 410/420/430 so that it communicates with your
LAN.
3. Log in to the MAX 410/420/430 Web Manager.
4. Finish configuring your FXS ports via the Web Manager.
5. Test your installation by making an Internet telephone call.
1.4 Locating Your FXS and/or FXO Ports
You need to be able to identify the MAX’s physical port numbers before you can begin
configuring its LAN settings.
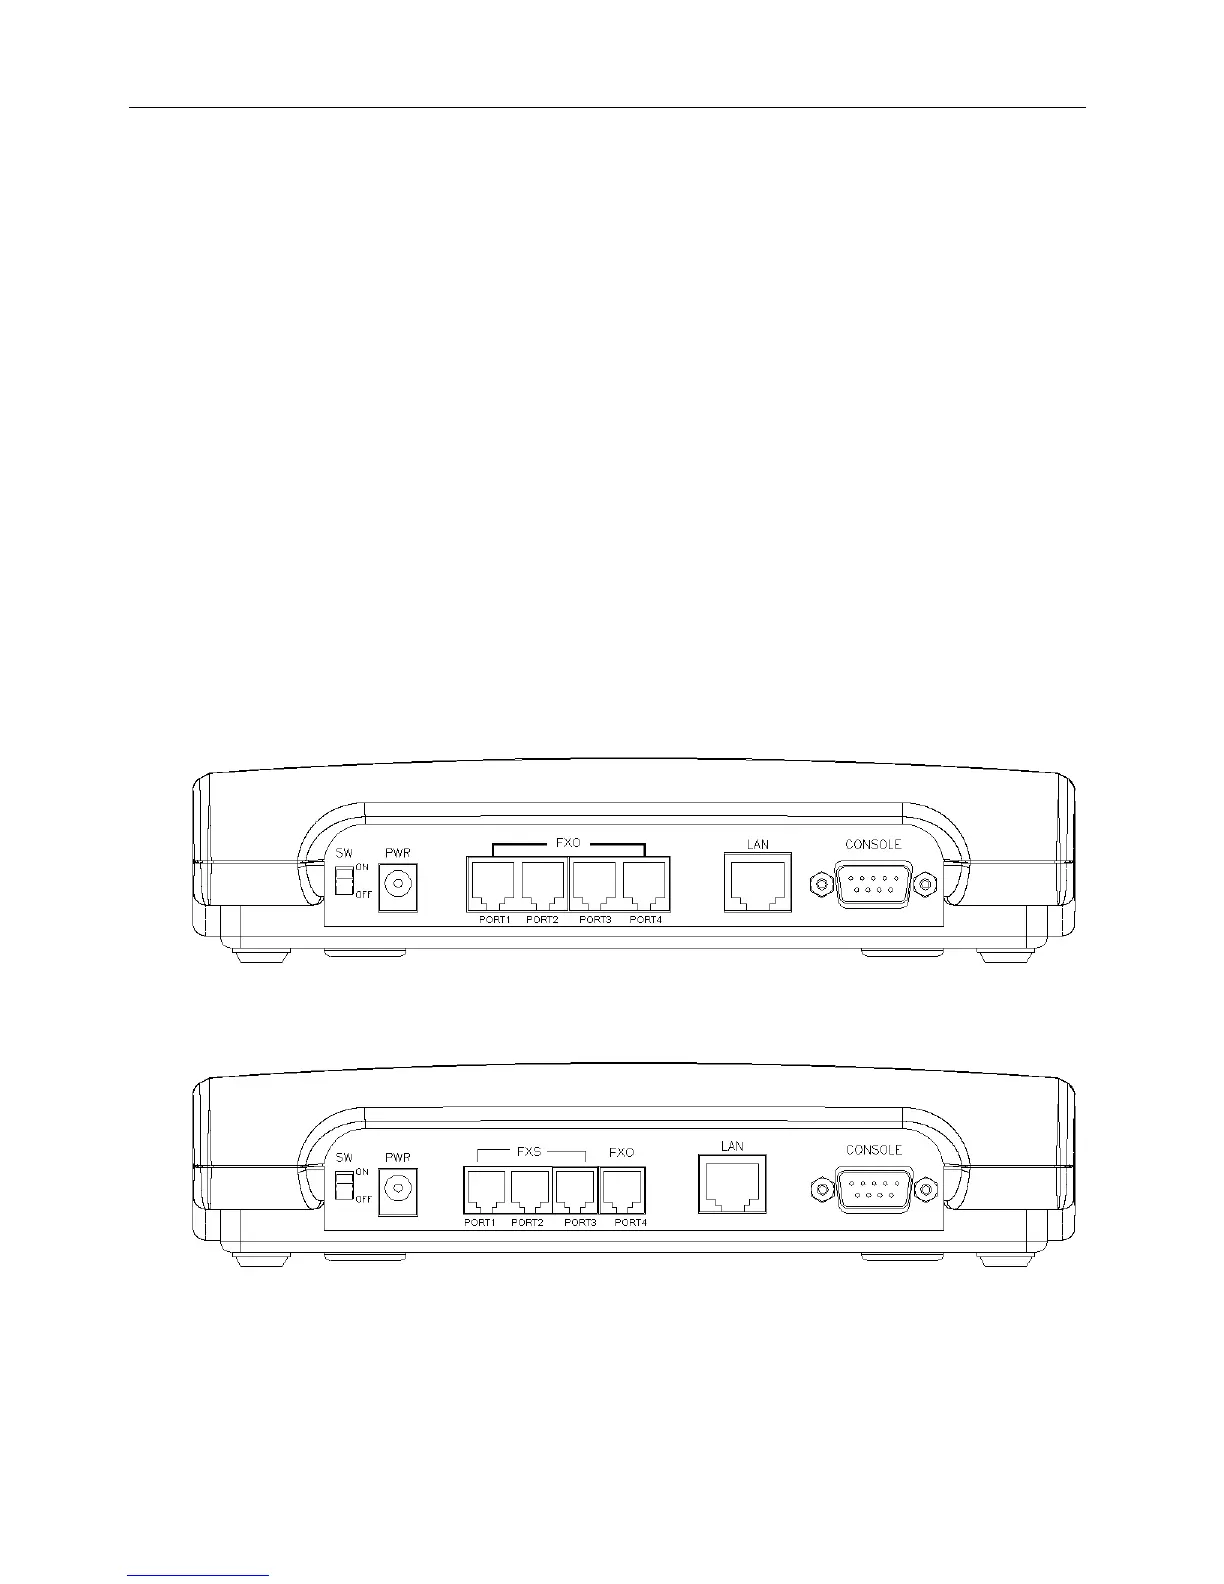
The RJ-11 sockets are visible on the MAX’s rear panel. Figure 1, below, shows the rear panel of
a MAX with 4 ports.
1.4.1 Physical Port Numbering
Figure 1 illustrates the physical port numbering on the MAX 410/420/430’s rear panel for a unit
with 4 ports installed. These numbers are referenced by the MAX Web Manager when
identifying ports, setting up the MAX’s features and configuring Net2Phone calling accounts.
As the illustration shows, the ports are numbered from left to right. The left-most port is port
number 1 and the last one on the right is number 4.
Ports also have logical numbers, used by the Routing Table, which are different from their
physical numbers. (See Section 4.5, Routing Table, in this Guide).
Figure 2 MAX 430
Net2Phone MAX 410/420/430 User Guide Section 1.4 – Locating Your FXS and/or FXO Ports
Figure 1 MAX 410