EasyManua.ls Logo

NETGEAR GS510TLP - User Manual

NETGEAR GS510TLP
27 pages
Print Icon
To Next Page IconTo Next Page
Loading...
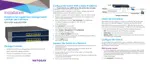
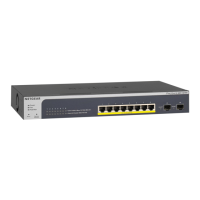
ProSAFE 8-Port Gigabit Smart
Managed Switch with PoE+
and 2 SFP Ports
Hardware Installation Guide
Models GS510TLP and GS510TPP
February 2017
202-11734-01
350 E. Plumeria Drive
San Jose, CA 95134
USA

Other manuals for NETGEAR GS510TLP

Questions and Answers

  • J
    Jeremy FritzJul 27, 2025
    Why is my NETGEAR GS510TLP Switch file transfer slow?
    • G
      gayrachelJul 27, 2025
      Slow file transfers on your NETGEAR Switch can occur due to a broadcast storm caused by a network loop (redundant path). To resolve this, ensure only one path exists between any two networked devices. You can also configure the Spanning Tree Protocol (STP) through the switch's web management interface to prevent network loops.
  • M
    Marcus LewisAug 1, 2025
    What to do if NETGEAR GS510TLP Switch speed/activity LEDs are blinking and the network is disabled?
    • J
      Justin BrownAug 1, 2025
      Continuous blinking of the speed/activity LEDs on all connected ports of your NETGEAR Switch, accompanied by a disabled network, indicates a network loop (redundant path). To fix this, ensure that only one path exists between any two networked devices. You can also configure the Spanning Tree Protocol (STP) using the switch's web management interface to prevent such loops.
  • C
    Christian Scott DDSAug 6, 2025
    How to fix a NETGEAR GS510TLP Switch when a device is not recognized on the network?
    • R
      Russell TranAug 6, 2025
      If a device isn't recognized on the network when connected to your NETGEAR Switch, it might be due to incorrect connections or cabling that doesn't meet Ethernet guidelines. Check that the cabling is correct and that all connectors are securely positioned in the ports. Ensure that no equipment has been accidentally disconnected.
  • W
    Wendy FlemingAug 11, 2025
    What to do if NETGEAR GS510TLP speed/activity LED is off?
    • J
      Jean WilsonAug 11, 2025
      If the combined speed/activity LED or individual speed and activity LEDs are off on your NETGEAR Switch when a port is connected to a device, the port connection may not be working. Check the crimp on the connectors and ensure the plug is properly inserted and locked into the port on both the switch and the connected device. Also, ensure all cables are correctly used and comply with Ethernet specifications. Test for a defective port, cable, or module in an alternate environment where all products are functioning.
  • J
    Jessica SmithAug 16, 2025
    How to troubleshoot a NETGEAR GS510TLP Switch with the power LED off?
    • H
      Harry AlexanderAug 16, 2025
      If the power LED on your NETGEAR Switch is off, it indicates that no power is being received. Check the power cable connections at both the switch and the power source. Ensure that all cables are used correctly and comply with the Ethernet specifications.
  • M
    Margaret OconnorAug 21, 2025
    Why NETGEAR Switch unit does not join the stack?
    • V
      vriveraAug 21, 2025
      If a unit is linked to a stack but does not join the stack in your NETGEAR Switch setup, it might be because the stacking ports of the new unit are configured differently from the stack, or the unit is configured as a standalone unit. Remove the unit from the stack and use the web management interface to configure it as a stackable unit, ensuring that combo links are used as the stacking ports.

Summary

Introduction

Overview

Provides a general overview of the switch's features, connectivity, and management options.

Features

Outlines the main hardware capabilities including port types, PoE support, and performance metrics.

Safety Instructions and Warnings

Details critical safety guidelines to prevent injury, shock, fire, and equipment damage.

Hardware Overview

Front Panel Components

Describes the front panel components including ports, LEDs, and buttons for both models.

Back Panel Components

Details the rear panel elements such as the Kensington lock slot and AC power connector.

LED Indicators

Defines the meaning of each LED indicator for power, fan, port status, and PoE.

Switch Interfaces and Controls

Covers RJ-45 ports, SFP ports, Reset, and Factory Defaults buttons.

Installation

Site Preparation and ESD Protection

Outlines site requirements and steps to prevent electrostatic discharge damage.

Unpack and Inspect Switch

Guides users on checking package contents and safely unpacking the switch hardware.

Switch Installation

Details procedures for installing the switch in a rack or on a flat surface.

Post-Installation Checks

Lists checks to perform before applying power, ensuring proper physical setup and cable connections.

Connect Modules and Devices

Explains optional SFP module installation and connecting network devices to the switch.

Power Up and Initial Management

Guides on applying AC power, checking LEDs, and introduces switch management.

Applications

Desktop Switching

Explains using the switch as a desktop device to build a small network with high-speed server access.

PoE Overview

Explains the switch's PoE+ capabilities, power budget, and port prioritization.

Connect PoE Equipment in a Business Environment

Illustrates connecting VoIP phones and other PoE devices in a business setting.

Connect PoE Equipment for Surveillance and Security

Shows how to connect PoE cameras and non-PoE devices for surveillance.

Troubleshooting

Troubleshooting Chart

Presents a table of common symptoms, their causes, and recommended solutions.

Additional Troubleshooting Suggestions

Offers extra suggestions for resolving issues not covered in the main troubleshooting chart.

NETGEAR GS510TLP Specifications

General IconGeneral
Product TypeManaged Switch
Port TypeGigabit Ethernet
SFP/SFP+ Ports2
PoE+Yes
Switching Capacity20 Gbps
Forwarding Rate14.88 Mpps
MAC Address Table Size8K
VLAN SupportYes
Quality of Service (QoS)Yes
Power SupplyInternal
LayerLayer 2
Jumbo Frame Support9K
ManagementWeb-based, SNMP
Operating Temperature0°C to 50°C
Storage Temperature-40°C to 70°C
Humidity10% to 90% (non-condensing)

Related product manuals