c. Rubber caps for the SFP sockets
d. Rack-mounting kit
e. Rubber footpads for tabletop installation
f. Quick installation guide
g. Resource CD with NETGEAR Smart Control Center utility
5. If any item is missing or damaged, contact your local NETGEAR reseller for replacement.
Step 4: Install the Switch
You can install the switch on a flat surface, attach it to a wall, attach it to a rectangular or rectangular pole
or table leg, or mount it in a standard 19-inch (48.26-centimeter) network equipment rack.
Install the Switch in a Rack
To install the switch in a rack, you need the 19-inch rack-mount kit supplied with the switch.
To install the switch in a rack:
1. Attach the supplied mounting brackets to the side of the switch.
2. Insert the screws provided in the product package through each bracket and into the bracket mounting
holes in the switch.
3. Tighten the screws with a No. 2 Phillips screwdriver to secure each bracket.
4. Align the mounting holes in the brackets with the holes in the rack, and insert two pan-head screws with
nylon washers through each bracket and into the rack.
5. Tighten the screws with a No. 2 Phillips screwdriver to secure mounting brackets to the rack.
Installation
17
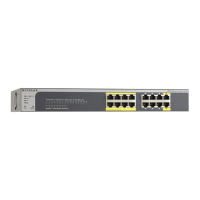
ProSAFE 8-Port Gigabit Smart Managed Switch with PoE+ and 2 SFP Ports

 Loading...