NETGEAR USB Multifunction Printer Server PS121v2 User Manual
Installation and Setup 2-7
v2.0, April 2007
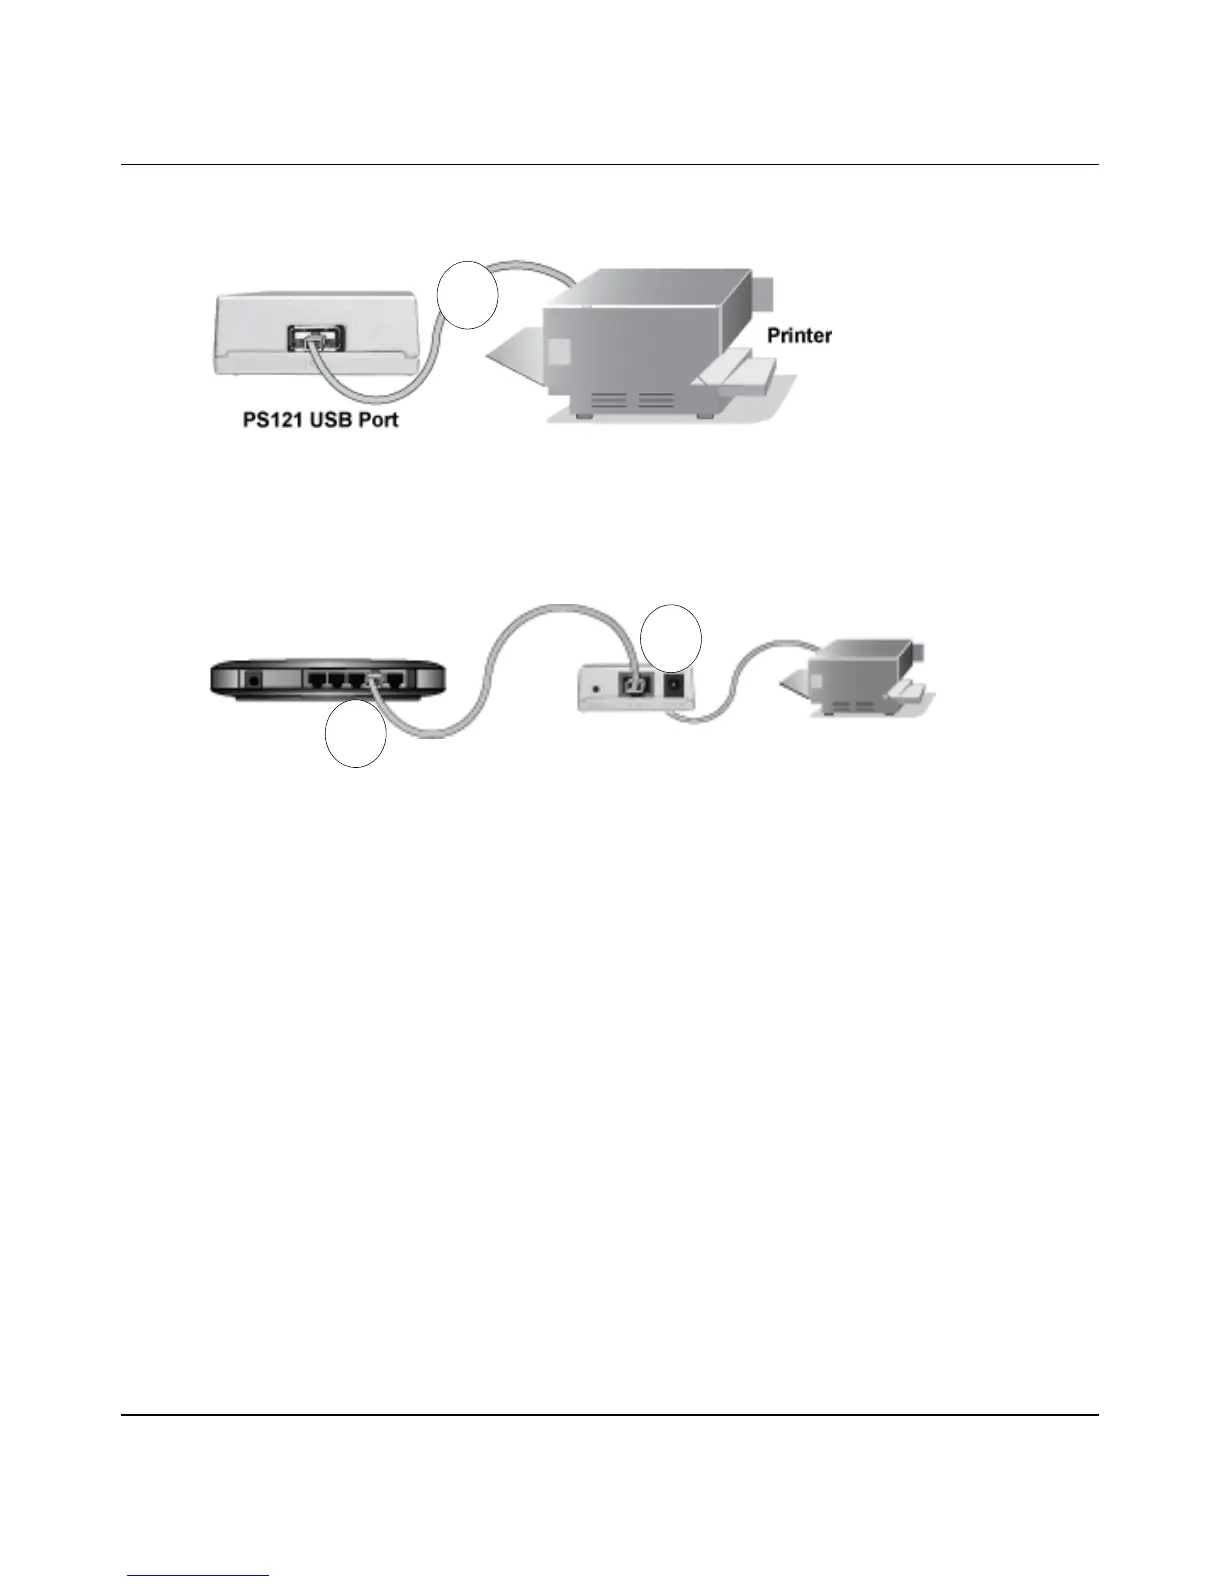
a. Connect the supplied USB cable (A) from the print server to the printer.
b. Insert one end (B) of an Ethernet cable into an open Ethernet LAN port in your access
point or router and insert the other end (C) into the Ethernet port on the print server.
c. Turn on your printer.
d. Connect the 12 V power adapter to the print server and plug it into a power source.
e. Check the PS121v2 status lights and verify the following:
• ERROR light: When the print server is powered on, the ERROR light will turn red
briefly, and then turn off.
• ACT light: When the print server is powered on, it should turn solid green.
f. Verify that your computers are connected to LAN ports on your router, as shown in
Figure 2-1 on page 2-2.
Figure 2-5
Figure 2-6
A
B
C