18
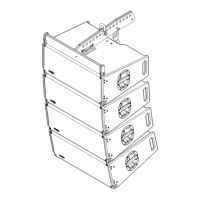
4.1.2 Pull Back
Step 1:
Remove both pins from the bottom
cabinet once the array has been
assembled.
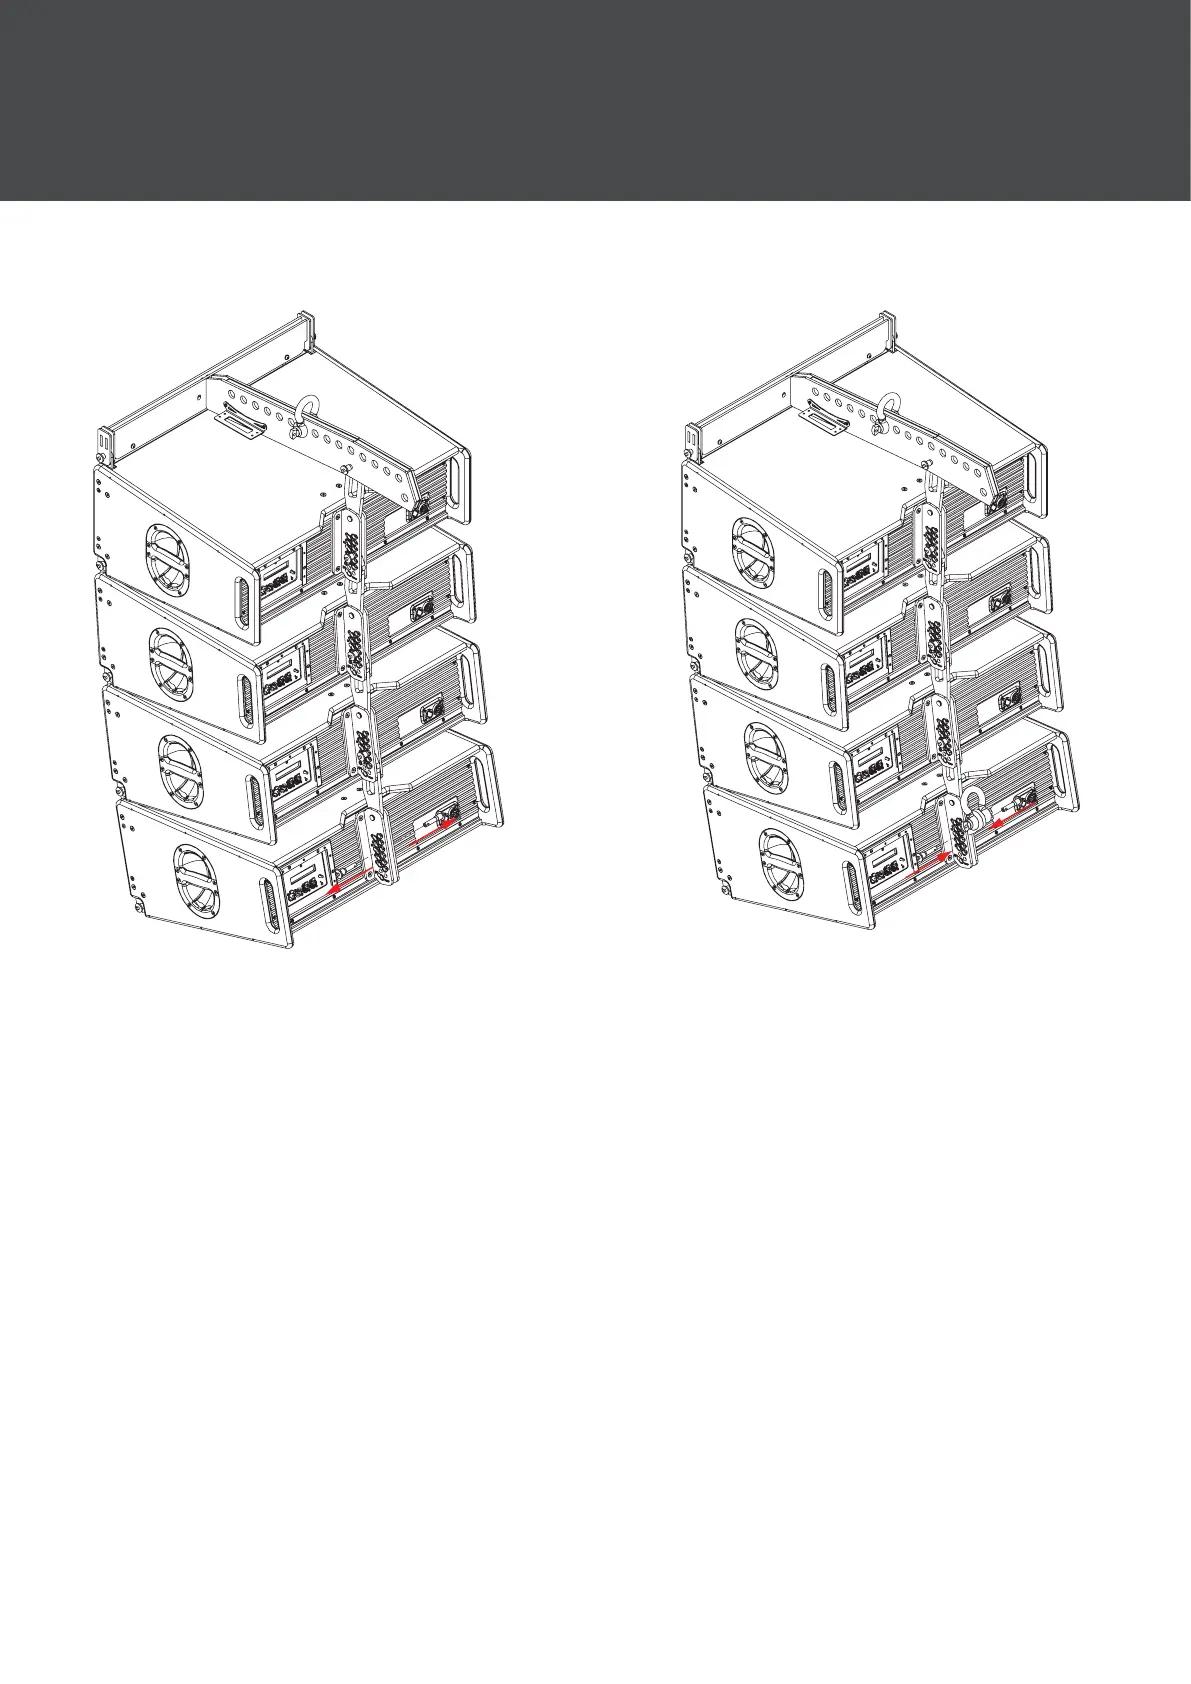
Step 2:
Move the pull back accessory into
position aligned with holes marked
pull back (number 5 on the left hand
side and number 9 on the right hand
side) and x into position using the
pins on the rigging assembly.
4 Mechanical Congurations