1-8 | ni.com
Chapter 1 Getting Started with the cDAQ Chassis
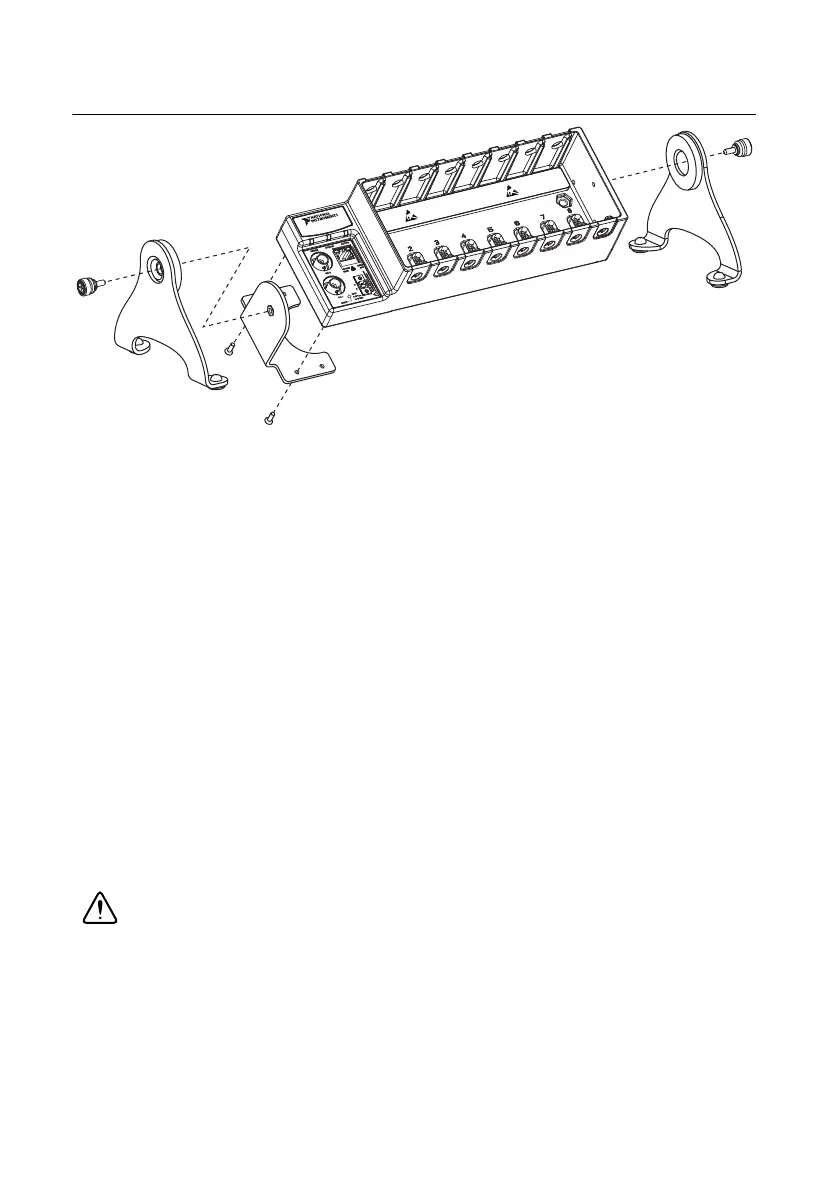
Figure 1-5. NI 9901 Desktop Mounting Kit
You must mount the chassis before installing the C Series I/O modules.
Mounting the cDAQ Chassis on a Panel
You do not need a kit to panel mount the NI cDAQ-9171 chassis. You can use a panel mount kit
to mount the NI cDAQ-9174/9178 chassis to a panel. For kit accessory ordering information,
refer to the pricing section of your cDAQ chassis product page at
ni.com.
NI cDAQ-9171
Two keyholes are located on the NI cDAQ-9171 for mounting it to a panel or wall. You can
panel mount the NI cDAQ-9171 with either #6-32 panhead machine screws or M3.5 panhead
machine screws. Installed screw height for both screw types is 7.37 mm (0.29 in.). Refer to the
NI cDAQ-9171 Specifications for mounting dimensions.
NI cDAQ-9174/9178
You can panel mount the cDAQ chassis with or without a panel mount kit:
• Panel Mounting with a Panel Mount Kit—Use the NI 9904 panel mount kit to mount the
NI cDAQ-9174 chassis on a panel. Use the NI 9905 panel mount kit to mount the
NI cDAQ-9178 chassis on a panel.
Caution Remove the C Series I/O module(s) from the cDAQ chassis before you
mount the chassis to the panel. After the cDAQ chassis is mounted, you can reinsert
the C Series module.
Align the cDAQ chassis on the panel mount accessory and attach the chassis to the
accessory with two M4 × 17 screws (included in the kit), as shown in Figure 1-6. You must
use these screws because they are the correct depth and thread for the panel. You can then
attach the panel mount accessory to a wall or panel with the two holes or the four keyholes