1-10 | ni.com
Chapter 1 Getting Started with the cDAQ Chassis
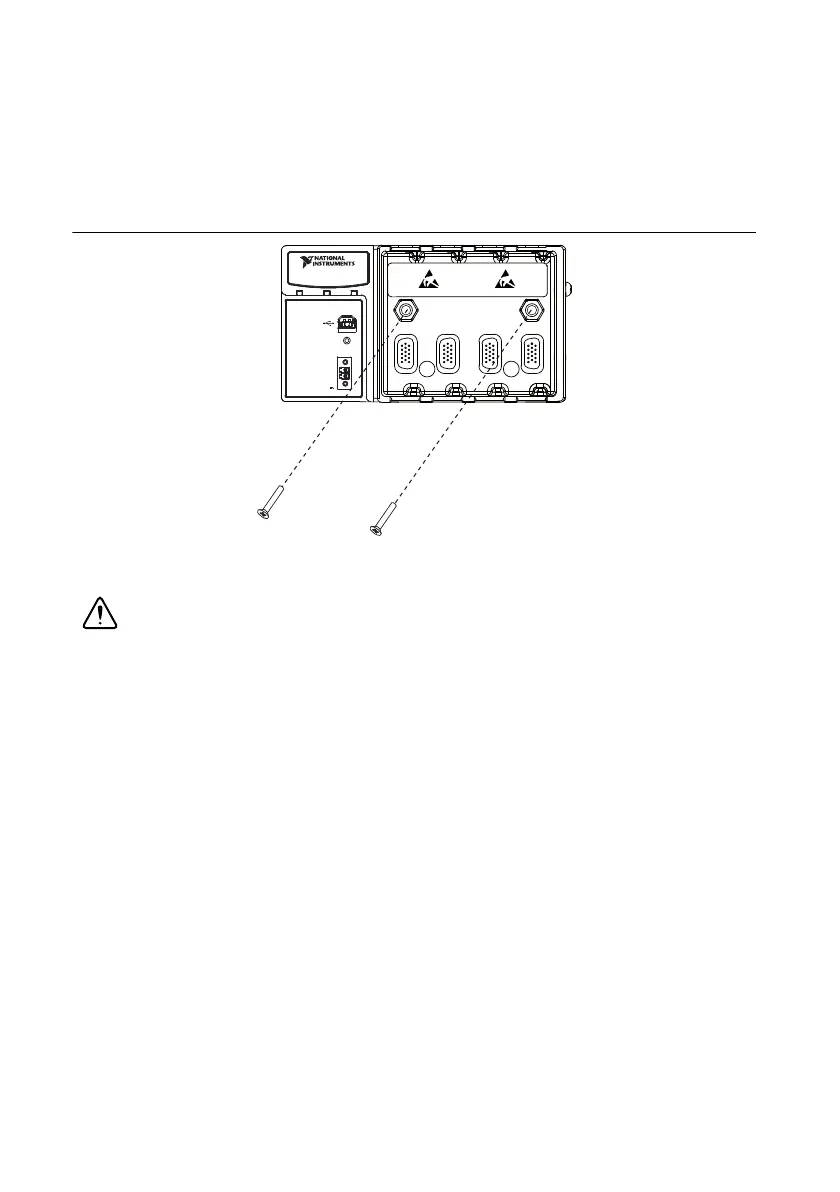
• Panel Mounting without a Panel Mount Kit—You can mount the cDAQ chassis directly
on a flat surface using the mounting holes. Align the chassis on the surface. Then, fasten
the chassis to the surface using two screws as shown in Figure 1-7. The NI cDAQ-9174
uses two M4 or No. 8 flathead screws. The NI cDAQ-9178 uses two M4 or No. 8 panhead
screws. National Instruments does not provide these screws with the chassis.
Figure 1-7. Mounting the cDAQ Chassis Directly on a Flat Surface
Refer to the specifications document for your cDAQ chassis for mounting dimensions.
Caution Make sure that no I/O modules are in the chassis before removing it from
the surface.
Mounting the NI cDAQ-9174/9178 on a DIN Rail
Use the NI 9912 DIN rail kit to mount the NI cDAQ-9174 chassis on a DIN rail. Use the NI 9915
DIN rail kit with the NI cDAQ-9178 chassis on a DIN rail.
Each DIN rail kit contains one clip for mounting the chassis on a standard 35 mm DIN rail. To
mount the chassis on a DIN rail, fasten the DIN rail clip to the chassis using a number 2 Phillips
screwdriver and two M4 × 17 screws. The screws are included in the DIN rail kit. Make sure the
DIN rail kit is installed as illustrated in Figure 1-8, with the larger lip of the DIN clip positioned
up. When the DIN rail kit is properly installed, the cDAQ chassis is centered on the DIN rail.
4321
INPUT
9-30 V
15 W MAX
POWER READY ACTIVE
V
C
NI cDAQ-9174
NI CompactDAQ