C343
8
09/2017
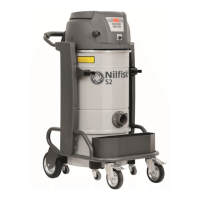
S2 / S3
GB
Emptying the dust container
WARNING!
■ Before proceeding with these operations, turn the
vacuum cleaner o and disconnect the plug from
the power socket.
■ Check the class of the vacuum cleaner.
Before emptying the container it is advisable to clean the lter
(see “Primary lter shaker”).
■ Standard and L version not suitable for vacuuming
hazardous dust
▪ Release dust container (1, Fig. 10), with lever (2),
then remove and empty it.
▪ Make sure the seal is in perfect condition and
correctly positioned.
▪ Place the container back in position and secure it
again.
Plastic bag
You can use the plastic bags supplied by our sales network
(Fig. 10A).
Versions for dusts harmful to health
■ Classes L, M, H suitable for vacuuming hazardous and/
or carcinogenic dust (class H).
Endless Bag
Classe M and H Vacuum cleaners are supplied with the
Longopac
endless bag (Fig.11).
If the bag is installed incorrectly, this could create health risks
for persons exposed.
Dust Bag
Vacuum cleaners can be supplied with the dust bag - code
81584000 (Fig. 12).
If the bag isn’t installed or is installed incorrectly, this could
create health risks for persons exposed.
Safe Bag
Vacuum cleaners can be supplied with the dust bag - code
4084001244 (Fig. 13). If the bag isn’t installed or is installed
incorrectly, this could create health risks for persons exposed.
Primary lter shaker
Automatic primary lter shaker
On models with an automatic primary lter shaker, the lter
shaker will be automatically activated at the start and end of
the operating cycle, respectively after starting the vacuum
cleaner and after all the motors have stopped (1 - Fig. 5).
Diagram A (see bottom of page - work phase sequence).
Manual primary lter shaker
Figure 9
In relation to the quantity of material vacuumed and if indicator
(9 - Fig. 5) is red, turn the vacuum cleaner o and use knob
(1 - Fig. 9) of the manual lter shaker.
WARNING!
Stop the vacuum cleaner before using the lter shaker.
Do not shake the lter while the vacuum cleaner is on,
as this could damage the lter.
Wait before restarting the vacuum cleaner, to allow the dust to
settle. Replace the lter element if the indicator remains red
(9 - Fig. 5) even after the lter has been shaken (consult the
“Primary lter replacement” paragraph).
Emergency stopping
Press Stop button (5 - Fig. 5). The vacuum cleaner stops.
WARNING!
The motors and internal components of the vacuum
cleaner will still be electrically powered.
To start the vacuum cleaner again, press the buttons of each
single motor or turn main switch(1 - Fig. 5) to “0” and then to
“I” again.
10
10 T (s)
2 2 2
STOP
0
I
0
I
0
I
A diagram
Power input
Motor 3
Motor 2
Motor 1
Automatic
lter shaker
Automatic
lter shaker
Stop motors
operating
time
 Loading...