INSTRUCTIONS FOR USE ENGLISH
1464815000 - SW4000, FLOORTEC R 870 31
03/2013
ENGINE OIL LEVEL CHECK
CAUTION!
Running the engine with a low oil level can
damage the engine itself.
NOTE
The oil alert system will automatically stop the engine
before the oil level goes down under the safety limit.
To avoid a sudden engine stop, always check the oil
level before each start-up.
1. Drive the machine on a level ground and engage the
parking brake.
2. Turn the ignition key (61) to “0”.
3. Open the engine compartment hood (18) with the handle
(41) and fasten it with the support rod (53).
4. Lift and disassemble the right side bulkhead (45).
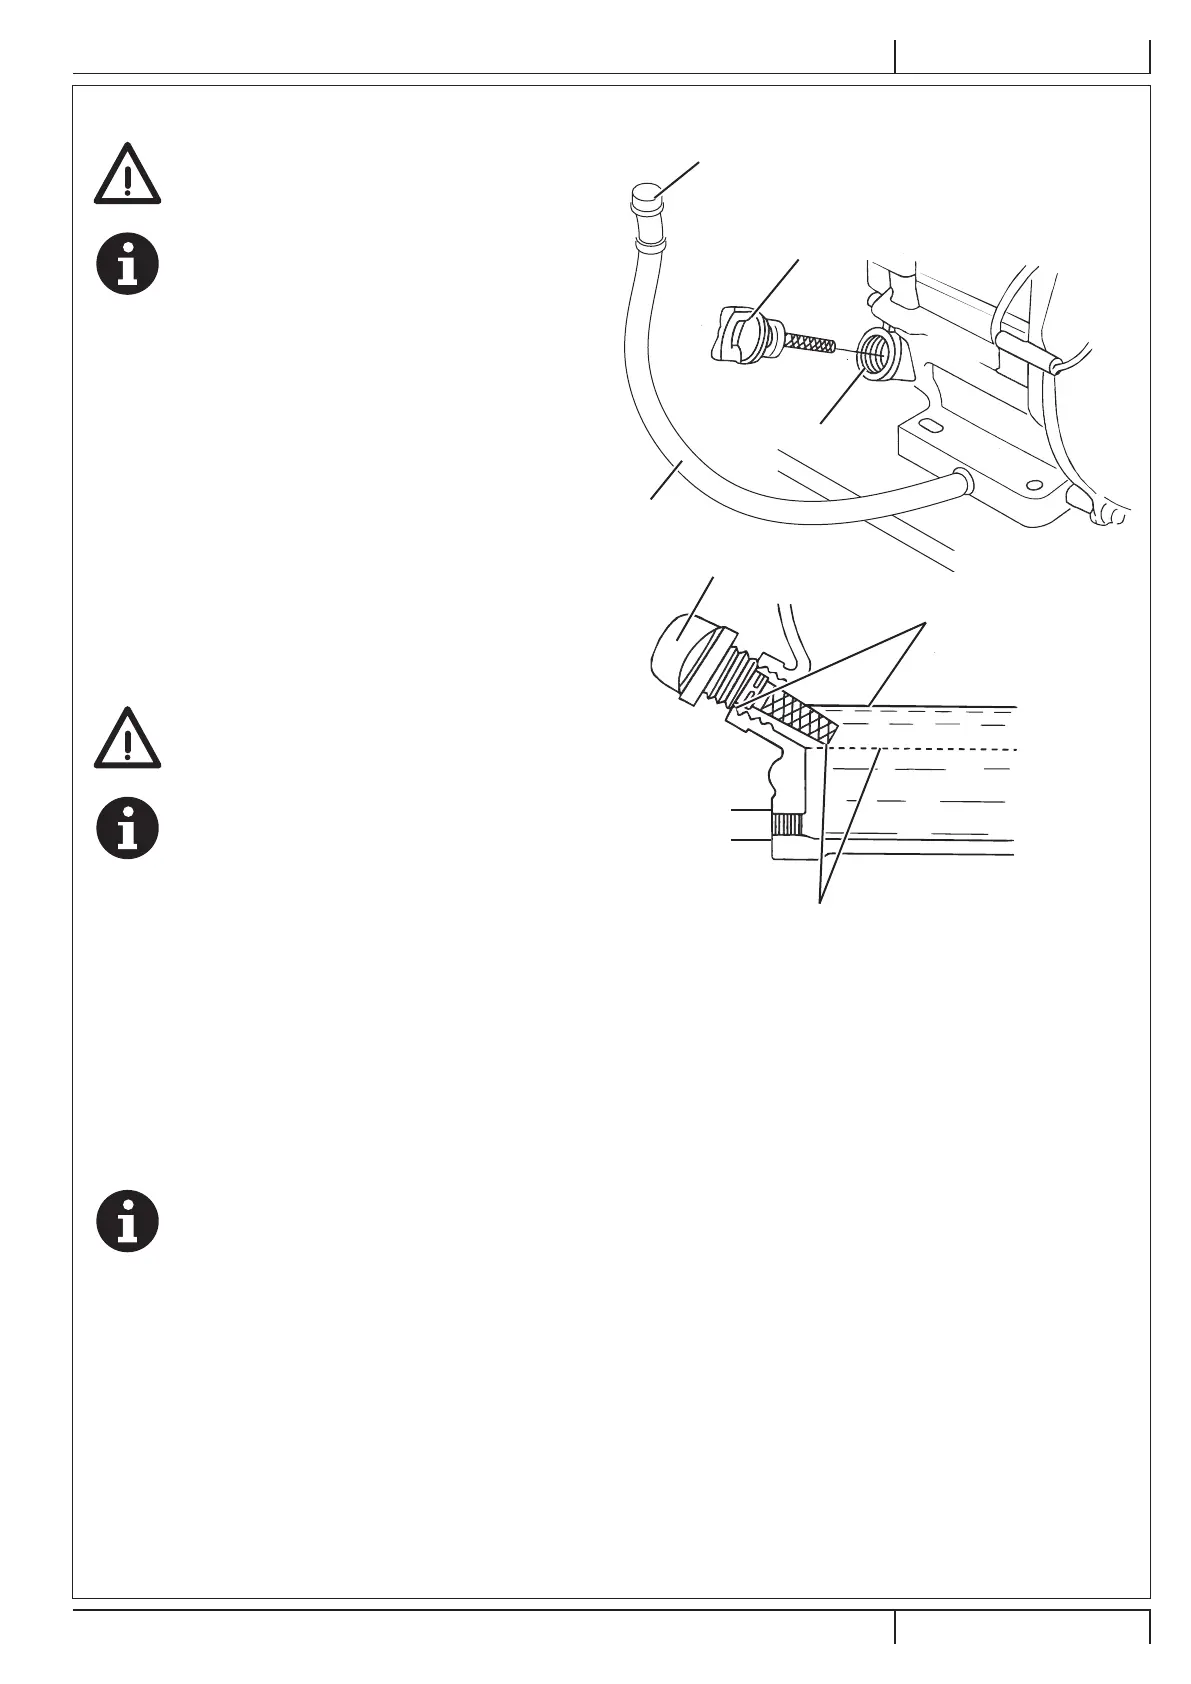
5. Remove the oil ller plug/dipstick (A, Fig. 22) and clean it.
6. Insert the oil ller plug/dipstick in the ller neck (B), but do
not tighten it, then remove it to check the oil level.
7. If the oil level is near or under the lower limit mark (C) on
the dipstick, top up with the specied oil up to the upper
limit mark (D) (lower edge of the oil lling hose). Do not
overll.
8. Install the oil ller plug/dipstick (A).
ENGINE OIL CHANGE
CAUTION!
The discharged engine oil must be disposed of
properly according to the Law in force.
NOTE
It is advisable to change the oil when the engine is
still hot, to make the oil downow easier.
1. Drive the machine on a level ground and engage the
parking brake.
2. Turn the ignition key (61) to “0”.
3. Open the engine compartment hood (18) with the handle
(41) and fasten it with the support rod (53).
4. Lift and disassemble the right side bulkhead (45).
5. Remove the oil ller plug/dipstick (A, Fig. 22), place the
hose (E) in a position that eases the oil drain, then remove
the plug (F).
6. Remove the oil drain plug (F) from the hose and drain the
oil into a suitable container, then install the oil drain plug
and hose.
7. Pour new oil in the ller neck (B) up to the upper limit mark
(D) (lower edge of the oil lling hose) on the dipstick.
NOTE
As for engine oil type and quantity, see the Technical
Data chapter and the Engine Manual.
8. Install the oil ller plug/dipstick (A) and tighten it.
A
A
B
E
D
P100616
Figure 22
 Loading...