ENGLISH INSTRUCTIONS FOR USE
32 SW4000, FLOORTEC R 870 - 1464815000
03/2013
ENGINE FILTER TRAP CLEANING (for Petrol version)
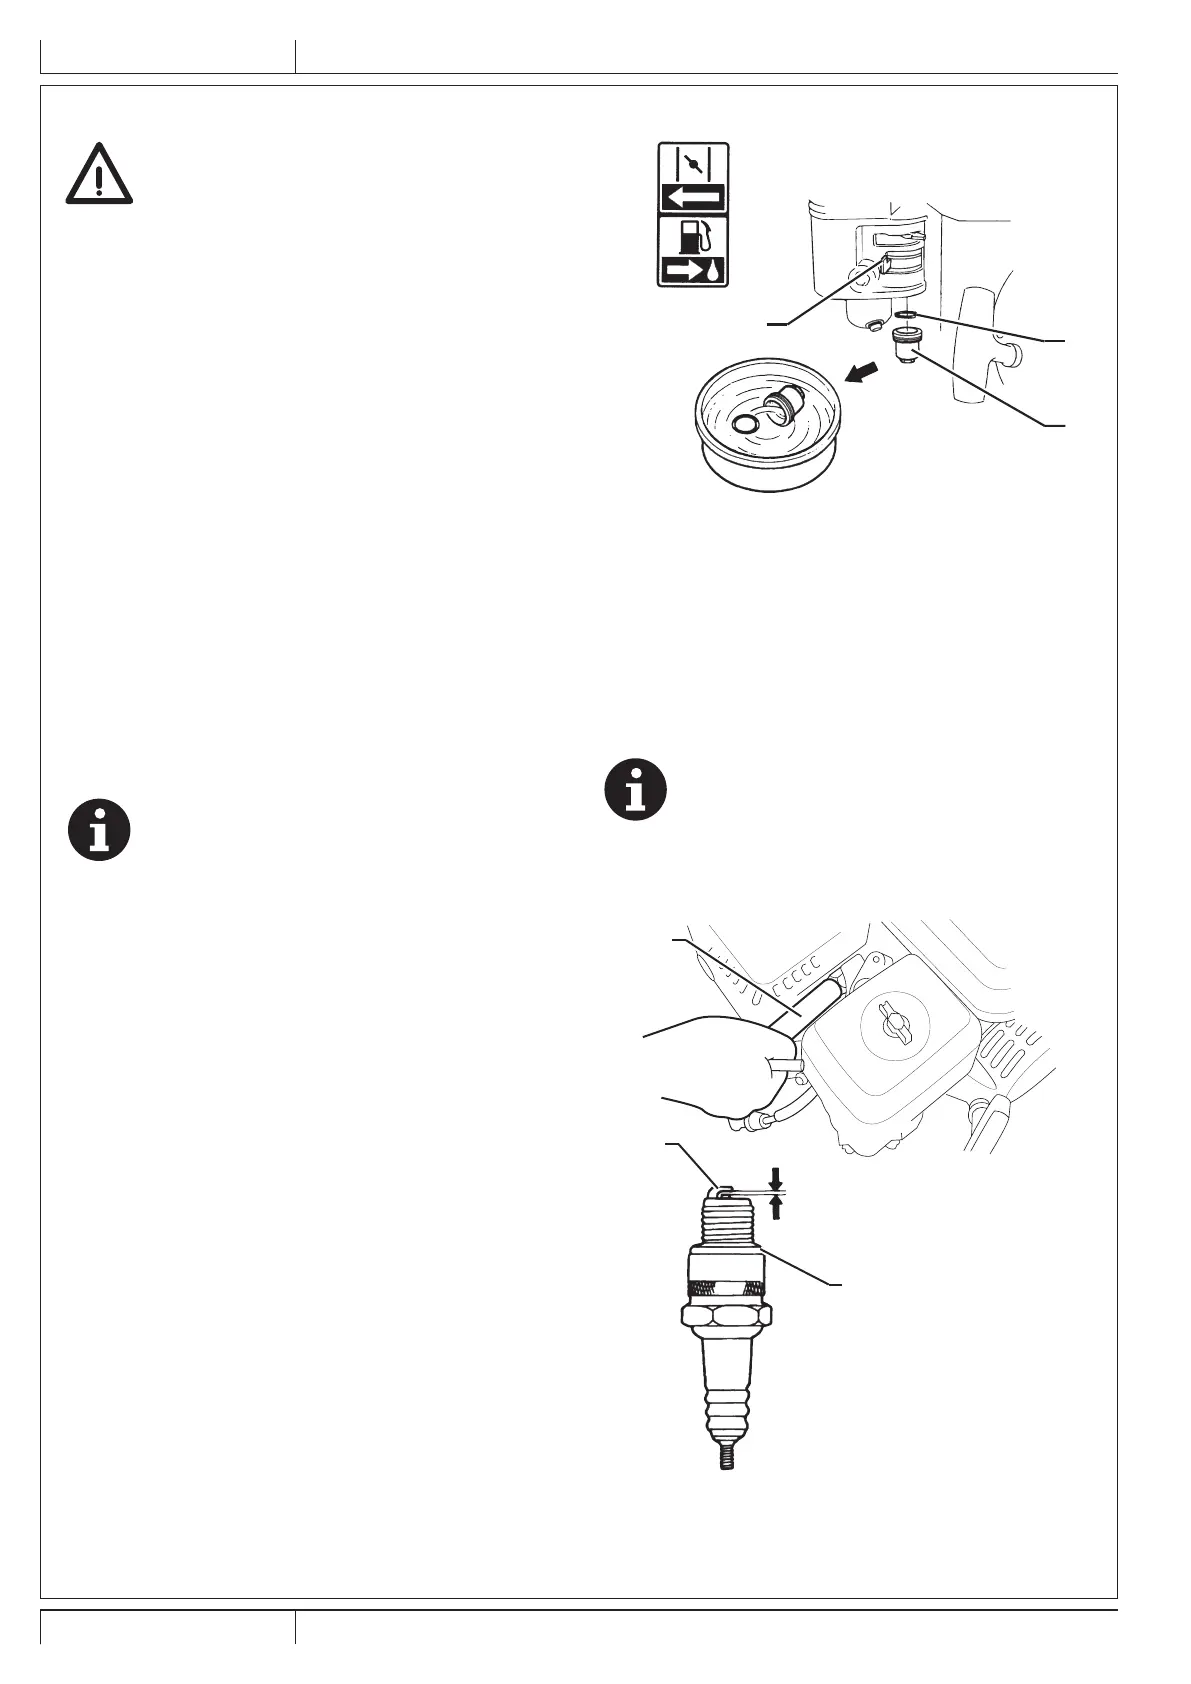
WARNING!
The petrol is highly ammable and explosive, it
can burn or cause serious injuries.
Turn off the engine, and keep it far from sparks,
ames and other sources of heat.
Handle the fuel outdoors only.
Wipe immediately any fuel accidentally spilled
out.
1. Drive the machine on a level ground and engage the
parking brake.
2. Turn the ignition key (61) to “0”.
3. Open the engine compartment hood (18) with the handle
(41) and fasten it with the support rod (53).
4. Lift and disassemble the right side bulkhead (45).
5. Move the fuel lever (A, Fig. 23) to OFF, then remove the
fuel lter cup (B) and the O-ring (C).
6. Wash the fuel lter cup (B) and the O-ring (C) with a non-
ammable solvent, then dry them accurately.
7. Place the O-ring (C) and assemble the lter cup (B) by
tightening it securely.
8. Move the fuel lever (A) to ON and check for leakages. If
any leakage is found, replace the O-ring (C).
OFF
A
P100617
Figure 23
ENGINE SPARK PLUG CHECK/REPLACEMENT
For the type of spark plug to be used, see Technical Data
chapter.
NOTE
A wrong spark plug can damage the engine.
1. Drive the machine on a level ground and engage the
parking brake.
2. Turn the ignition key (61) to “0”.
3. Open the engine compartment hood (18) with the handle
(41) and fasten it with the support rod (53).
4. Lift and disassemble the right side bulkhead (45).
5. Disconnect the spark plug cap and remove dirt around the
spark plug.
6. Remove the spark plug with a proper wrench (A, Fig. 24).
7. Check the spark plug. Replace it if it is damaged, dirty, if
the sealing washer (B) is damaged or if the electrode is
worn.
8. Measure the distance between the spark plug electrodes
with a feeler gauge. Correct the distance by bending
carefully the side electrode (C). The distance between the
electrodes must be of 0.70 - 0.80 mm.
9. Install the spark plug manually with great care, to avoid
tightening it improperly.
10. Once the spark plug is in place, tighten it with a proper
wrench to press the sealing washer.
11. When a new spark plug is installed, tighten 1/2 turn once
the spark plug is in place to press the washer.
12. When the original spark plug is reinstalled, tighten 1/8 - 1/4
turn once the spark plug is in place to press the washer.
NOTE
A loose spark plug can overheat and damage the
engine.
Do not over-tighten, otherwise the threads in the
cylinder head can be damaged.
13. Install the cap on the spark plug.
0,70 - 0,80mm
A
B
C
P100618
Figure 24
 Loading...