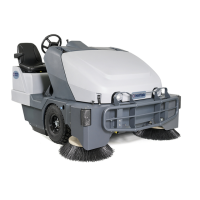
QUICK START GUIDE ENGLISH
1464813000 - SW4000 37
BEFORE MACHINE START-UP
Checklist
1. Have a full knowledge of the machine operating controls and their functions.
2. Insert the key (61) and start the machine (see the procedure in the following paragraph).
3. Check the fuel reserve warning light (71). If it is on, refuel with petrol or replace the LPG tank (see previous paragraph).
4. Check the horn with switch (67), the reverse gear buzzer with switch (68) and the working light switch (78, optional) for proper
operation.
5. &KHFNWKHSDUNLQJEUDNHDQG7KHEUDNHPXVWKROGLWVORFNHGSDUNHGVHWWLQJ¿UPO\ZLWKRXWHDVLO\EHLQJUHOHDVHGUHSRUW
DOOGHIHFWVLPPHGLDWHO\WR1LO¿VN6HUYLFH&HQWHU
6. Check the service brake pedal (6) for proper operation.
WARNING!
,IWKHSHGDOLV³VSRQJ\´RUIDGHVXQGHUSUHVVXUHZLWKRXWDQHI¿FLHQWEUDNLQJIRUFHGRQRWGULYHWKHPDFKLQH
UHSRUWDOOGHIHFWVLPPHGLDWHO\WR1LO¿VN6HUYLFH&HQWHU
7. Make sure that there are no open doors/hoods and that the machine is in normal operating conditions.
Cleaning planning
1. Arrange long runs with a minimum of stopping or starting.
2. Allow a small amount of broom path overlap to ensure complete coverage.
3. Avoid making sharp turns, bumping or scraping the side of the machine.
Filling the DustGuard™ system water tank (optional)
1. 5HPRYHWKHSOXJWRUHDFKWKH¿OOHUQHFN
2. )LOOWKHWDQNZLWKFOHDQZDWHU'RQRW¿OOWKHWDQNFRPSOHWHO\OHDYHDIHZFHQWLPHWUHVIURPWKHHGJH
STARTING AND STOPPING THE MACHINE
Starting the machine
1. Sit on the driver’s seat (3) and adjust it with the lever (4) to allow easy reach of all controls.
NOTE
7KHGULYHU¶VVHDWLVHTXLSSHGZLWKDVDIHW\VHQVRUZKLFKDOORZVWKHPDFKLQHWREHGULYHQRQO\ZKHQWKHRSHUDWRULV
RQWKHGULYHU¶VVHDW
2. Pull the engine choke lever (55).
NOTE
)RU3HWUROYHUVLRQ'RQRWXVHWKHFKRNHOHYHULIWKHHQJLQHLVKRWDQGLIWKHDLUWHPSHUDWXUHH[FHHGV&
NOTE
)RU/3*YHUVLRQ$OZD\VXVHWKHFKRNHOHYHUWRDSSUR[LPDWHO\KDOIVWURNH
3. Insert the ignition key (61) and turn it clockwise to “II”. When the engine starts, release the key. Wait (a few seconds) for the
display (69) to turn on and sowing the working hours.
CAUTION!
When starting the engine with the ignition key (61) do not press the drive pedal (5).
,IWKHGULYHV\VWHPZDUQLQJOLJKWÀDVKHVWXUQRIIWKHPDFKLQHDQGUHSHDWWKHVWDUWXSSURFHGXUH
4. After the ignition, let the engine run for a few seconds, then release the choke lever (55).
5. Disengage the parking brake.
6. Drive the machine to the working area, by keeping the hands on the steering wheel (1) and pressing the pedal (5).
The drive speed can be adjusted from zero to maximum speed by increasing the pressure on the pedal.
7. The forward/reverse direction is selected with the relevant switch (68) on the dashboard. When the reverse gear is selected,
the relevant buzzer turns on.
8. Lower the main broom with the lever (63).
9. Lower the side brooms with the lever (64).
NOTE
:KHQWKHEURRPVDUHORZHUHGWKHEURRPVWKHYDFXXPV\VWHPDQGWKHGXVWJXDUGV\VWHPRSWLRQDOLIWXUQHGRQZLWK
WKHVZLWFKDXWRPDWLFDOO\DFWLYDWHVRQO\ZKHQWKHPDFKLQHLVPRYLQJ
 Loading...
