nokia
CONNECTING PEOPLE
PAGE 12 (21) Approved 1.0
Customer Care EMEA
DJk
Technical Services Confidential 26.01.2004
Repair Concepts
Service Manual 2300 Level 1&2 Copyright 2003-2004 © Nokia Corporation
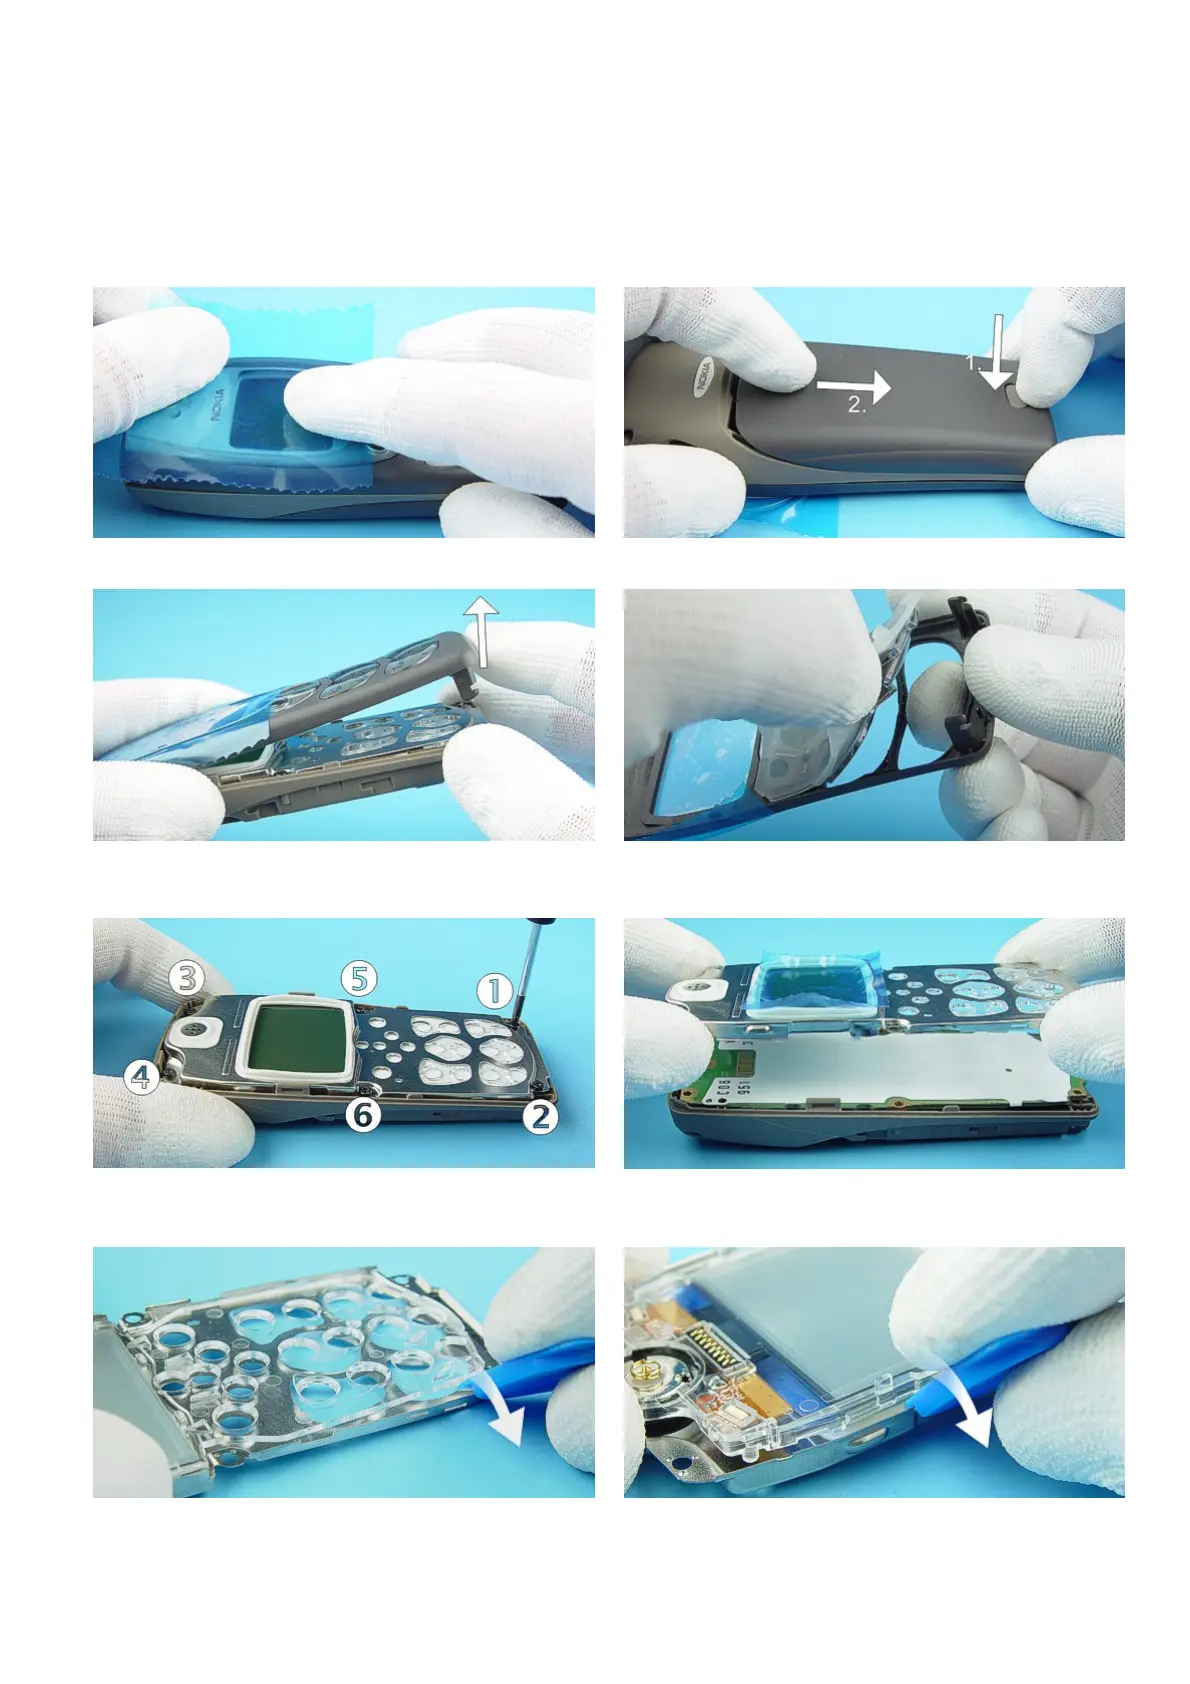
8. DISASSEMBLY INSTRUCTIONS (ALSO SEE THE VIDEO CLIPS ON CARE POINT)
If not already done protect Window with a film to
avoid dust and scratches.
Press the Release Button before removing the Battery
Cover.
Open A-Cover from bottom side on.
Now, Keymat can be taken away easily.
Unscrew the six Torx Plus
®
size 6 screws. For
assembly, the reverse order and a Torx Plus
®
driver
with a torque of 21Ncm have to be used.
Take LCD Assy from Engine Module.
Unlock LCD snaps of the LCD Light guide on the bottom
side.
Unlock LCD snaps of the LCD Light guide on the top
side.

 Loading...