5 Installing the machine and adjusting the level
65
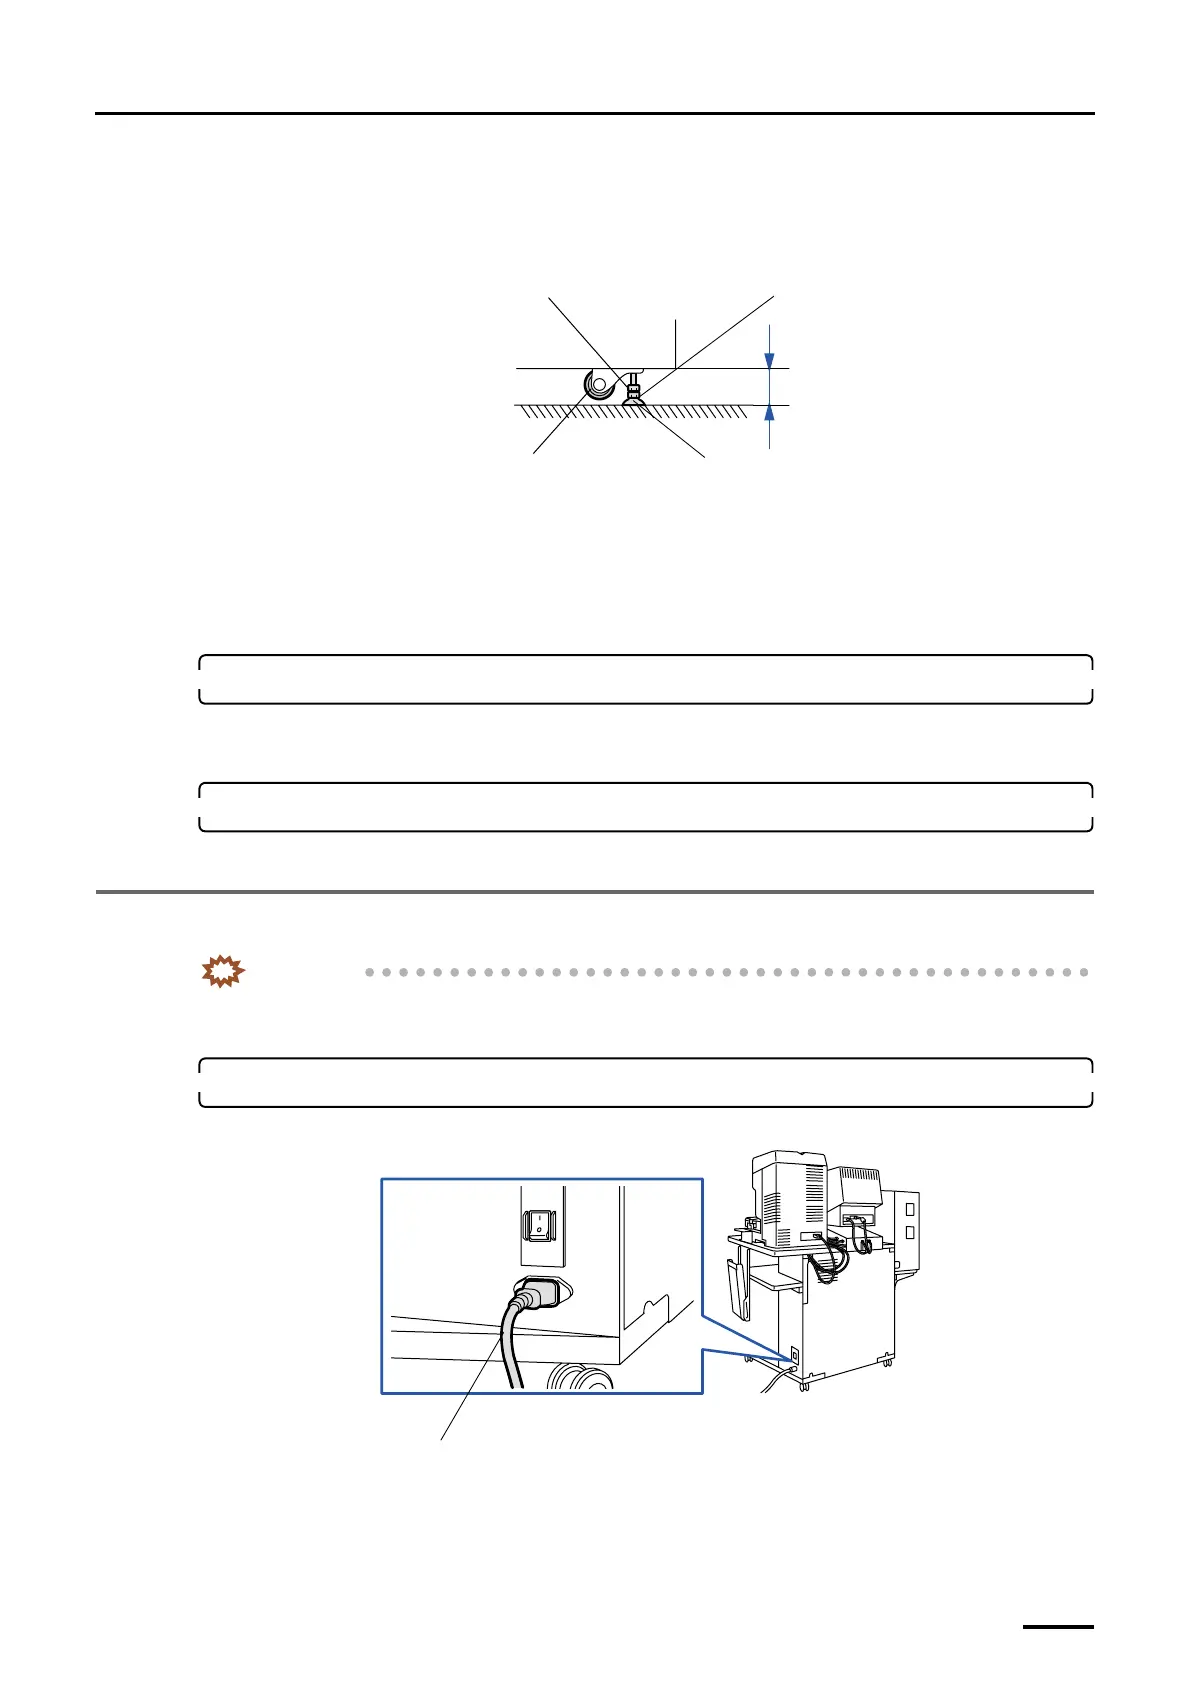
• Check that each jack bolt is securely supporting the machine (the castors must not touch the
floor).
• To prevent the jack bolt slipping off, the distance between the bottom frame of the machine
and the floor should be 60 mm or less.
(5) After the level adjustment, lock the jack bolts with the lock nuts.
(6) Tighten the bolts up for connecting the printer and the processor securely.
(7) Remove the levels.
(8) Reattach the paper magazine to the magazine deck unit and put it away.
11. Attach the triple magazine.
This is for the machine with the optional triple magazine.
• For details about how to attach the triple magazine, refer to
☞Installing the optional triple magazine.
12. Close printer doors 1 and 2.
This completes adjusting the level of printer and paper processor.
5.3 Connecting the desk section and the printer section (power cable)
IMPORTANT
• When you connect the power cable, do not pull it by force and do not give extra pressure to the cable.
• Wire the cables with a wiring duct to prevent the cables from stepping on or getting caught.
1. Connect the power cable from the printer section to the input section.
Example: For the machine with the scanner
This completes connecting the desk section to the printer section (power cable).
Lock nut
Adjusting nut
Castor
Jack bolt
Within 60 mm
G068862
Power supply cable (J/P161)
G068938
Distributed by: minilablaser.com
 Loading...