6 Connecting the power supply
72
6 Connecting the power supply
6.1 Connecting the power supply
• It can cause electrical shock.
Before performing the following operation, be sure to turn off the circuit breaker and the main power supply.
IMPORTANT
• Install the circuit breaker for the main power supply in an easily accessible position (close to the machine).
Leave the operation explained in 6 Connecting the power supply to an electric specialist.
1. Confirm the power specification.
The wiring method varies depending on the power specifications.
Check the power specifications indicated on the rating plate (power supply type, voltage, and frequency) before
proceeding with wiring.
IMPORTANT
• Incorrect wiring could cause an electric shock or a fire. Confirm the power specification carefully
before operating.
2. Confirm that the circuit breaker and main power supply are off.
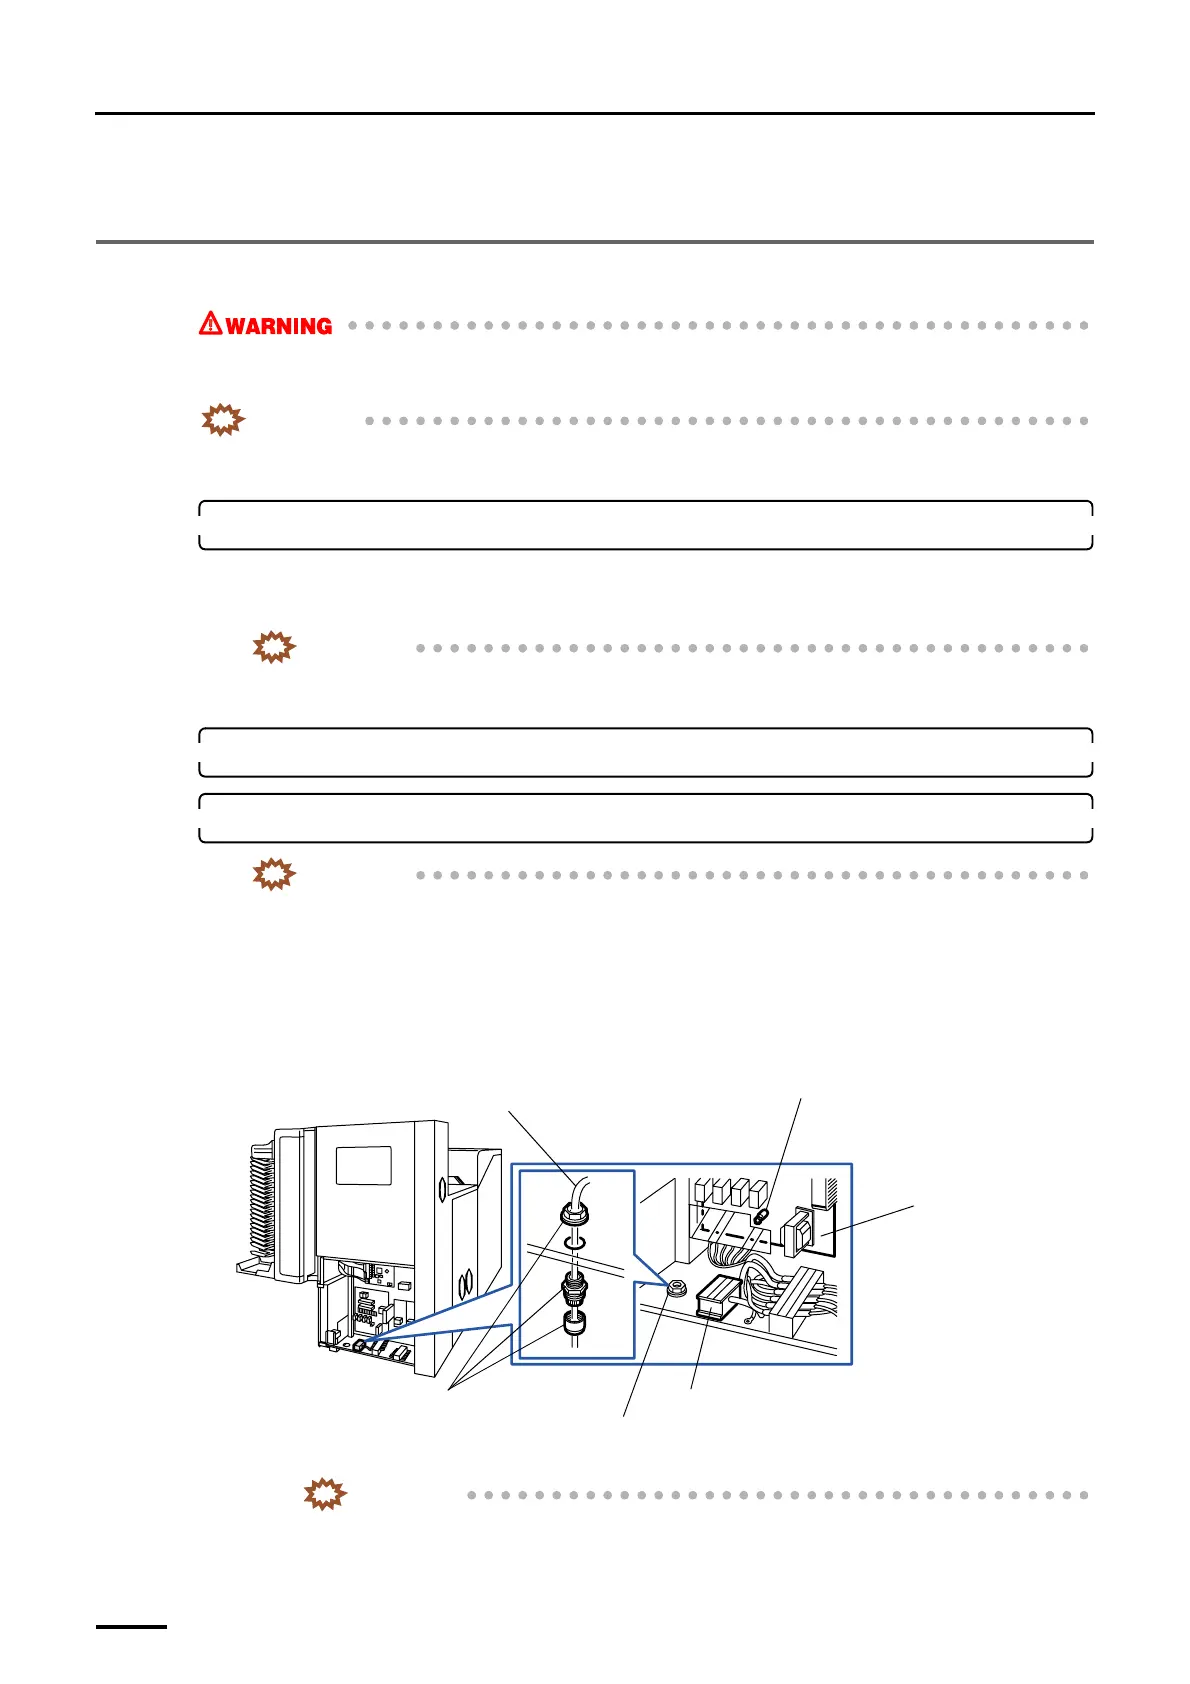
3. Connect the power cable to the terminal strips.
IMPORTANT
• This machine is equipped with a surge protector. When conducting an insulation resistance test,
disconnect the connector on the PCB shown in the figure.
• For USA - Field Wiring connection must meet NEC code for conduit connection.
• For CANADA - Field Wiring connection must meet CEC code for conduit connection.
(1) Draw the cable from the cable opening.
(2) Secure the power cable using the fixings.
Connect the power cable to the terminal strips referring the following table.
IMPORTANT
• Tighten the screws on the terminal strips again within 24 through 48 hours.
Cable opening
Terminal strips
Processor relay PCB
Connector to be removed when the
insulation resistance test is carried out
(J/P663)
Power cable
Fixings
G070353
Distributed by: minilablaser.com
 Loading...