30
• Selecting Learn Once or Learn Latch from the drop-down menu which appears when you click on the learn state
in the Control Map Info section of the Automap Universal window (when in Control Map View).
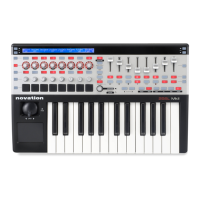
• Pressing the LEARN button on the ReMOTE SL. Repeated presses of the LEARN button cycle through Learn Once,
Learn Latch and Off.
If you use Learn Latch (instead of Learn Once) then you can continue assigning parameters by altering them with the
mouse and operating a control on the ReMOTE SL until you turn learn mode off (don’t forget to turn it off once you are
done assigning!). Note that it is possible to assign more than one control on the ReMOTE SL to the same software
parameter but only one parameter can be assigned to each control.
7.8 CONTROL SETTINGS – NAME RANGE AND STEP SIZE
The Name, Max, Min and Step Size settings are available to edit from both the Automap border and Control Map View of
the Automap Universal window. You can edit these settings by clicking on them with the mouse, typing in a new name/
value and pressing Enter to confirm, or Escape to cancel.
When you first load an instance of an Automap-wrapped plug-in, or immediately after a plug-in is given Automap focus, the
Name box on the Automap border will show the instance name of that plug-in as it appears in Browser View and on the
ReMOTE SL when selecting a control map. It may be useful to change the instance name so you can differentiate it from
another instance of the same plug-in. For example, you may have two instances of the Novation Bass Station soft-synth in
your project, one playing a bass line and another playing a lead line. When you select a different control map you will see
them both appear as ‘BassSta’. Renaming them to e.g. ‘BS-Bass’ and ‘BS-Lead’ will allow you to see which one is which.
Once a plug-in has been given Automap focus, simply operate any control to bring up its Name, Max, Min and Step Size
settings in the Automap border. In the Automap Universal window, you must select a control with the mouse to bring up its
Max, Min and Step Size settings. If the control is not assigned to a parameter then no settings will appear.
To change the name of a control as it appears on the ReMOTE SL display, simply click on the Name box on the Automap
border, or on the control name in the Control Map View, then type in a new name and press Enter to confirm, or Escape
to cancel. If the name is longer than 8 characters it will be automatically abbreviated on the ReMOTE SL display unless the
control to the right of it is unassigned, in which case the blank display space is used to show the full control name.
The Max, Min and Step Size settings have a different effect depending on whether the control is a pot, slider, encoder
or button:
Encoders:
The difference between the max and min values determines the number of encoder steps it takes to scale
the whole range of a parameter i.e. it determines how sensitive the encoder is. Since it is the difference between the
max and min values and not their absolute values that determine sensitivity, the values you enter can be anything you
like. We recommend leaving the min value set to 0 and the step size value set to 1, you can then simply edit the max
value to change the encoder sensitivity. A higher max value will give finer control over a parameter and a lower max
value will give coarser control.
If you want the encoder action to be reversed so that it changes the parameter from min to max as you rotate it anti-
clockwise, swap the max and min values around. If you want an encoder to have its 0 position in the centre, enter a
negative number for the min value. This is useful for parameters such as pan and EQ gain.
Buttons: The difference between the max and min values determines the number of button presses required to
change the parameter from its minimum value to its maximum value. For a switch-type parameter with only two states
e.g. bypass on/off, max=1, min=0 and step size=1 will give the button a toggle action.
If the assigned parameter is a switch-type with more than two states e.g. filter type switchable between low-pass,
band-pass and high-pass, enter a higher max value. For the example given, a max value of 2 will cause the button to
switch between the three filter types.
 Loading...
