31
LFO 1:
• can modify the waveform shape of each oscillator when LFO1 is selected by the
oscillator’s Source button
23
;
• can modulate the filter frequency; the amount of modulation is adjusted in the Filter
Section with LFO 1 Depth control
65
.
LFO 2:
• can modulate the pitch of each Oscillator; the amount of modulation is adjusted
in the Oscillator Section with the LFO 2 Depth control
21
. This is the method of
adding “vibrato” to a sound.
Either LFO may additionally be patched in the Modulation Matrix (see xxx) to modulate
many other synth parameters.
LFO 1 & 2 Waveform
The Type button
24
selects one of four wave shapes – Triangle, Sawtooth,
Square or Sample and Hold. The LEDs above the button confirm the waveform currently
selected.
LFO 1 & 2 Rate
The speed (or rate, or frequency) of each LFO is set by the Range button
26
and the
rotary Rate control
27
. The Range button has three settings: Low, High and Sync.
Selecting Sync reassigns the function of the Rate control, allowing the speed of the LFO
to be synchronised to an internal or external MIDI clock, based on a sync value selected by
the control. When Sync is selected, the OLED displays the LFO’s RateSync parameter
when the Rate control is moved: this allows you to choose the tempo division required.
See LFO Sync Rate table on page page 45
LFO 1 & 2 Fade Time
LFO effects are often more effective when faded-in, rather than just ‘switched on’; the
Fade Time parameter sets how long the LFO output takes to ramp up when a note is
played. The rotary control
25
is used to adjust this time. See also Fade Mode (page
32), where you can also make the LFO fade out after the Fade Time, or using a Gate
setting, start or end abruptly after the Fade Time.
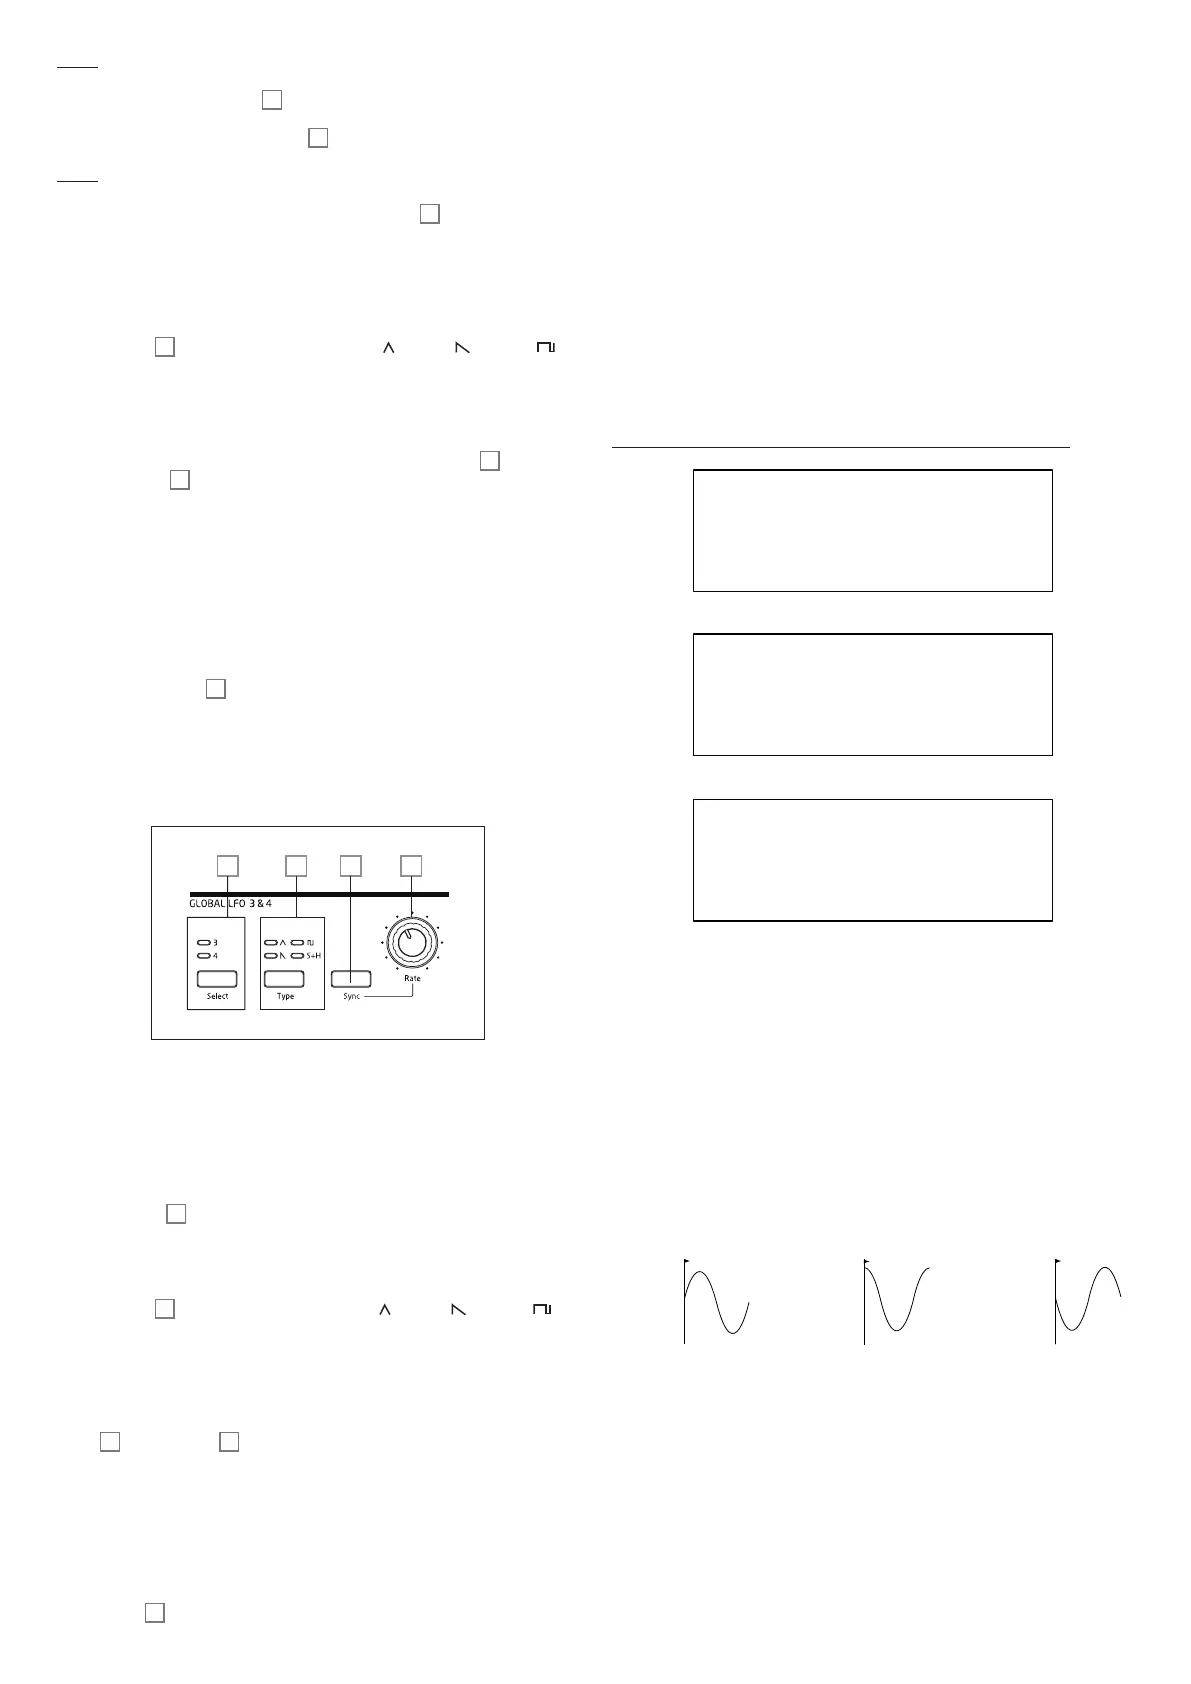
LFO 3 and LFO 4 hardware controls
28 29 30 31
LFO 3 and LFO 4 share a set of panel controls which may be assigned to either LFO, and
each has its own page in the LFO menu with further parameters. The LFO outputs are
not routable using direct panel controls in the way that LFO 1 and LFO 2 are, but may be
routed to any of the Modulation Matrix’s destinations.
LFO 3 & 4 Select
The Select button
28
assigns the other controls on the GLOBAL LFO 3 & 4 panel
section to LFO 3 or LFO 4 respectively.
LFO 3 & 4 Waveform
The Type button
29
selects one of four wave shapes - Triangle, Sawtooth,
Square or Sample and Hold. The LEDs above the button confirm the waveform currently
selected. Waveform selection may also be made from the LFO menu.
LFO 3 & 4 Rate
The speed (or rate, or frequency) of the selected LFO (LFO 3 or LFO 4) is set by the Rate
control
30
Selecting Sync
31
reassigns the function of the Rate control, allowing the
speed of the LFO to be synchronised to an internal or external MIDI clock, based on a
sync value selected by the control. When Sync is selected, the OLED displays the LFO’s
RateSync parameter when the Rate control is moved: this allows you to choose the
tempo division required. See LFO Sync Rate table on page page 45. LFO 3/4 Rate may
also be set from the LFO menu.
LFO 3 & 4 Sync
Pressing Sync
31
locks the LFO speed to an external or internal MIDI clock, to enable
it to be synchronised to external equipment. The sync division factor is adjusted by the
LxRateSync parameter (where x=3 or 4) in the LFO menu.
The LFO Menu
LFO1 and LFO 2 are ‘per voice’. This is a very powerful feature of Summit (and other
Novation synthesisers). For example, when an LFO is assigned to create vibrato, and a
chord is played, each note of the chord will be varied at the same rate, but not necessarily
in the same phase. There are various settings in the LFO Menu that control how the LFOs
respond and lock together.
LFO 1 and LFO 2 each have three menu pages; the parameters available for LFO 1 and
LFO 2 are identical.
As LFO 3 and LFO 4 are intended for the creation of additional modulation effects rather
than fundamental tone generation, they are ‘global’ as opposed to ‘per-voice’, meaning that
they can also be used to modulate FX parameters via the FX Modulation Matrix. They have
one menu page each; the parameters available for LFO 3 and LFO 4 are identical.
LFO 1 and LFO 2: The default menu displays for LFO 1 are shown below:
LFO 1 1/8
MonoTrig Legato
Phase Free H
Slew 0
LFO 1 2/8
FadeMode FadeIn H
FadeSync On
Common Off
LFO 1 3/8
Repeats Off H
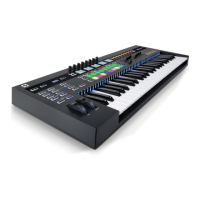
LFO Phase
Displayed as: Phase
Initial value: Free
Range of adjustment: Free; 0deg to 357deg (in 3deg increments)
Each LFO runs continuously ‘in the background’. If the Phase is set to Free (the
default), there is no way of predicting where the waveform will be when a key is pressed.
Consecutive presses of a key will inevitably produce varying results. With all other values
of Phase, the LFO will re-start at the same point on the waveform every time a key is
pressed, the actual point being determined by the parameter value. A complete waveform
has 360º, and the control’s increments are in 3º steps. Thus a half-way setting (180deg)
will cause the modulating waveform to start at half-way through its cycle.
KEY "ON"
KEY "ON"
PHASE = 0
O
PHASE = 90
O
PHASE = 180
O
KEY "ON"
MonoTrig
Displayed as: M o n oTrig
Initial value: Legato
Range of adjustment: Legato or Re-Trig
M o n oTrig only applies to monophonic Voice modes (see page 22). Providing that
LFO Phase is not set to Free, the LFOs are re-triggered each time a new note is pressed.
But if you are playing in legato style (literally “smoothly” – playing further keys while one key
is still held), the LFOs will only re-trigger if M o n oTrig is set to Re-Trig. If set to Legato,
you will only hear the effect of re-triggering on the first note.