12
With the amplifier or mixer off or muted, connect the AC mains to Summit
1
. Turn the
synth on
2
: after completing its boot sequence, Summit will load Single Patch 000*, and
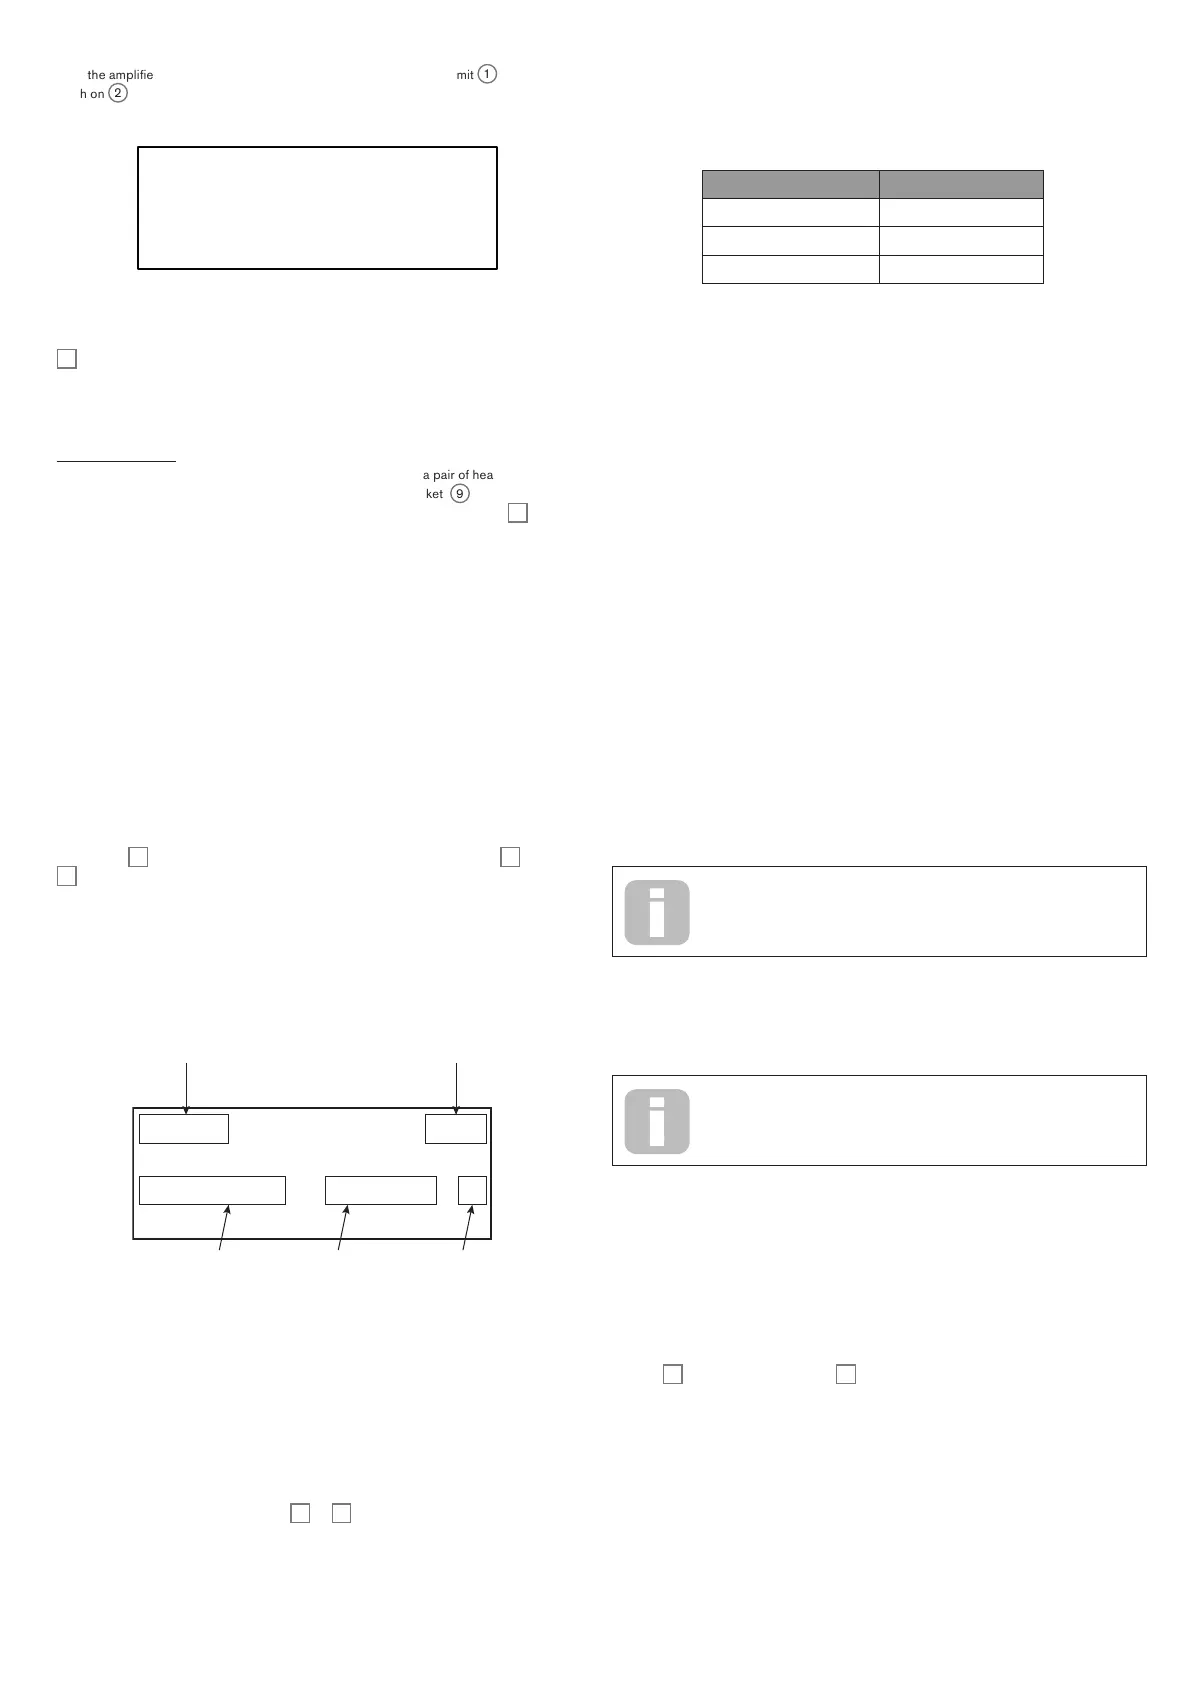
the LCD display will confirm this:
Dystopian 1/1
Patch 000 H
Bank A
Category All
“Dystopian” is the name of the factory Single Patch in Bank A, memory location 000.
Turn on the mixer/amplifier/powered speakers, and turn up the Master Volume control
1
until you have a healthy sound level from the speaker when you play.
*This refers to the first time Summit is powered “out of the box”. Subsequently, Summit will load
the last Patch used when power-up.
Using headphones
Instead of a speaker and/or an audio mixer, you may wish to use a pair of headphones.
These may be plugged into the rear panel headphone output socket
9
. The main outputs
are still active when headphones are plugged in. The Master Volume control
1
also
adjusts headphone level. By default, the headphone output follows the main output, which
– again by default – carries both Parts A and B of a Multi Patch. You can change what you
hear in the headphones on Page A of the Settings menu – see xxx for full details.
NOTE: Summit’s headphone amplifier is capable of outputting a high signal level; please
take care when setting the volume.
Menu Navigation
Although most of the key parameters affecting the nature of the sound Summit generates
are immediately accessible through dedicated, “per-function” rotary controls and switches,
many further parameters and synth settings can be modified using the OLED display and
its associated controls. The menu system has been designed so that all parameters and
settings can be accessed on a single menu “level” – there are no multi-level submenus to
navigate.
Summit’s menu system has been designed to be as simple and consistent as possible.
The buttons
9
above the display, plus Settings and the two Patch buttons
4
and
5
, select one of eleven menus. All menus except Single Patch have multiple pages:
use the Page I and H buttons to scroll through the pages in sequence.
On each page, Row 1 is a “title” row and stays fixed. Rows 2, 3 and 4 each display a
parameter for modification; some pages do not present data in all rows. Use the three
buttons to the left of the display to select the row to edit: the active row is indicated by
a H symbol. The parameter value may be adjusted either by the rotary control or the
Value +/- buttons.
Phase Free
MonoTrig Legato H
Slew 0
Parameter to
be adjusted
Current
parameter
value
Row 3 is
selected
Bi-timbral synthesis
Summit can be effectively two synthesisers in one. Each control on the panel and each
menu function can affect the relevant parameter in either or both, depending on the mode
in use.
When a Single Patch is in use, the two synthesisers operate “in tandem”: they are both
operational but do exactly the same thing. When you move a control on the panel or adjust
a parameter in a menu, you are making the same adjustment to both synths, by the same
amount. Each synth has 8 voices, so you have 16 voices available in all. The MULTIPART
CONTROL and MULTIMODE buttons (
12
to
15
) will be unlit.
When a Multi Patch is in use, the two synths operate independently. The Multi Patch will
consist of two separate Single Patches, one – Part A – generated by one synth, the other
– Part B – by the other. The ability to combine two different sounds gives you a greatly
enlarged sound palette to work with, as every parameter in each Part may be adjusted
independently, if wished.
When a Multi Patch is selected (or created), the MULTIPART CONTROL and
MULTIMODE buttons become available, and their colour reflects Summit’s operational
mode:
ACTIVE PARTS COLOURS
Part A Blue
Part B Orange
Parts A and B White
With Part A selected in MULTIPART CONTROL, Summit’s controls will affect only the
synth generating Part A: similarly, with Part B selected, the controls affect the Part B synth.
You can press buttons A and B together to invoke the third control state – Both. Now the
control panel – knobs, buttons, sliders and menus - will affect both synths at the same time.
You can choose how to play Multi Patches with the three MULTIMODE buttons, though a
factory Multi Patch will default to the Mode that the sound designer had in mind when they
developed the Patch.
• In Layer Mode, you will hear parts A and B mixed together (initially 1:1, but the
actual mix can be adjusted in the menus), and you can play the Multi Patch over the
whole extent of the keyboard.
• In Split Mode, Part A is assigned to the lower part of the keyboard and Part B to
the upper. The “split point” is, by default, at middle C (C3). You can move the split
point anywhere else on the keyboard by holding down the Split button and then
pressing the key denoting the new split point, or by changing the Split P oin t
parameter for the Multi Patch on Page 3 of the MULTI SETTINGS Menu. Note that
the chosen split point is specific to each Patch: different Patches may have different
split points.
• In Dual Mode, what you hear follows the selected MULTIMODE CONTROL button,
so you can play Part A or Part B alone over the whole extent of the keyboard. If you
press A and B together to invoke the Both state, you will hear both Parts A and
B together: this is exactly the same configuration as selecting Layer Mode: in this
case, the control panel and menus will affect both Parts simultaneously.
Loading Patches
Summit has 1,024 memory locations for Patches, 512 for Single Patches and 512 for Multi
Patches.
Because each Multi Patch is made up of two Patches - which can be
played independently if you wish – you actually have 1,536 individual
Patches at your disposal!
The two blocks of 512 have the same arrangement: each consists of four Banks of 128; the
banks are designated A to D. The memory is pre-loaded with 768 factory Patches: these
have been especially created for Summit and we hope that they will inspire you and be of
use to you in your compositions.
A full list of factory Patches and sound designer credits can be found at
the end of this manual, see page 50
There are 384 each of Single Patches and Multi Patches. These occupy Banks A, B and C
in both cases; both Banks D are provided as convenient memory locations for storing your
own Patches, although you can store your own Patches in any memory location if you don’t
mind overwriting a factory Patch (they can easily be restored using Novation Components).
Each Bank D memory location is pre-loaded with the same default “initial” Patch: for Single
Patches this is named Init Patch, and for Multi Patches it is named Init M ulti.
An initial Patch will always be the starting point for creating new sounds “from scratch”.
A Patch is loaded by simply selecting its number with the rotary control or Value +/-
buttons
10
, or the Patch +/- buttons
6
, if row 2 is currently selected on the OLED. It is
immediately active.