EasyManuals Logo

NTI ENVIROMUX Series Instruction Manual

NTI ENVIROMUX Series
19 pages
To Next Page IconTo Next Page
To Previous Page IconTo Previous Page
Page #5 background imageLoading...
Page #5 background image
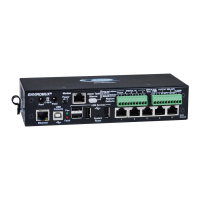
NTI ENVIROMUX TEMPERATURE/HUMIDITY SENSOR ATTACHMENT
Template for easy mounting the E-STHS-
L
CDW
Mounting Instruction
Using Side Brackets
1. Mount one side bracket to each side of the sensor with the screws provided.
2. Position sensor and mark top of keyholes.
3. Drill two 3/16” diameter holes where top of keyholes were marked.
4. Insert wall anchors (provided) and start the mounting screws.
5. Hang the sensor on the screws and snug down the screws.
Using Rear Keyhole Slots
1. Position template at mounting location and mark top of keyholes.
2. Drill two 3/16” diam
eter holes where top of keyholes were marked.
3. Insert wall anchors (provided) and start the mounting screws.
4. Screw in until head of screw is approximately 1/8-3/16” ” from the wall.
5. Hang the sensor on the screws.
3

Other manuals for NTI ENVIROMUX Series

Questions and Answers:

Question and Answer IconNeed help?

Do you have a question about the NTI ENVIROMUX Series and is the answer not in the manual?

NTI ENVIROMUX Series Specifications

General IconGeneral
Product TypeEnvironmental Monitoring System
Temperature Range-40°C to 85°C
Power Supply12V DC or 24V AC
Network InterfaceEthernet 10/100 Mbps
Alarm NotificationsEmail, SNMP
Sensor Types SupportedTemperature, Humidity, Water, Airflow
Power12V DC or 24V AC
Operating Temperature-40°C to 85°C
MountingWall or Rack Mount
Communication InterfacesEthernet
Data LoggingYes
ComplianceCE, RoHS

Related product manuals