40
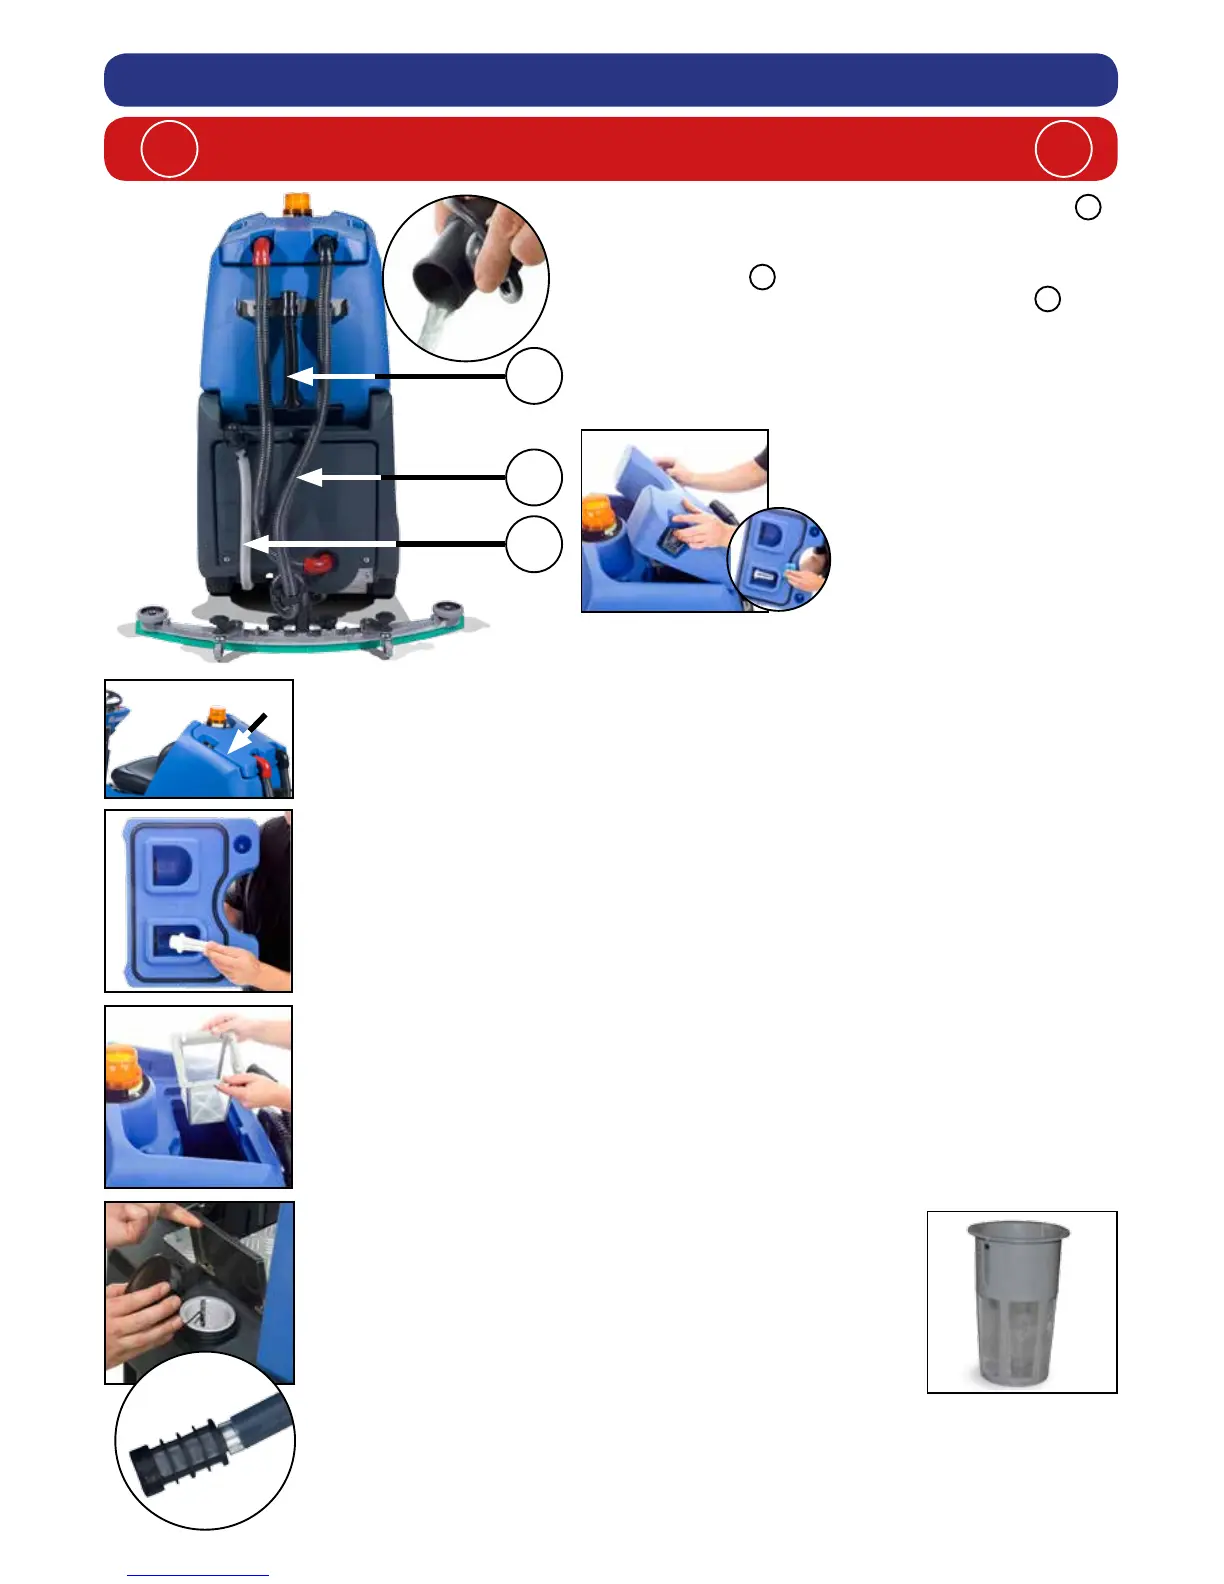
After use, empty waste-water tank using emptying hose
and ush-out with clean-water.
Next remove oor-tool vacuum hose and ush out
with clean-water.
Next empty clean-water tank, using emptying hose
and again ush out with clean-water.
A
A
B
C
B
C
Before removing
separator, rst pull-off
connected hoses.
Whilst pressing in the
separator toggles, remove hood
and rinse using clean-water.
The hood also has a
sealing-rubber which should be
examined at every
clean-down.
Remove white lter and rinse using clean-water, and ret.
IMPORTANT:
Never use the machine without the recommended lter as it may cause damage to the machine.
Remove debris basket lter and rinse using clean-water, and ret.
IMPORTANT:
If the debris basket is allowed to become clogged, vacuum performance can deteriorate.
Located in your waste-water (top) tank is a full tank switch, this stops your machine from
working once the waste-water reaches its maximum limit. Sometimes the switch gets clogged
and blocked, clean to ensure correct operation.
The secondary clean-water tank lter is located to the rear of the battery compartment, and
should be checked at regular intervals. Lift white plug and remove the lter, rinse and ret.
Ensure tank has been emptied and care is taken when working in the vicinity of batteries.
NOTE: ANY SPILLS SHOULD BE WIPED-UP BEFORE TANK IS LOWERED.
The clean debris basket lter is located under the ller cap.
Remove debris basket lter and rinse using clean-water, and ret.
Machine Cleaning
ALWAYS ENSURE THAT THE MACHINE IS SWITCHED
OFF PRIOR TO ANY MAINTENANCE.
! !