6. INSTALL THE UNIT (CONT’D)
6.6 INSTALLING INSULATED FLEXIBLE DUCTS TO TANDEM
®
TRANSITION (GSVH1K, GSHH3K & GSEH3K MODELS ONLY)
Use the following procedure for connecting the insulated flexible ducts to the Tandem
®
transition* (
EXHAUST AIR TO OUTSIDE
and
FRESH AIR FROM OUTSIDE
).
*Patent pending.
NOTES: 1. If the joists are perpendicular to the ducts, or if the connection to the exterior hood is in a limited area, your installation will
need two exterior hoods instead of one AirDuo™ exterior hood. In this case, do not use the Tandem
®
transition.
2. If there is not sufficient space to install the Tandem
®
transition, both optional single exterior hood and AirDuo™ exterior hood
must be used. Identify each insulated duct. For fresh air from outside duct, use the blue sticker dots (one dot at each end).
For exhaust air to outside duct, use the red sticker dots (one dot at each end).
Then, go to Section 6.8 and 6.9.
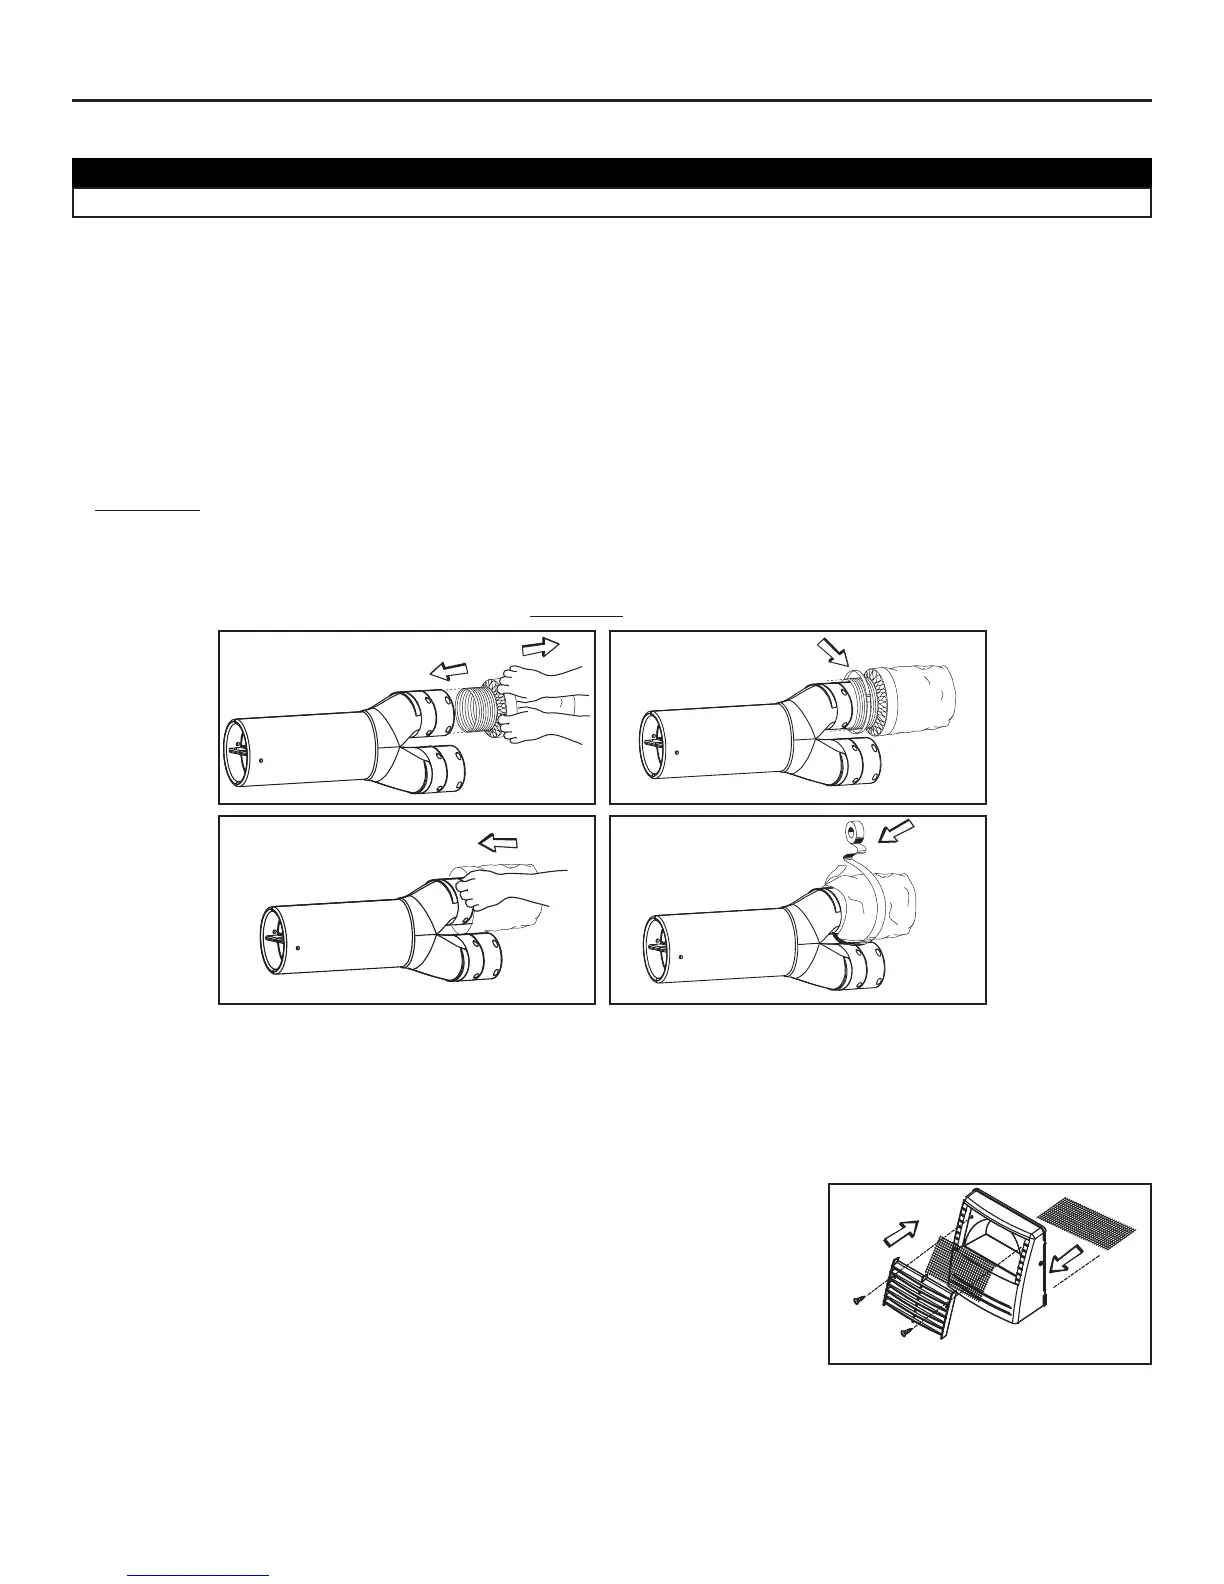
6.6.1 CONNECTION TO TANDEM
®
TRANSITION
1. For each duct, pull back the insulation to expose the interior flexible duct.
2. Connect the interior flexible duct to the smaller part of the Tandem® transition (5’’ oval) using a 24’’ tie wrap.
NOTE: If you are using a 6’’ diameter insulated duct, use the bigger part of the Tandem® transition (6’’ oval).
3. Pull the insulation over the joint. Pull the vapor barrier over the insulation.
4. Apply duct tape gently to the joint in order to make an airtight seal
. See figures below.
Identify each insulated duct. For fresh air from outside duct, use the blue sticker dots (one dot at each end). For exhaust air to outside
duct, use the red sticker dots (one dot at each end). Be careful to identify the exhaust air to outside duct (red dot) at the upper
section of the transition.
6.7 INSTALLING AIRDUO™ EXTERIOR HOOD* (GSVH1K, GSHH3K AND GSEH3K MODELS ONLY)
6.7.1. ASSEMBLING AIRDUO™ EXTERIOR HOOD
AirDuo™ exterior hood requires assembly. Assemble the top metal screen, the plastic grille
and the bottom metal screen to AirDuo™ exterior hood. Use provided screws. See illustration
beside.
*Patent pending
- 19 -
CAUTION
Make sure the insulated ductwork vapor barrier does not tear during installation.