6. INSTALL THE UNIT (CONT’D)
6.7 INSTALLING AIRDUO™ EXTERIOR HOOD* (GSVH1K, GSHH3K AND GSEH3K MODELS ONLY) (CONT’D)
6.7.2 L
OCATING THE AIRDUO™ EXTERIOR HOOD
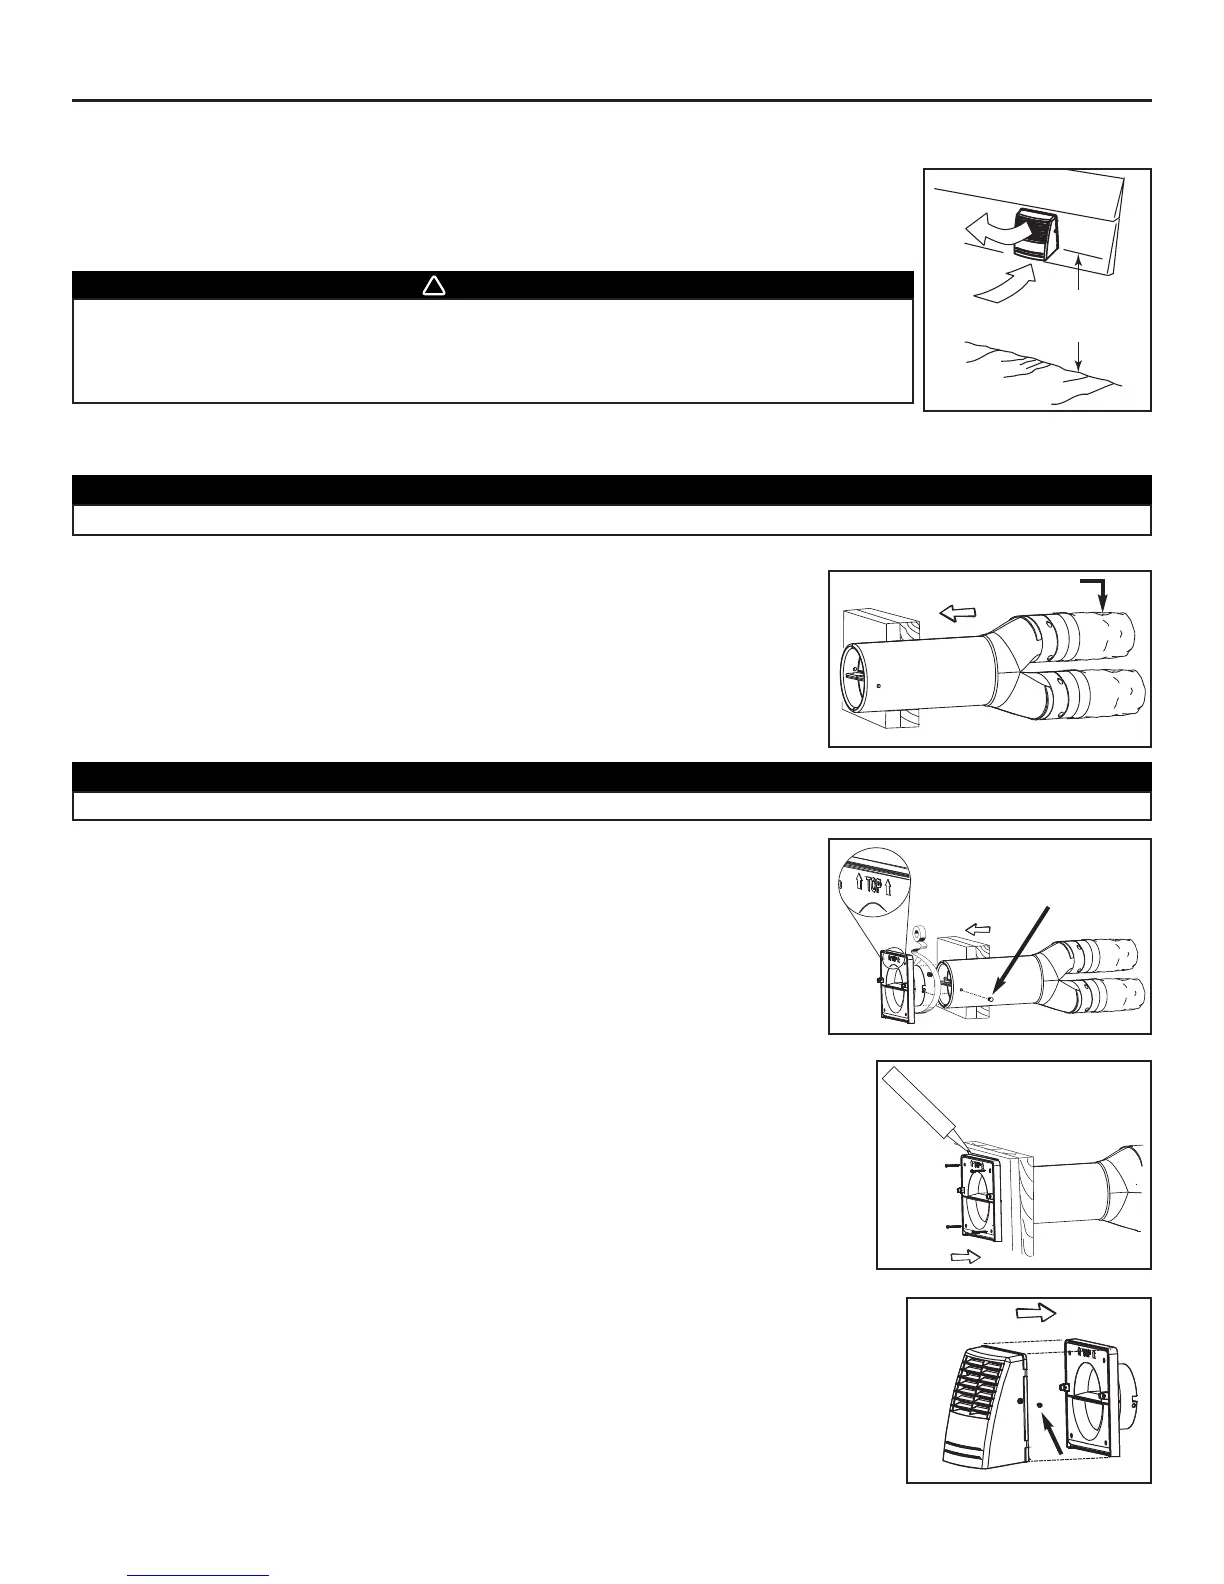
The AirDuo™ exterior hood must be installed at a minimum distance of 18 inches (457 mm) above the
ground. See illustration beside.
6.7.3 CONNECTING TANDEM® TRANSITION TO AIRDUO™ EXTERIOR HOOD
1. Using a jig saw, cut a 6’’ diameter hole in the exterior wall and insert the Tandem®
transition through this hole.
2. Joint the end of the Tandem® transition to the rear of the exterior backplate. Secure
with 2 Xmas tree pins and seal properly with duct tape.
WARNING
Make sure this hood is at least 6 feet (1.8 m) away (or more, as per applicable building codes or
standards) from sources of contamination such as:
• High efficiency furnace vent. •Any exhaust from a combustion source.
• Gas meter exhaust, gas barbecue-grill. •Garbage bin.
- 20 -
CAUTION
The exterior backplate must be installed with the word “TOP” pointing upward.
CAUTION
The Tandem® transition must be inserted in such a way that the
EXHAUST AIR TO OUTSIDE
duct will be located on the top.
Xmas tree pin
EXHAUST AIR TO OUTSIDE duct
3. Using 4 no. 8 x 1½” screws, attach the exterior backplate to the exterior wall. Seal the
outline with caulking, as shown.
screw
4. Snap the assembled AirDuo™ exterior hood on its backplate and secure with two
provided screws (no. 8 x 3/4” long). Go to Section 6.9.