nVent.com | 53
SECTION 7 AC 2000+ PROGRAMMING AND CONFIGURATION
7.1 INTRODUCTION
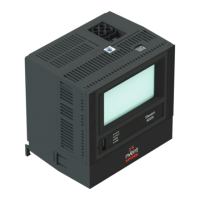
This section provides complete operating and programming details for the AC 2000+ alarm/
communications interface card. Please see Section 1.5 of this manual for an overview
of the AC 2000+.
7.2 INITIAL CONFIGURATION
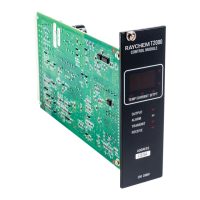
Before the AC 2000+ alarm/communications interface card can be used to interface an
external programming device with RAYCHEM T2000 HTC control modules, the AC 2000+
communication ports must be configured. This is accomplished by connecting a Personal
Computer (PC) to the local front panel RS-232 port using a standard serial communications
cable and running the “Communication Controller Configuration Utility” program (see Section
1.5.3). This program will allow the user to set up all of the communication parameters for each
communications port on the AC 2000+.
To set up the AC 2000+ communication parameters, follow the procedure outlined below:
1. Remove the AC 2000+ from the card rack.
2. Set the dip switches, located along the top edge of the AC 2000+ (see Figure 7-1), as follows:
E1, E5 Closed
E2, E3, E4, E6 Open
3. Insert the AC 2000+ back into the card rack.
4. Observe the STATUS LED located on the front panel of the AC 2000+. The following
defines the various conditions indicated by the STATUS LED when the AC 2000+ is in the
CONFIGURATION mode:
– Flashing Amber (expected color): The AC 2000+ is in Configuration Mode. Proceed to
step 5.
– Flashing Amber and Red: The AC 2000+ is in Configuration Mode but an internal failure
has occurred. All previously saved configuration data was found to be corrupt and default
values are being used. The user must re-configure the AC 2000+ as outlined in step 5.
Once any configuration data parameter of the AC 2000+ has been modified, the STATUS
LED will flash amber only.
– Green: The AC 2000+ is in Run Mode not in Configuration Mode. Verify that dip switch
E1 is closed and make sure the AC 2000+ is correctly inserted into left-most slot of the
cardrack.
– Red or Off: The AC 2000+ is in Configuration Mode but an internal failure has occurred.
The AC 2000+ should be returned to nVent for service.
5. Run the “Communication Controller Configuration Utility” program, and set up the AC 2000+
communications parameters as described in the Communication Controller Configuration
Utility, Installation and Operating Instructions (see Section 1.5.3).
6. When all of the AC 2000+’s communication parameters have been set up as desired, remove
the AC 2000+ from the card rack.
7. Open the dip switch labeled E1 that was closed in step 2. The dip switches should now be
set as follows:
E5 Closed
E1, E2, E3, E4, E6 Open
8. Insert the AC 2000+ back into the card rack.
9. Again, observe the STATUS LED located on the front panel of the AC 2000+. The following
defines the various conditions indicated by the STATUS LED when the AC 2000+ is in the
RUN mode:
– Green (expected color): The AC 2000+ is in Run Mode and may be used with external
devices to communicate with RAYCHEM T2000 HTC control modules.
 Loading...