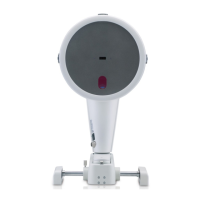
9 Scan Menu
12 / 29 Instruction Manual Pentacam® / Pentacam HR® (G/70700/0109/en)
the crosshairs. The blue dot marks the centre of the pupil, while the blue ring frames
the pupil.
You can set the type of image required for the respective examination in the "Image
Options" area (3) (sect. 9.1.1, page 12 and sect. 9.1.2, page 13).
Click the [Slit Light] checkbox (4) to activate/deactivate the blue light for illuminating
the eye.
Click the [Automatic Release] checkbox (5) to activate automatic measurement.
Clicking the [Start Scan] button (6) activates manual measurement. You can also use
the Return key.
Inside the adjustment window (7), there are arrows showing you the direction in
which you must move the Pentacam to activate automatic measurement (Automatic
Release).
The "Fixation Target" setting (8) is a parameter used only on the Pentacam HR
(sect. 9.1.2, page 13).
Click the [Quit] button (9) to abort the measurement.
The Scheimpflug image (10) shows the distance between Pentacam and patient. The
objective of this setting is to move the red dot on the front surface of the cornea so
as to coincide with the red line.
The "Orientation" field (11) shows the respective position of the camera and the eye,
which is currently being examined.
9.1.1 Scheimpflug image settings
You can set the number and type of images required for the respective examination in the
"Image Options" box (3).
"Scheimpflug Image" group box
If you activate this option, the camera records only one Scheimpflug image. You can
freely select the camera position you require by clicking the white rings in the
"Orientation" field (11).
"Enhanced Dynamic Scheimpflug Image" group box
Use this option to make the camera record either 5, 10 or 15 Scheimpflug images,
with the camera remaining in the same position. Image averaging is carried out on
the recorded images to minimise background noise. Only one Scheimpflug image is
displayed. You can freely select the camera position you require by clicking the white
rings in the "Orientation" field. This type of image is suitable for a purely densito-
metric assessment of the lens.
"3D Scan" group box
Use this option to select how many images you want the camera to record per scan.
The difference is in the duration of the examination and the number of measuring
points that are evaluated. A scan comprising 50 images takes longer, but assuming
good prior fixation of the patient it is the most accurate. This type of examination is
used for evaluating the cornea and anterior chamber.