EasyManuals Logo

OCULUS Pentacam User Manual

OCULUS Pentacam
33 pages
To Next Page IconTo Next Page
To Previous Page IconTo Previous Page
Page #15 background imageLoading...
Page #15 background image
9 Scan Menu
Instruction Manual Pentacam® / Pentacam HR® (G/70700/0109/en) 11 / 29
9Scan Menu
Note
Switching from the Pentacam program to the Scan menu:
Î In the Pentacam program (fig. 7-1, page 8) select the menu item [Examination] and
click [Scan].
9.1 Screen layout
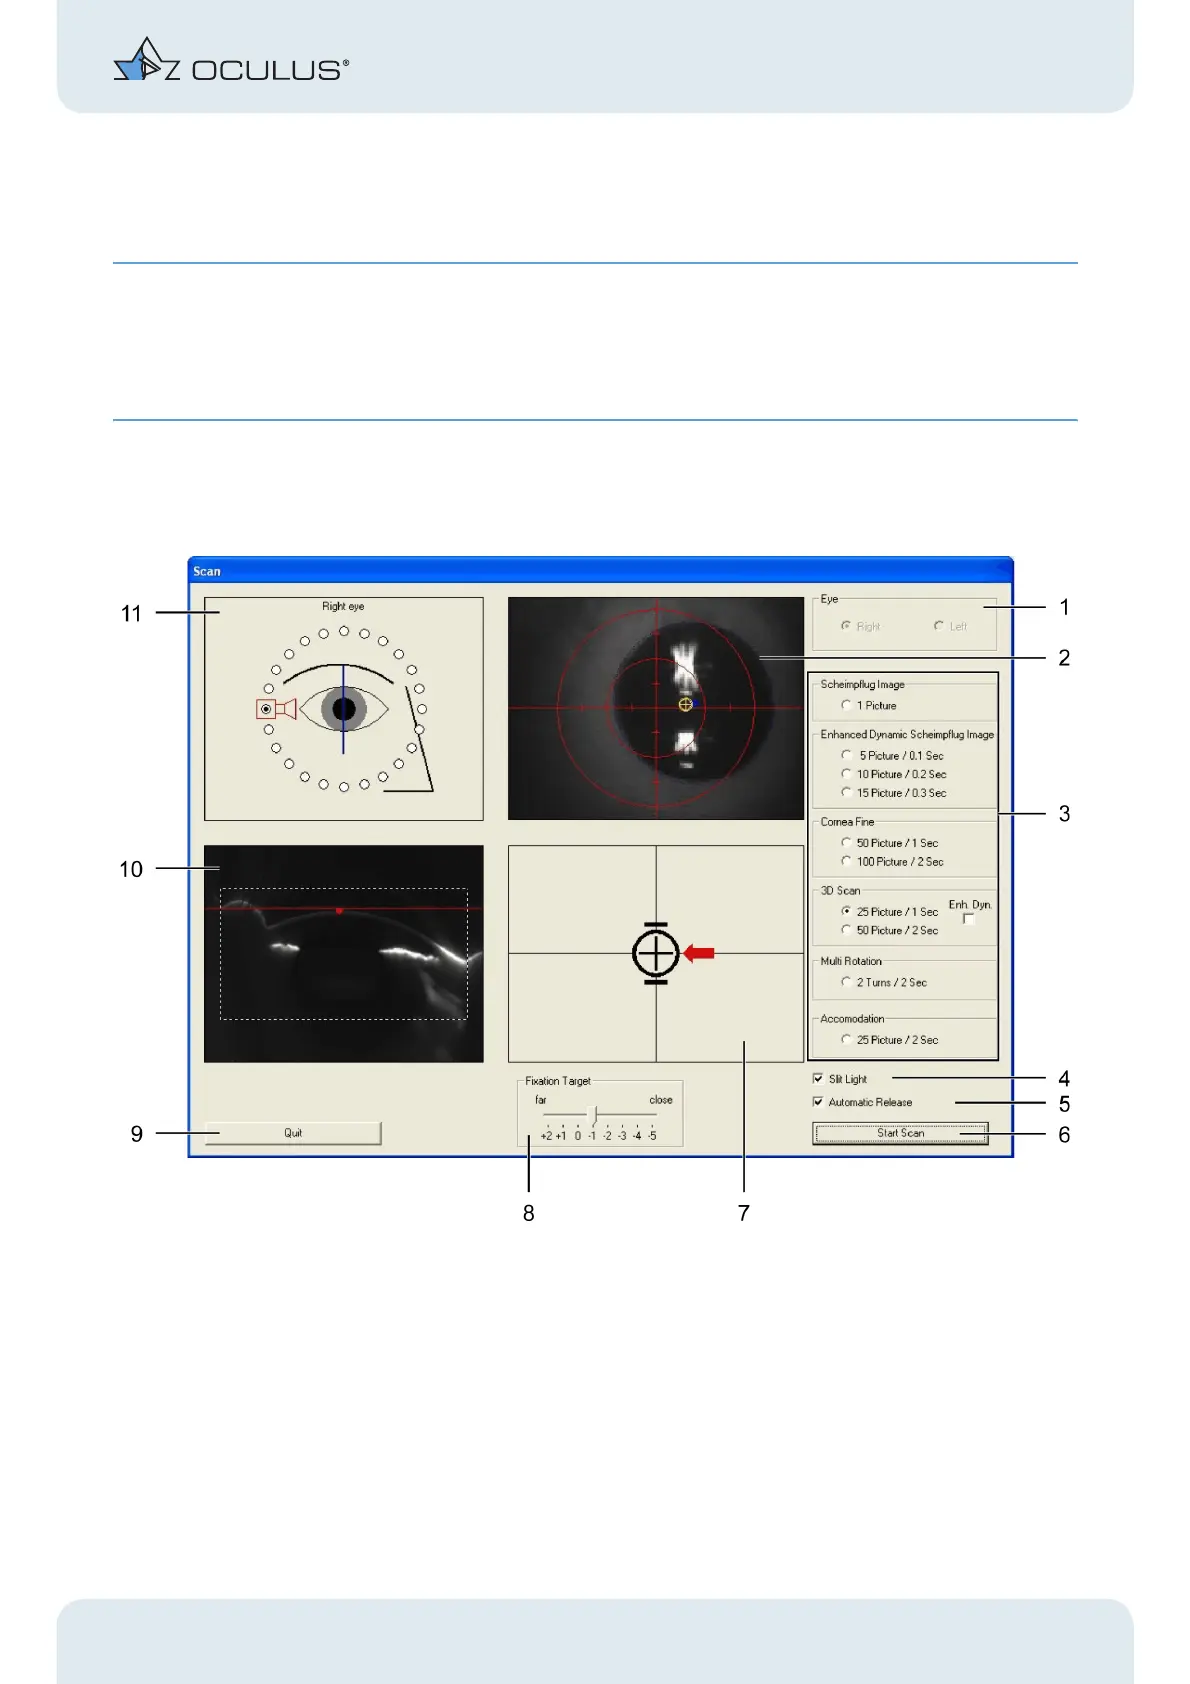
Fig. 9-1: "Scan" screen ("HR" model)
The eye currently being examined is detected automatically and is displayed in the
"Eye" field (1).
The Pupil Image (2) shows the vertical / horizontal positioning of the Pentacam. The
object is to position the yellow dot marking the apex of the cornea in the centre of
1 "Eye" field 7 Adjustment window
2 Pupil image 8 Fixation Target (HR only)
3 "Image Options" area 9 [Quit] button
4 [Slit Light] checkbox 10 Scheimpflug Image
5 [Automatic Release] checkbox 11 "Orientation" field
6 [Start Scan] button

Other manuals for OCULUS Pentacam

Questions and Answers:

Question and Answer IconNeed help?

Do you have a question about the OCULUS Pentacam and is the answer not in the manual?

OCULUS Pentacam Specifications

General IconGeneral
Measurement TimeLess than 2 seconds
Corneal CoverageUp to 12 mm
SoftwarePentacam Software
Data TransferUSB
Corneal TopographyYes
DisplayExternal monitor required
Measurement PrincipleScheimpflug imaging
CameraRotating Scheimpflug camera
Light SourceBlue LED
PachymetryYes
Anterior Chamber AnalysisYes
Imaging PrincipleScheimpflug imaging
FixationInternal
Power Supply100-240 V, 50/60 Hz
ResolutionHigh resolution
Lens Density MeasurementYes
DimensionsVaries depending on model and configuration
WeightVaries by model, check manufacturer specifications
Number of Images25 or 50

Related product manuals