Windows> 19
it”. If you select “Install now to use it”, click Install in the
following dialog box.
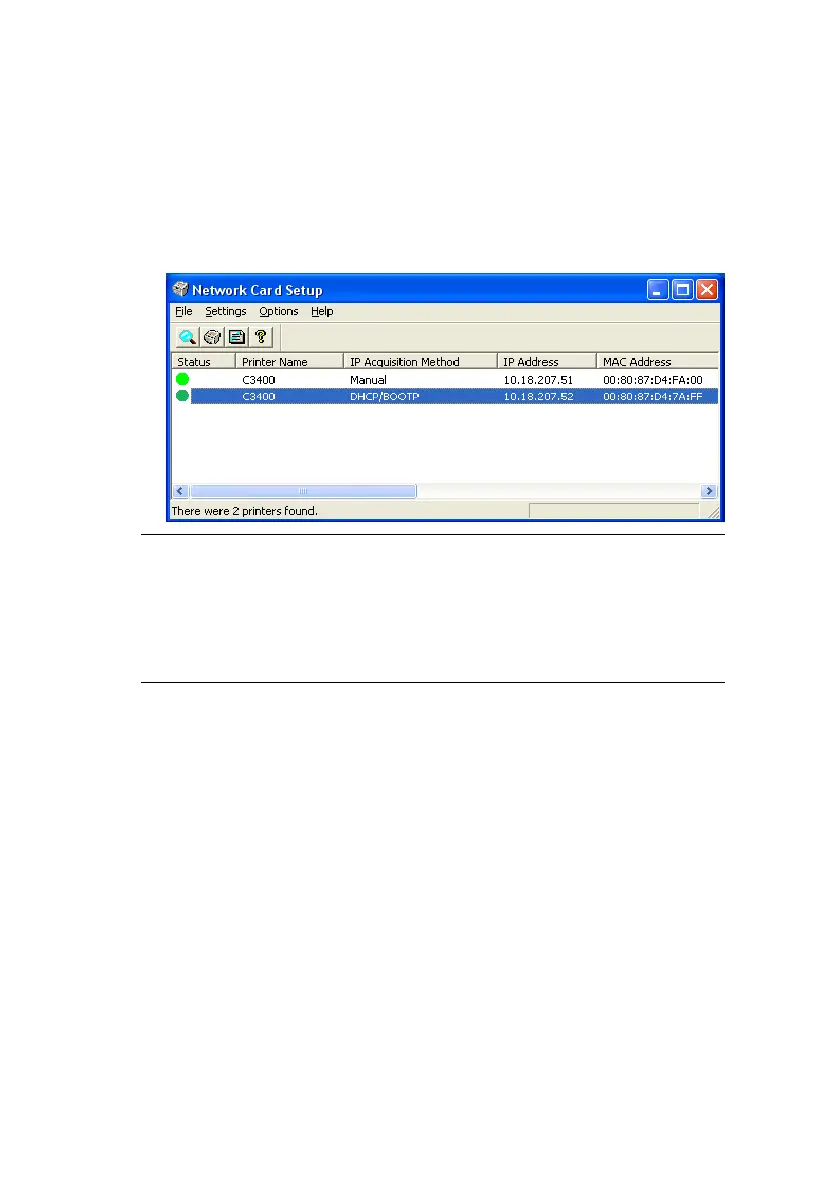
8. The “Printer Discovery” message is displayed. When the
printer is detected, the Network Card Setup utility
launches, displaying the printer status and network
information.
Now that both Windows and the printer have been configured to
use TCP/IP, the next step is to configure Windows to print to the
network printer.
S
TARTING
THE
N
ETWORK
C
ARD
S
ETUP
UTILITY
Once installed, you can launch the Network Card Setup utility by
selecting Start -> Programs -> Okidata -> Network Card Setup.
M
ANUALLY
CONFIGURING
THE
IP
ADDRESS
If there is no DHCP protocol to automatically assign IP addresses
to devices on your network, you might want to set the IP
Address, Subnet Mask and Default Gateway Address for your
printer manually.
1. In the “Network Card Setup” pane, click to select the
printer.
NOTE
In the “Network Card Setup”, the “IP Acquisition Method” may
display as “Manual”. This is because, when using the TCP/IP
protocol in an environment without a DHCP server, you must
assign the IP address manually. For instructions on how to do
this, see “Manually configuring the IP address” on page 19.