- 32 -
Connecting to a Computer
1
1. Setup
First, Set the IP address of the printer.
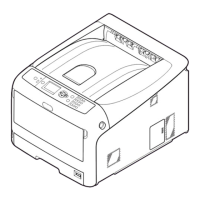
1 Turn on the printer.
2 Press the <ENTER> button on the
operator panel.
3 Press the scroll button to select
[Admin Setup], and press the
<ENTER> button.
䎩䏘䏑䏆䏗䏌䏒䏑䏖䎃䎃䎃䎃䎃䎃䎕䎒䎕
䫹
䎦䏄䏏䏌䏅䏕䏄䏗䏌䏒䏑
䎤䏇䏐䏌䏑䎃䎶䏈䏗䏘䏓
4 Enter the administrator password, using
the numeric (0-9) keys.
The factory default password is “aaaaaa”. Press
<ENTER> button after each character you input.
䎨䏑䏗䏈䏕䎃䎳䏄䏖䏖䏚䏒䏕䏇
䯴䎙䎐䎔䎕䏇䏌䏊䏌䏗䏖䎌
5 Press the <ENTER> button.
6 Check that [Network Setup] is selected
and press the <ENTER> button.
䎤䏇䏐䏌䏑䎃䎶䏈䏗䏘䏓䎃
䎃
䎃䎃䎔䎒䎗
䎳䏕䏌䏑䏗䎃
䎶䏈䏗䏘䏓
䎳䎶䎃䎶䏈䏗䏘䏓
䎳䎦䎯䎃䎶䏈䏗䏘䏓
䎱䏈䏗䏚䏒䏕䏎䎃䎶䏈䏗䏘䏓
7 Press the to select [IP Address Set],
and press the <ENTER> button.
䎱䏈䏗䏚䏒䏕䏎䎃䎶䏈䏗䏘䏓
䎃䎃
䎕䎒䎘
䎬䎳䎃䎤䏇䏇䏕䏈䏖䏖䎃䎶䏈䏗
䎬䎳䏙䎗䎃
䎤䏇䏇䏕䏈䏖䏖
䎶䏘䏅䏑䏈䏗䎃䎰䏄䏖䏎
䎨䏗䏋䏈䏕
䎃
䎷䏄䏏䏎
8 If setting the IP address manually, press
the scroll button and select [Manual],
and press the <ENTER> button.
Proceed to the step 9.
䎬䎳䎃䎤䏇䏇䏕䏈䏖䏖䎃䎶䏈䏗䎃䎃
䎃
䎔䎒䎔
䎤䏘䏗䏒
䎍䎃
䎃
䎰䏄䏑䏘䏄䏏
If obtaining the IP address automatically, check
that [Auto] is selected, and press the <ENTER>
button.
Proceed to the step 15.
䎬䎳䎃䎤䏇䏇䏕䏈䏖䏖䎃䎶䏈䏗䎃䎃䎔䎒䎔
䎰䏄䏑䏘䏄䏏
䎍䎃
䎃
䎤䏘䏗䏒
9 Press the <BACK> button until
[Network Setup] is displayed.
Press the scroll button to select
[IPv4 Address], and press the
<ENTER> button.
䎱䏈䏗䏚䏒䏕䏎䎃䎶䏈䏗䏘䏓
䫹
䎕䎒䎘
䎶䏘䏅䏑䏈䏗䎃䎰䏄䏖䏎
䎬䎳䏙䎗䎃
䎤䏇䏇䏕䏈䏖䏖
䎪䏄䏗䏈䏚䏄䏜䎃䎤䏇䏇䏕䏈䏖䏖
䎬䎳䎃䎤䏇䏇䏕䏈䏖䏖䎃䎶䏈䏗