7 – Menus 47
paragraph “2 Recording”.
E.
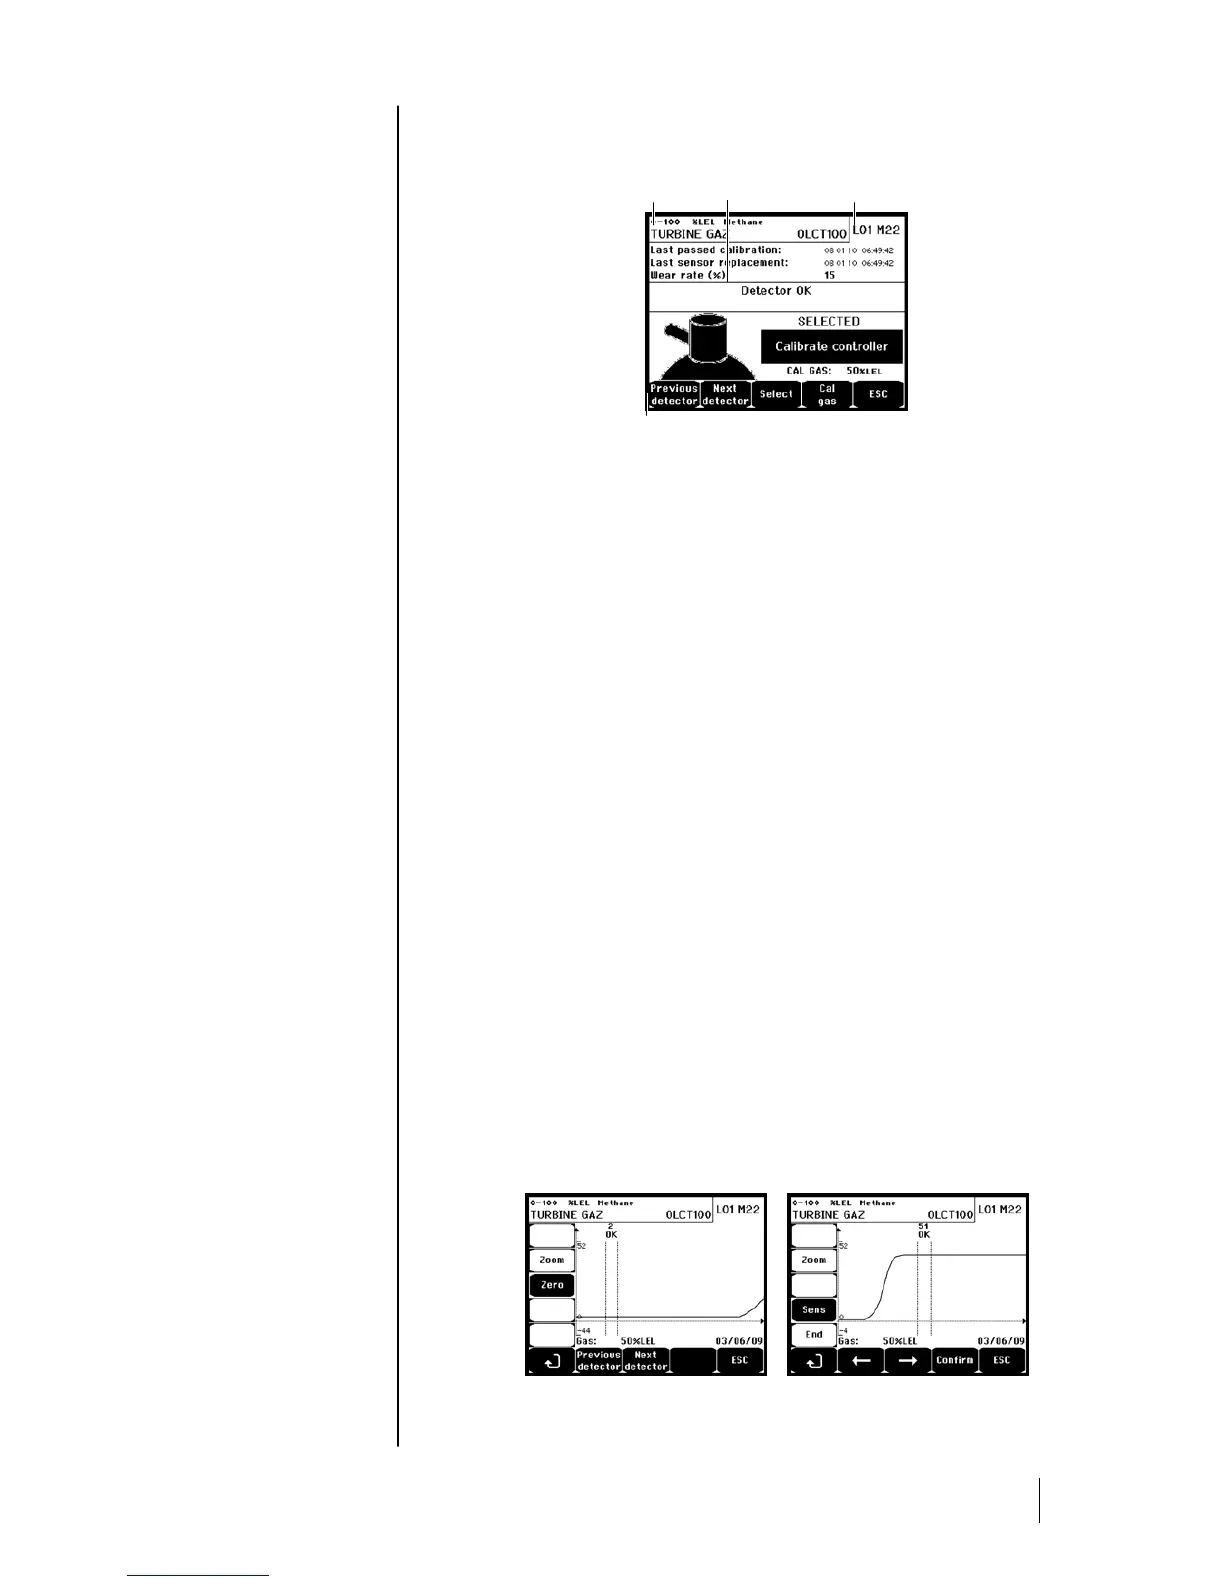
Display the calibration gas.
A. B. C.
D. E.
ECR_14
Figure 42: Example of the “Select detectors” screen.
2 Start Recording
■ Yes: Launches the recording of calibration measurements for the selected
detectors. From this moment onwards, all the calibration measurements are
recorded for these detectors. “Start recording” is then displayed. The
calibration of the detectors with the help of the standard gas can begin.
For a detector in which the cell has been changed, it is important to adjust the
detector locally to obtain a 4-20mA output corresponding to the detector range.
For detectors connected to the analog input module, perform the
adjustments directly on the module (cf page 28).
Attention: During calibration, the standard gas must be injected for at least
thirty seconds.
■ No: Exits the recording procedure.
3. Stop recording
■ Yes: Detector calibration having finished, this validates the end of calibration
measurement recording for the detectors previously selected. From this
moment onward, no calibration measurement is recorded. “Stop recording” is
then displayed.
■ No: Exits the end of the recording procedure.
4 Validation
This allows the adjustment and validation of zero and detector sensitivity once
calibration is completed.
ECR_22_24
Figure 43: Adjustment of zero (left) and sensitivity (right).