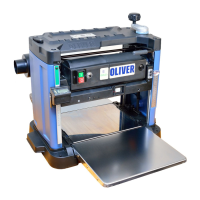
18 | Page Oliver Machinery 10044 Planer
Mounting hardware for dust hood
• Screw
•
Dust hood with 4” dust port
Cutterhead elevation crank and mounting screw
Cutter insert installation instructions from Byrd Tool
1/4" Spinner handle and
T25 Torx bit socket (1/4 in. Drive)
Spare Byrd cutter inserts
AAA battery for digital readout
NOTICE: If you cannot find an item in the list above, please check if it is still attached to the packaging.
Occasionally the item may have been pre-installed in the factory. See section “Parts List” to check if a
component is included or installed.
NOTICE: This machine comes with various standard sized, non-proprietary parts. If any of these parts are
missing, we are happy to deliver them to you. To have the machine up and running as soon as possible,
you can also find these parts at your local hardware store.
Additional Items Recommended for Machine Assembly
Cutter inserts installation and for checking Torx screw tension (45 lbs.-
inch).
Waxing
The surfaces of the steel planer bed and extension wings have a low resistance finish. To minimize stock
feeding resistance, it is recommended to wax these surfaces with paste wax before first use, and routinely
thereafter.
Assembly
This planer is mostly assembled in the factory. There are a few more items to set up before the machine
is ready for a test run:
1. Install the dust hood.
2. Install the cutterhead elevation crank.
3. Install the DRO battery.
4. Connect the planer to a dust collection system.
The approximate time for cleaning and assembly is approximately 15 minutes.