32 | Page Oliver Machinery 10044 Planer
Instructions for Maintenance and Adjustments
Service Cutterhead and Rotate Cutter Inserts
CAUTION
Cutter inserts are extremely sharp. Protect your hands with thick leather gloves
to avoid
1. Disconnect the planer from the power
source!!
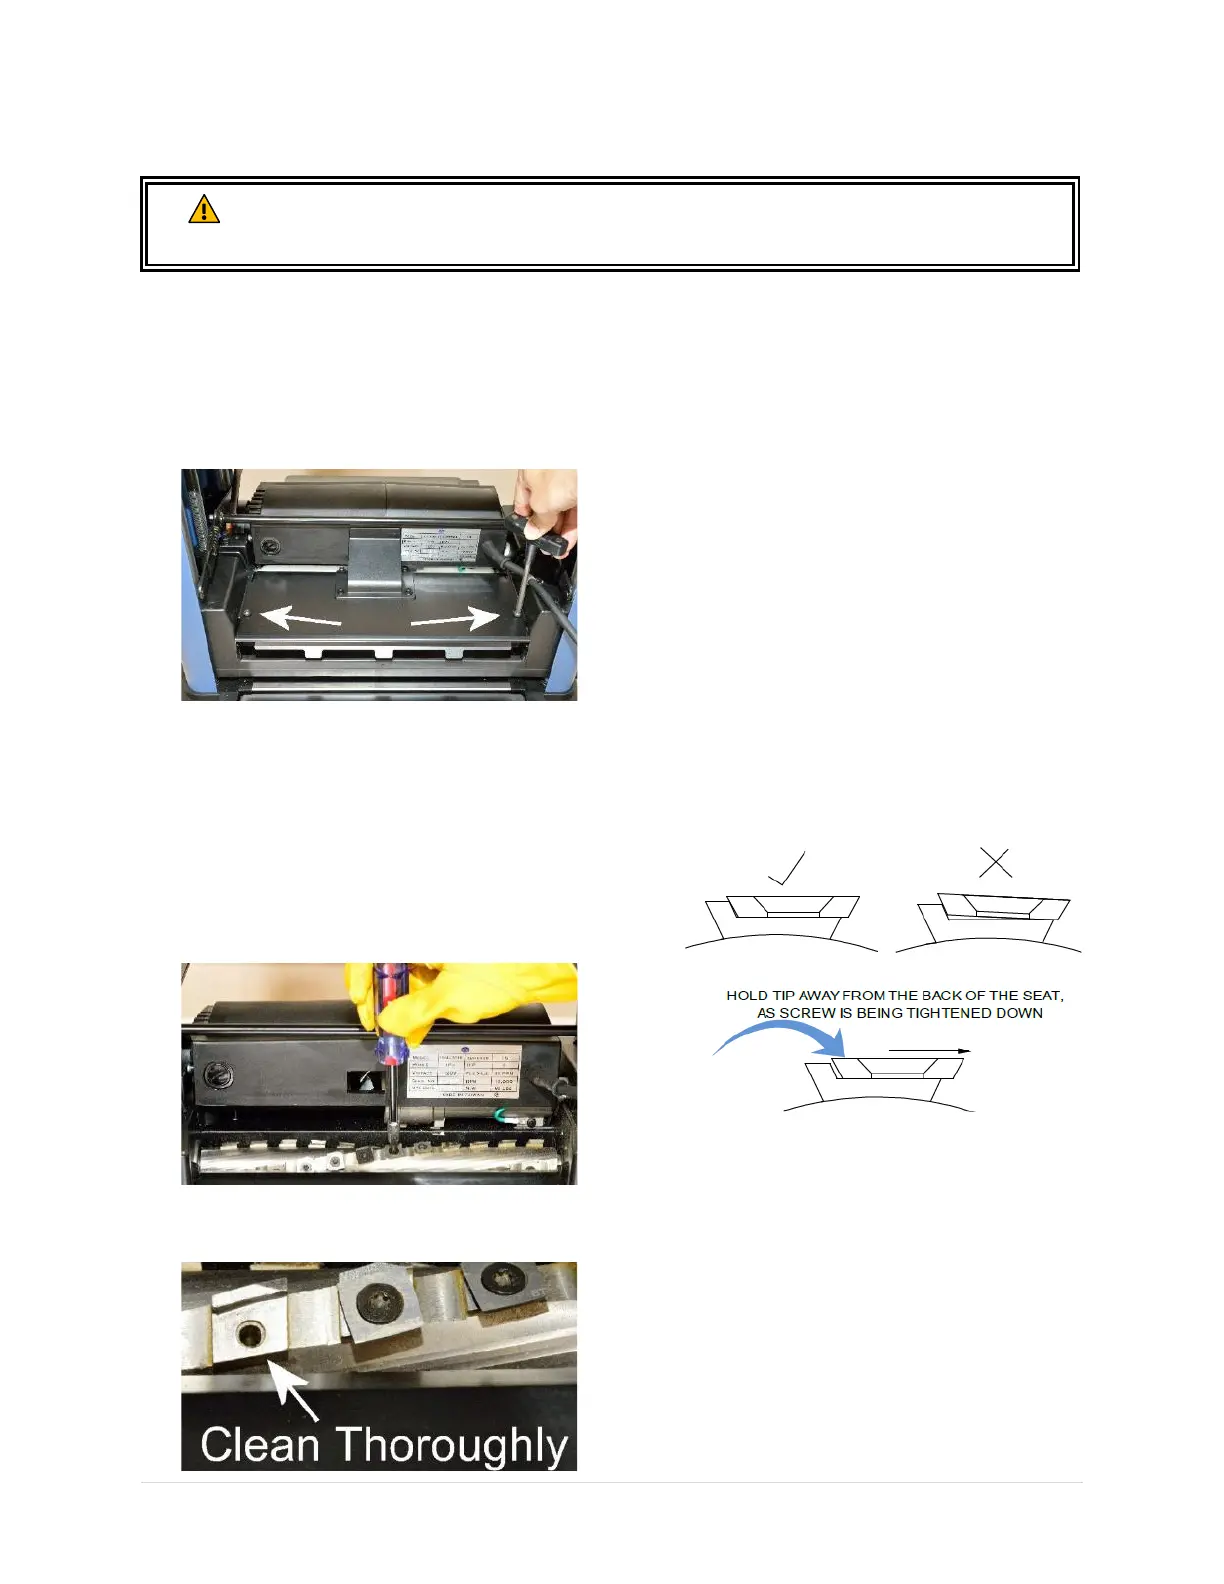
2. Remove dust hood.
3. Remove cutterhead cover with a T-30 Torx
wrench.
4. Remove dust and resin accumulations on
cutterhead and areas nearby.
5. Rotate cutter inserts 90° clockwise when
they get dulled or nicked. Use a permanent
marker to mark the new edge to be used.
6. To rotate/replace a cutter insert, remove
the Torx screw with a T-25 Torx bit. Turn
COUNTERCLOCKWISE to loosen the screw.
7. With the cutter insert removed from its seat,
thoroughly clean the seat with a vacuum.
IMPORTANT: Obstacles between the insert
and its seat will create uneven pressure
against the insert. This will impact cut quality
and may cause the insert to break.
8. Inspect the Torx screw. Replace any
damaged screws. Lubricate screw thread
with a thin coat of lightweight machine oil.
IMPORTANT: Do not apply an excessive
amount of lubrication, or the Torx screw and
the cutter insert will not sit properly.
9. Reinstall cutter insert with the marked
cutting edge facing out. Secure it with 45
lbs.-inch of torque.
10. To make sure the cutter insert is seated
properly, slightly pull it towards the screw
and away from its seat. Let the screw pull the
cutter insert into position while tightening
the screw.
IMPORTANT: Do not overtighten the screw
or the inserts may break. Do not use power
tools to tighten the Torx screws as it can strip
the screws.
11. Reinstall cutterhead cover and dust hood
when cutterhead service completes.