10044 Planer OLIVERMACHINERY.NET 27 | Page
Step 3: Select Feed Direction
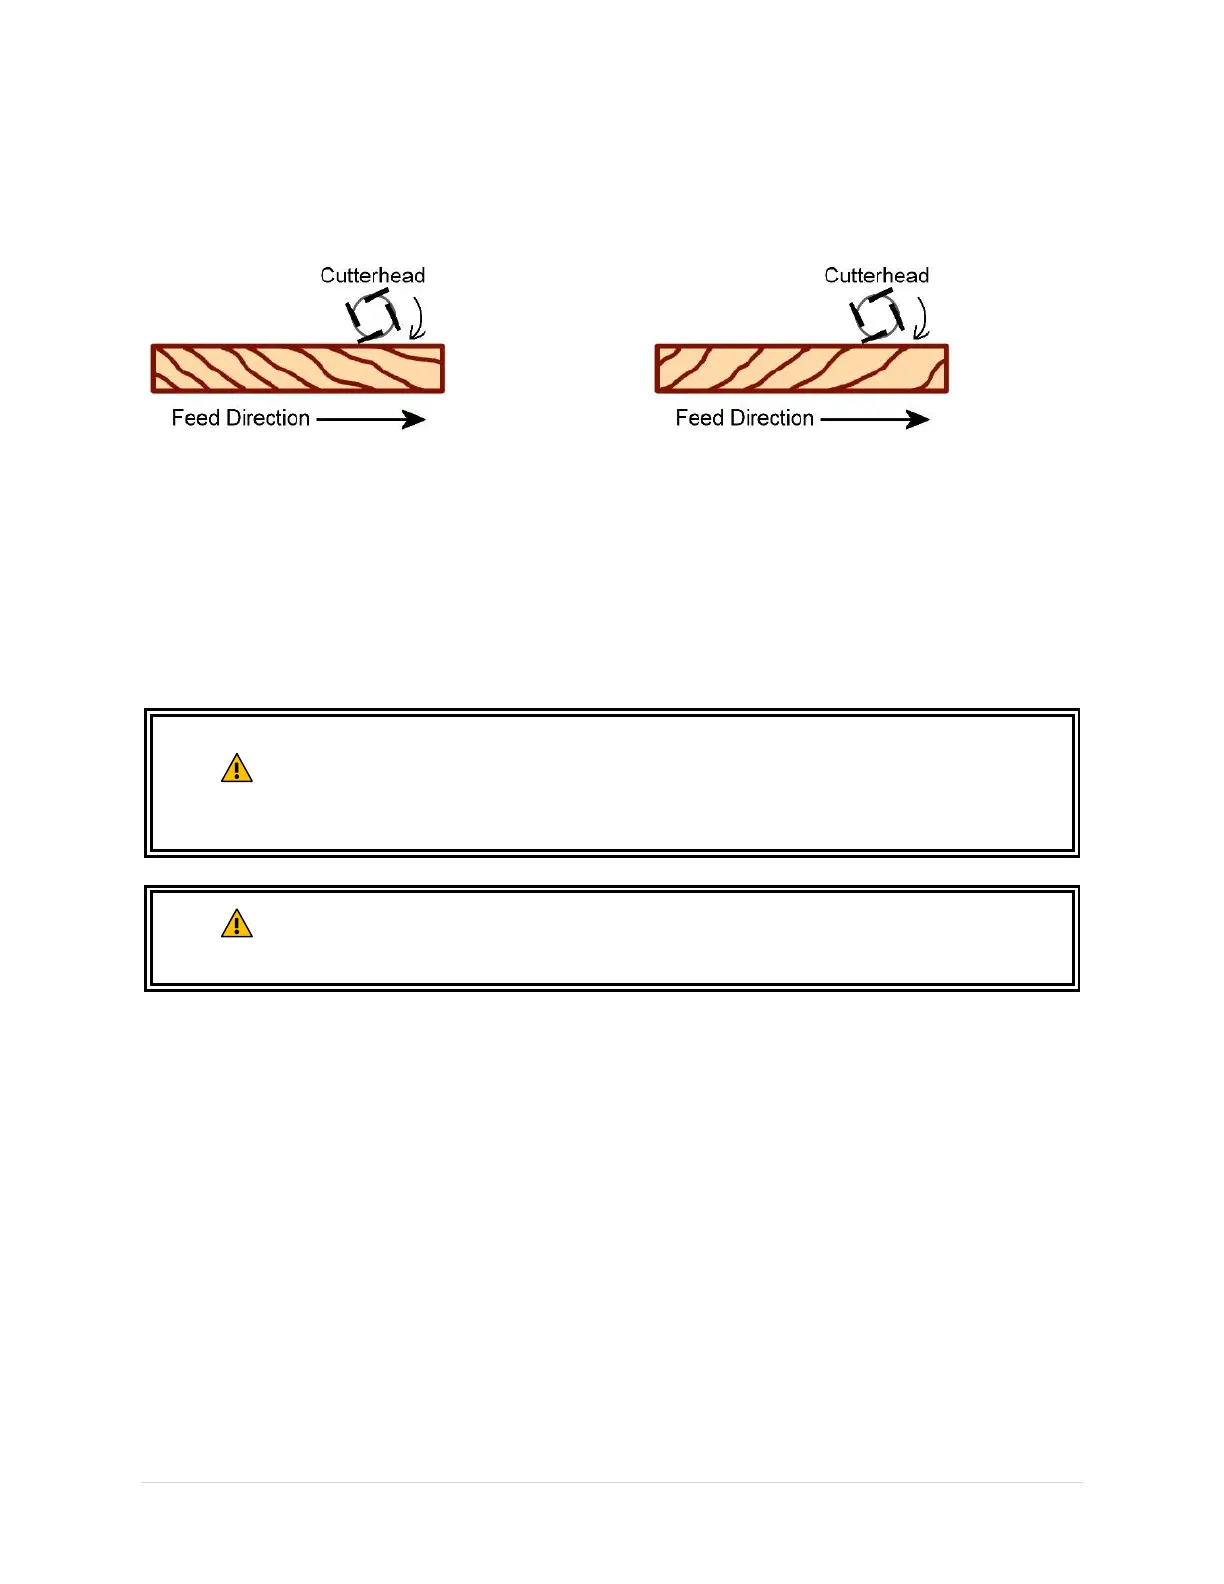
Inspect the workpiece and identify the direction of the edge grain. Choose a feed direction such that
cutters will cut WITH grain to minimize tear outs.
Good – Planer cuts WITH the grain
Not Ideal – Planer cuts AGAINST the grain
Sometimes it is impossible to cut with the grain for the entire length of a workpiece. In this case, try
feeding the workpiece in opposite direction and see what works best. Reducing the depth of cut can also
help improving cut quality.
Step 4: Planing Wood to Desired Thickness
With the above preparation steps completed, the workpiece is ready for planing.
WARNING
ALWAYS wear goggles and other protection devices when operating this machine.
Stay on the side of the planer to avoid kickback related accidents. NEVER look
inside the planer during operation. Failing to comply may result in serious injuries
or death.
CAUTION
Use an ear protection device to prevent hearing loss. Ensure dust collection system
is functional and use a dusk mask to avoid inhaling harmful airborne particles.
1. Put on protection devices.
2. If you have a long workpiece, make sure it is properly supported throughout the process. Bolt down
the planer on a stable surface as needed.
3. Measure workpiece thickness and set the initial depth of cut to no more than 1/32”. This allows feed
rollers to properly engage the workpiece, and at the same time not taking too much materials off for
a test pass.
4. Turn on the dust collection system and planer.
5. While standing on the side of the planer, gently feed the workpiece with the face jointed side down.
Once the infeed roller engages the workpiece, allow the machine to feed the workpiece. DO NOT
force feed the workpiece through the planer.
If infeed roller does not engage the workpiece:
• Carriage height is set too high.
• Stop the machine and wait for it to come to a complete stop, then remove the workpiece.
• Lower carriage height, and restart from step 4.