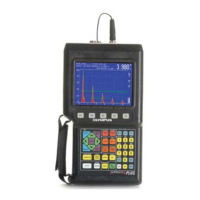
Calibrating the EPOCH 4PLUS
Part # 910-250C
55
7 Calibrating the EPOCH 4PLUS
This chapter describes how to calibrate the EPOCH 4PLUS. Calibration is the process of
adjusting the unit so that it measures accurately on a particular material, using a particular
transducer at a particular temperature. You must adjust the Zero Offset and Velocity
parameters of the EPOCH 4PLUS during calibration. Zero Offset (sometimes referred to
as probe delay) compensates for the dead time between the firing of the Main Bang and the
entry of the sound into the test piece. The unit must be programmed with the correct
Velocity setting so that it matches the material velocity of the test piece.
The EPOCH 4PLUS has an advanced Auto-Calibration feature, which provides for a fast
and easy calibration process. The following section details the procedure to calibrate the
EPOCH 4PLUS when using the four basic transducers configurations: straight beam,
delay line, dual element, and angle beam.
Note: Do NOT use the Auto-Calibration feature when the EPOCH 4PLUS is in the
following modes:
- Microsecond Time-Of-Flight Mode
- DAC
- TVG
Topics are as follows:
• Getting Started
• Calibrating with a Straight Beam Transducer
• Calibrating with a Delay Line Transducer
• Calibrating with a Dual Element Transducer
• Calibrating with an Angle Beam Transducer
7.1 Getting Started
Until you are completely comfortable operating the EPOCH 4PLUS, we recommend that
a basic review and set-up procedure be used prior to starting the actual calibration. The
split-screen feature of the EPOCH 4PLUS is useful for this as it lets you simultaneously
view the waveform display and all instrument calibration data.
To setup the EPOCH 4PLUS before calibrating, follow these steps:
1. Press [DISPLAY] to select the split screen display.
2. Press [2nd F], [VEL] (REJECT) to set the reject level to 0%. Press [F1] or use the
[] slewing key to adjust the value to zero.
3. Press [GAIN] to select an initial gain value that is appropriate for the calibration and
adjust the value by using the direct access function keys or the [] and [] keys. If the
appropriate gain level is unknown, set the initial gain at 30 dB and adjust it as
necessary during calibration.

 Loading...