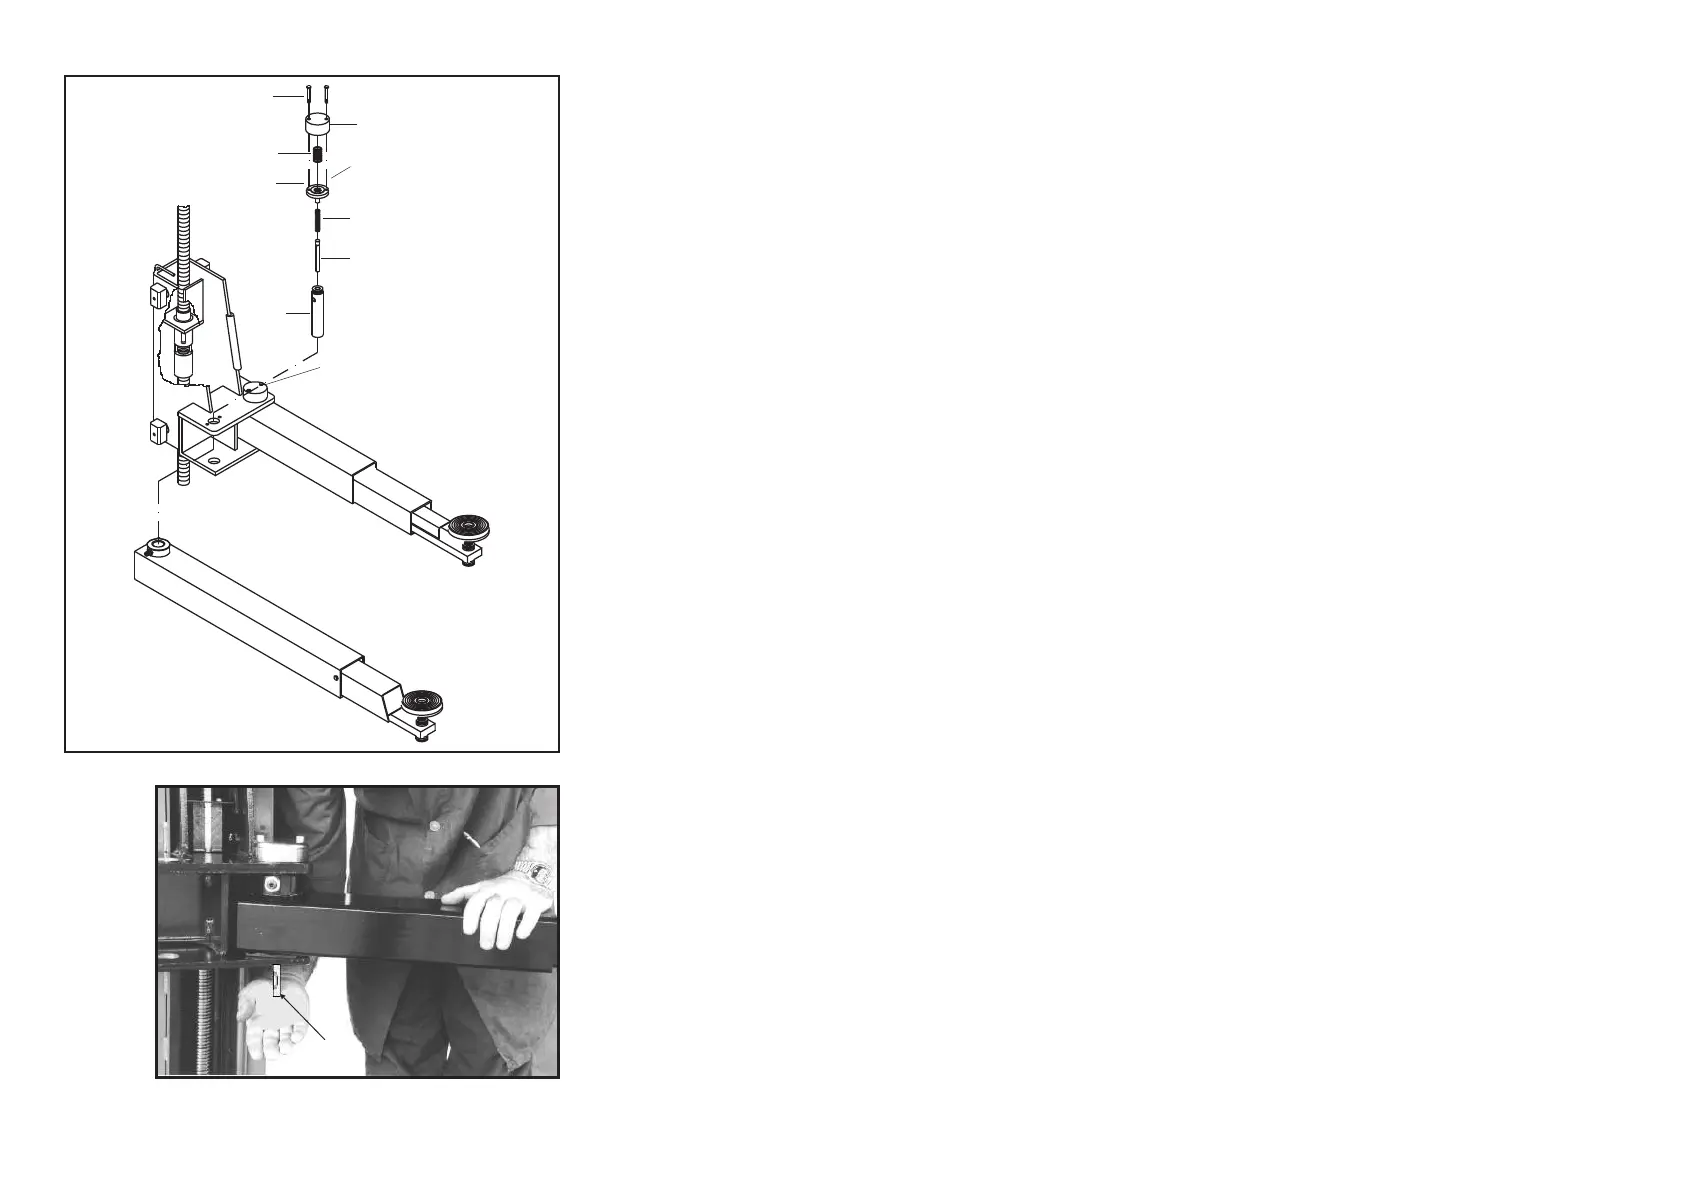
Fig.43-Abb.43
Fig.44-Abb.44
4-(Fig.43)Inserireilpernospingimolla(1)nellaspinadentata(10)e
successivamentelamolla(2),avendocuradiingrassarelesuddette
partiprimadimontarle.
5-Inserirelospinotto(3)nelforodellaspinadentata(10)esuccessiva
-
menteposizionarelarondelladentata(5)sull’estremitàscanalatadella
spina(10)chesporgeràdalsupportodeibracci(11)dialcunimillimetri.
Montarequindilamolla(8)facendonecoincidereildiametrointernocon
larondellapostasullarondelladentata(5).
Coprireconilcappellotto(7),inserireleviti(9),centrandoiforidel
supportobracci,quindiavvitarle.
6-Verificareilcorrettofunzionamentodeldispositivodibloccaggio
bracci,premendoversol’altoilpernospingimolla(1)eruotandoilbrac
-
cioinunodei2sensi,cosìchedopounabreverotazioneilpernoritorni
nellasuaposizione(Fig.44).
7-Ripeterelestesseoperazioniperilmontaggiodeglialtri3bracci.
4-(Fig.43)Insertthespringpressurepin(1)intothehollowcoreofthe
splineddowelpin(10)andthenfitthespring(2).Greasethepartsbefo
-
reassembling.
5-Nowinsertpin(3)intothehollowcoreofthedowelpin(10)and
thenfitcollar(5)withsplinesontheinsidediameteroverthesplineson
thedowelpin(10)(notethatthesplineddowelpinwillprotrudefromthe
armbracket(11)byafewmillimetres.
Fitthesecondspring(8)sothattheinsidediameterengagesthepre-
assembledwashersecuredbythescrew(5).
Fitcap(7)andinsertscrews(9)makingsuretheyengagetheholeson
thearmbrackets,thentighten.
6-Checkthatthearmlockingdevicefunctionscorrectlybypushingthe
springpressurepin(1)upwardsandturningthearmineitherdirection.
Thepinshouldfallafterabriefrotation(Fig.44).
7-Repeatthesamestepswheninstallingtheother3arms.
43
9
7
8
5
3
2
1
10
11
1