14
3.1 Installation Overview
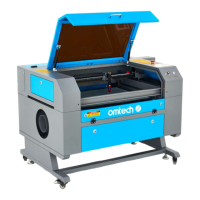
A complete working system consists of the laser engraving cabinet, its vent, a water tank with a pump (included),
all applicable connection cables, and the laser and access keys. The cabinet can use designs provided by the
enclosed engraving software by direct or internet connection with your computer; it can also engrave designs loaded
directly from a fl ash drive. Users can confi gure other additional accessories (such as an industrial water chiller,
fume extractor, or rotary axis) to suit their needs.
Please note the specifi c requirements of your system's installation. Every customer must understand these notes
before installation to execute a proper setup and achieve safe laser performance. If you have any installation
questions or problems, contact our technicians and customer support team.
Any auxiliary equipment must be adjusted to the base machine. Queries may be directed to the dealer or
manufacturer of such equipment.
3.2 Location Selection
Prior to assembling your fi ber laser marker, select an appropriate location for its use.
Be sure that it meets all of the requirements discussed in the Safety Information above. The location should be
stable, level, dry, and climate controlled to ensure an ambient temperature of 40–95°F (5–35°C) and an ambient
humidity under 70%. In particular, the temperature and humidity together should not be close to the dew point.
It is also advisable to use a windowless room or to use blinds and/or curtains to avoid exposure to the potential
additional heat of direct sunlight. The location should be free of dust and other airborne pollutants and well
ventilated enough to process any fumes produced by the engraving process in accordance with all applicable
laws and regulations. Depending on the materials to be processed, this may require construction of a dedicated
ventilation system. It should be away from children; combustible, fl ammable, explosive, or corrosive materials; and
sensitive EMI devices. The power cord should be plugged into a compatible and stable power source via a grounded
3-prong outlet. No other item should be drawing current from the same fuse. There should be fi refi ghting equipment
nearby and the local fi re department's phone number should be clearly displayed.
It is highly recommended to have an extra work table nearby in order to avoid placing objects on or directly
adjacent to the machine, which could become a fi re or laser hazard.
3.3 Unpacking Your Engraver
Your engraving machine arrives in a wooden crate with its accessories
(including this manual) packaged in the main bay. You should have placed
the crate in a spacious fl at area for unpacking, ideally where you plan to
operate the machine permanently.
Step 1. If you have not already done so, fi nish removing the crate from
around your engraver. Each foot is attached to the base of the
crate with a hex screw. Use a 7.8 mm hex wrench to remove them.
Rotate the feet up, unlock the wheels, and roll the machine into
place.
Step 2. Fix it in place by pressing down on the brake pads on the 2
front wheels and rotate the feet down to anchor them. If needed,
suitable fasteners can also be used with the 0.2 inch (5 mm) holes
to further secure your engraver.
3. Installation
Use only the hardware, wiring, and power sources that came with or are compatible with this device.
Installing equipment that your device is not designed to work with can lead to poor performance,
shortened service time, increased maintenance costs, property damage, and personal injury.

 Loading...