24
4.4 Control Console Instructions
4.4.1 Overview
You can control your engraver directly from the built-in control panel, through a direct connection with your
computer, or over the internet. For details on operating your engraving software, see its separate manual. The built-
in control panel can operate the laser manually or engrave designs loaded onto fl ash drives and external hard drives
connected to the USB port on the right side of the cabinet.
For manual operation, the arrow keys can be used to move the laser head along the X and Y-axis guide rails and the
PULSE button can be used to fi re the laser. The laser head can be set to tab over a set distance each time the arrow
buttons are pressed by hitting Z/U and adjusting the parameters under Manual Set+. The laser can be set to fi re for
a fi xed period by pressing Z/U and adjusting the parameters under Laser Set+. All of the buttons and menus should
be labelled in English. If they are not, press Z/U and go to the top button in the right column to change the console's
language settings.
To load a design from a FAT16 or FAT32 formatted fl ash disk or external hard drive, press FILE and then select
Udisk+ and Copy to Memory. Select the design in the File menu and then select Run. Various parameters can be
adjusted using the console's menus and submenus, including setting multiple origin points to engrave the design on
your material four times in a single session.
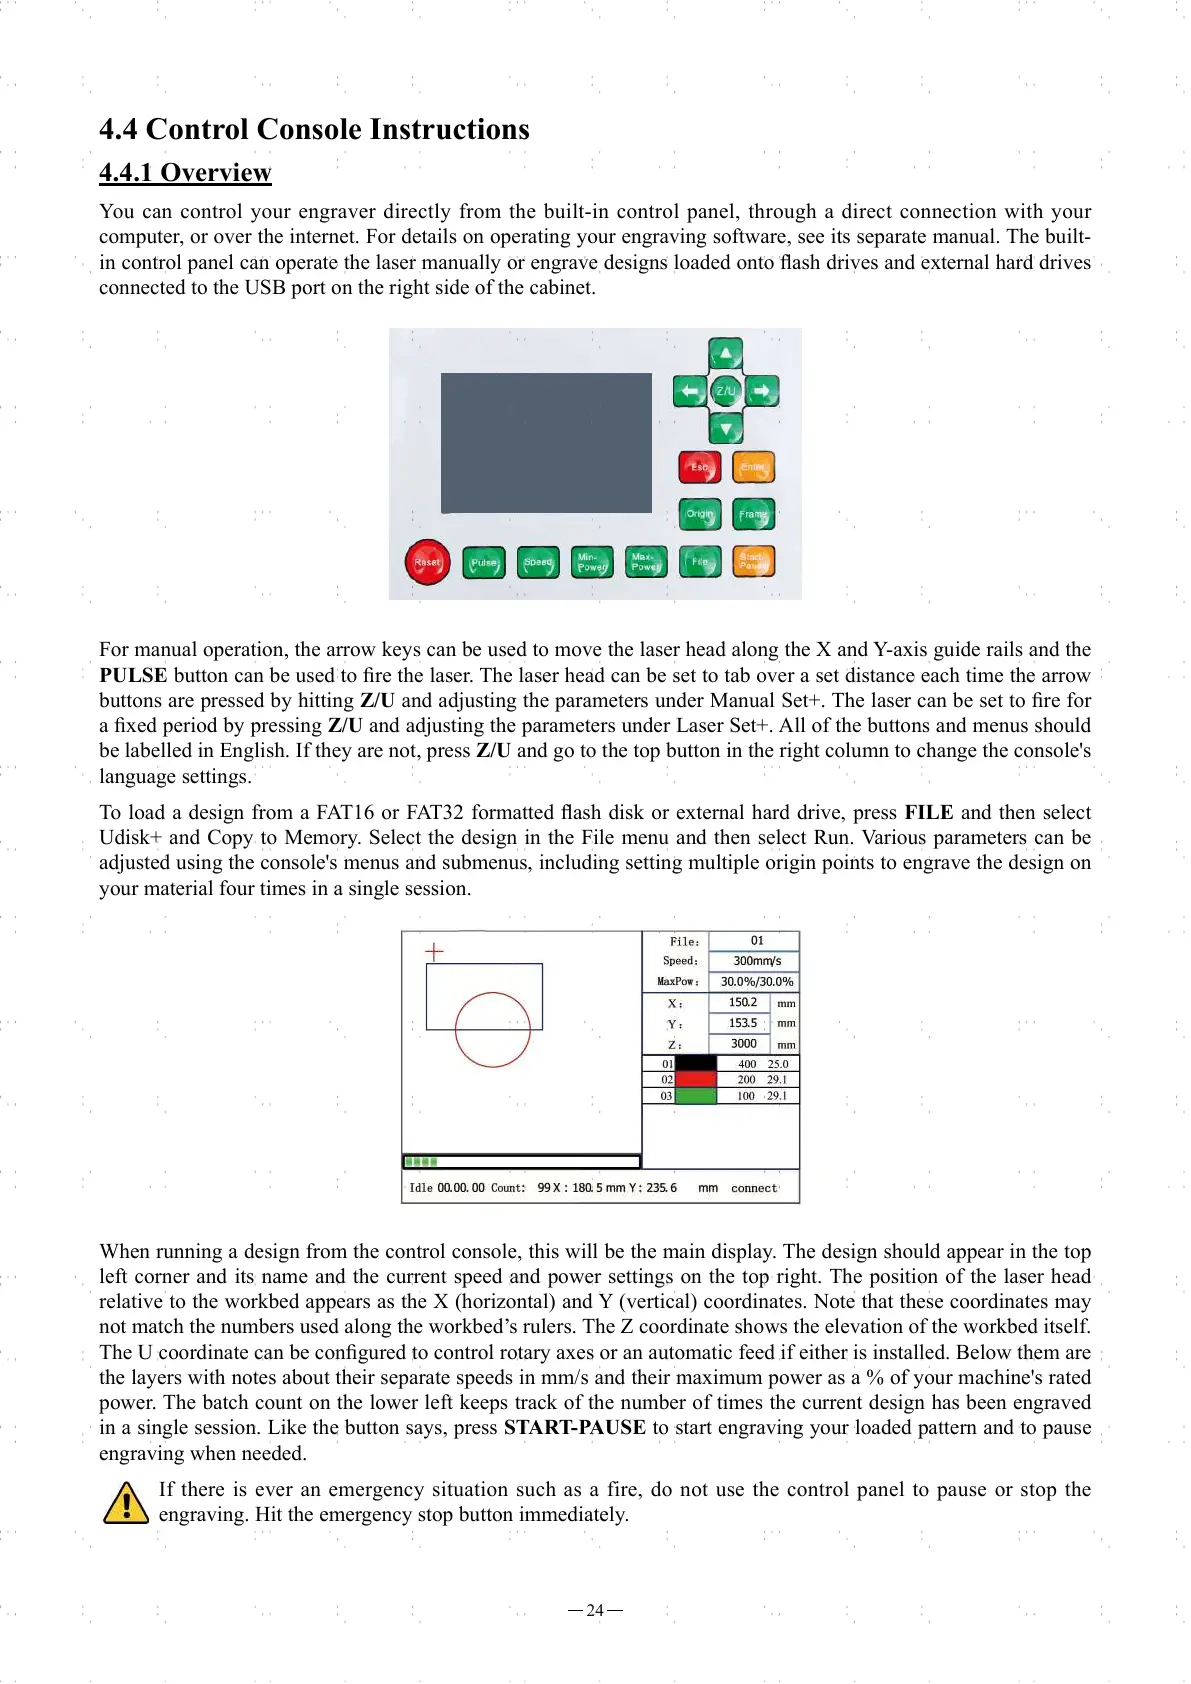
When running a design from the control console, this will be the main display. The design should appear in the top
left corner and its name and the current speed and power settings on the top right. The position of the laser head
relative to the workbed appears as the X (horizontal) and Y (vertical) coordinates. Note that these coordinates may
not match the numbers used along the workbed’s rulers. The Z coordinate shows the elevation of the workbed itself.
The U coordinate can be confi gured to control rotary axes or an automatic feed if either is installed. Below them are
the layers with notes about their separate speeds in mm/s and their maximum power as a % of your machine's rated
power. The batch count on the lower left keeps track of the number of times the current design has been engraved
in a single session. Like the button says, press START-PAUSE to start engraving your loaded pattern and to pause
engraving when needed.
If there is ever an emergency situation such as a fire, do not use the control panel to pause or stop the
engraving. Hit the emergency stop button immediately.