6
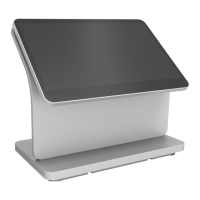
Workstation Setup
This section contains instructions for assembling, setting up, securing each
configuration of the Workstation 6 Series.
• Removing the Adjustable Stand Cover
• Locating the Hex Key and Security Screws
• Securing the Adjustable Stand Cover
• Securing the I/O Panel Cover
• Securing the Workstation to the Adjustable Stand
• Attaching the Epson PS-180 Power Supply to the Adjustable Stand
• Securing the Workstation Display to the Wall Mount
• Securing the Workstation Display to a VESA Mount
• Securing the Adjustable Stand to a Counter
• Installing the High-Mount Customer Display on the Adjustable Stand
• Installing the 10-Inch Customer Display with High Mount on the Workstation 6
Series Adjustable Stand
• Installing the 10-Inch Customer Display with Pole Mount
• Calibrating the Workstation and 10–Inch Customer Display
• Installing the Wireless Networking Module
• Installing the Power USB Module
• Installing the Biometric Fingerprint Module
• Installing Memory Modules
• Installing the NIST Label
Removing the Adjustable Stand Cover
Removing the Adjustable Stand cover is a common procedure used when setting up
any configuration of the Workstation 6 Series.
1. Place the Adjustable Stand on a flat surface.
2. If you attached the security screws to the cover, remove them using the hex key.
6-1
 Loading...