Other CRUs
Removal and Replacement 3-25
3. Grasp the module, pull the module forward until the break in the flange is visible,
lower the front of the module, pull the module free from the one above it, and
away from the rack.
4. Set the module down and away from the front of the rack.
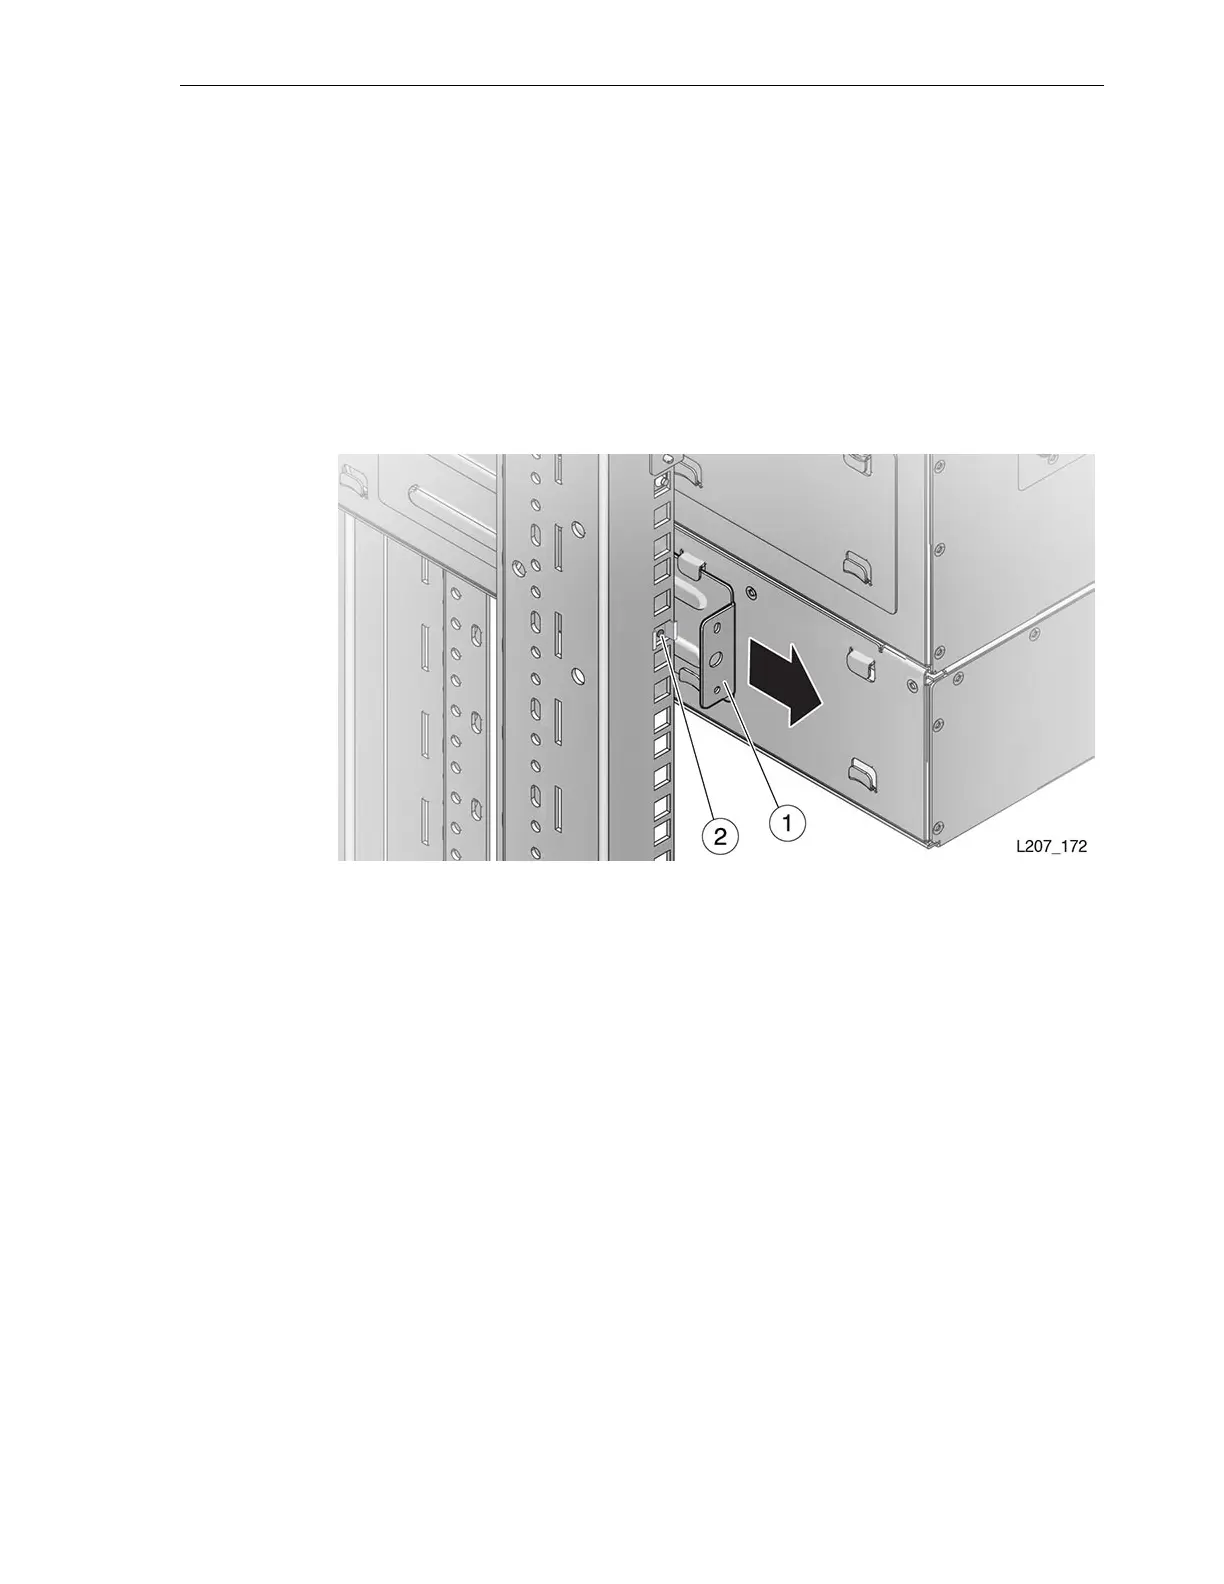
5. Remove the Phillips screws and rear rails from the module. Leave the clip nut in
place (see Figure 3–24).
6. Repeat "Remove Operational Expansion Modules Below the Defective Module" on
page 3-24 as necessary until you have removed all modules below the failing
expansion module.
Figure 3–24 Module Rear Rail Removal
Illustration Legend:
1 - Rear Rail
2-ClipNut
Task 4 Remove CRUs and the Defective Module
1. Remove the tape drive trays (see "Remove the Tape Drive Tray" on page 3-8), if
applicable.
2. Remove the tape drive filler (see "To Remove the Drive Filler" on page 3-25), if
applicable.
3. Remove the power supplies (see "To Remove the Power Supply" on page 3-10), if
applicable.
4. Remove the power supply filler (see "To Remove the Power Supply Filler" on
page 3-26), if applicable.
5. Remove the module controller (see "Removal" on page 3-17).
6. Remove the failed expansion module.
7. Continue with "To Prepare the Expansion CRU for Replacement" on page 3-27.
To Remove the Drive Filler
1. Loosen the thumbscrew on each side of the tape drive filler (see Figure 3–25).

 Loading...


