ST 9100 - INSTALLATION GUIDE
1. Hold the FAKRA connector between your thumb and finger as shown in Figure 14.
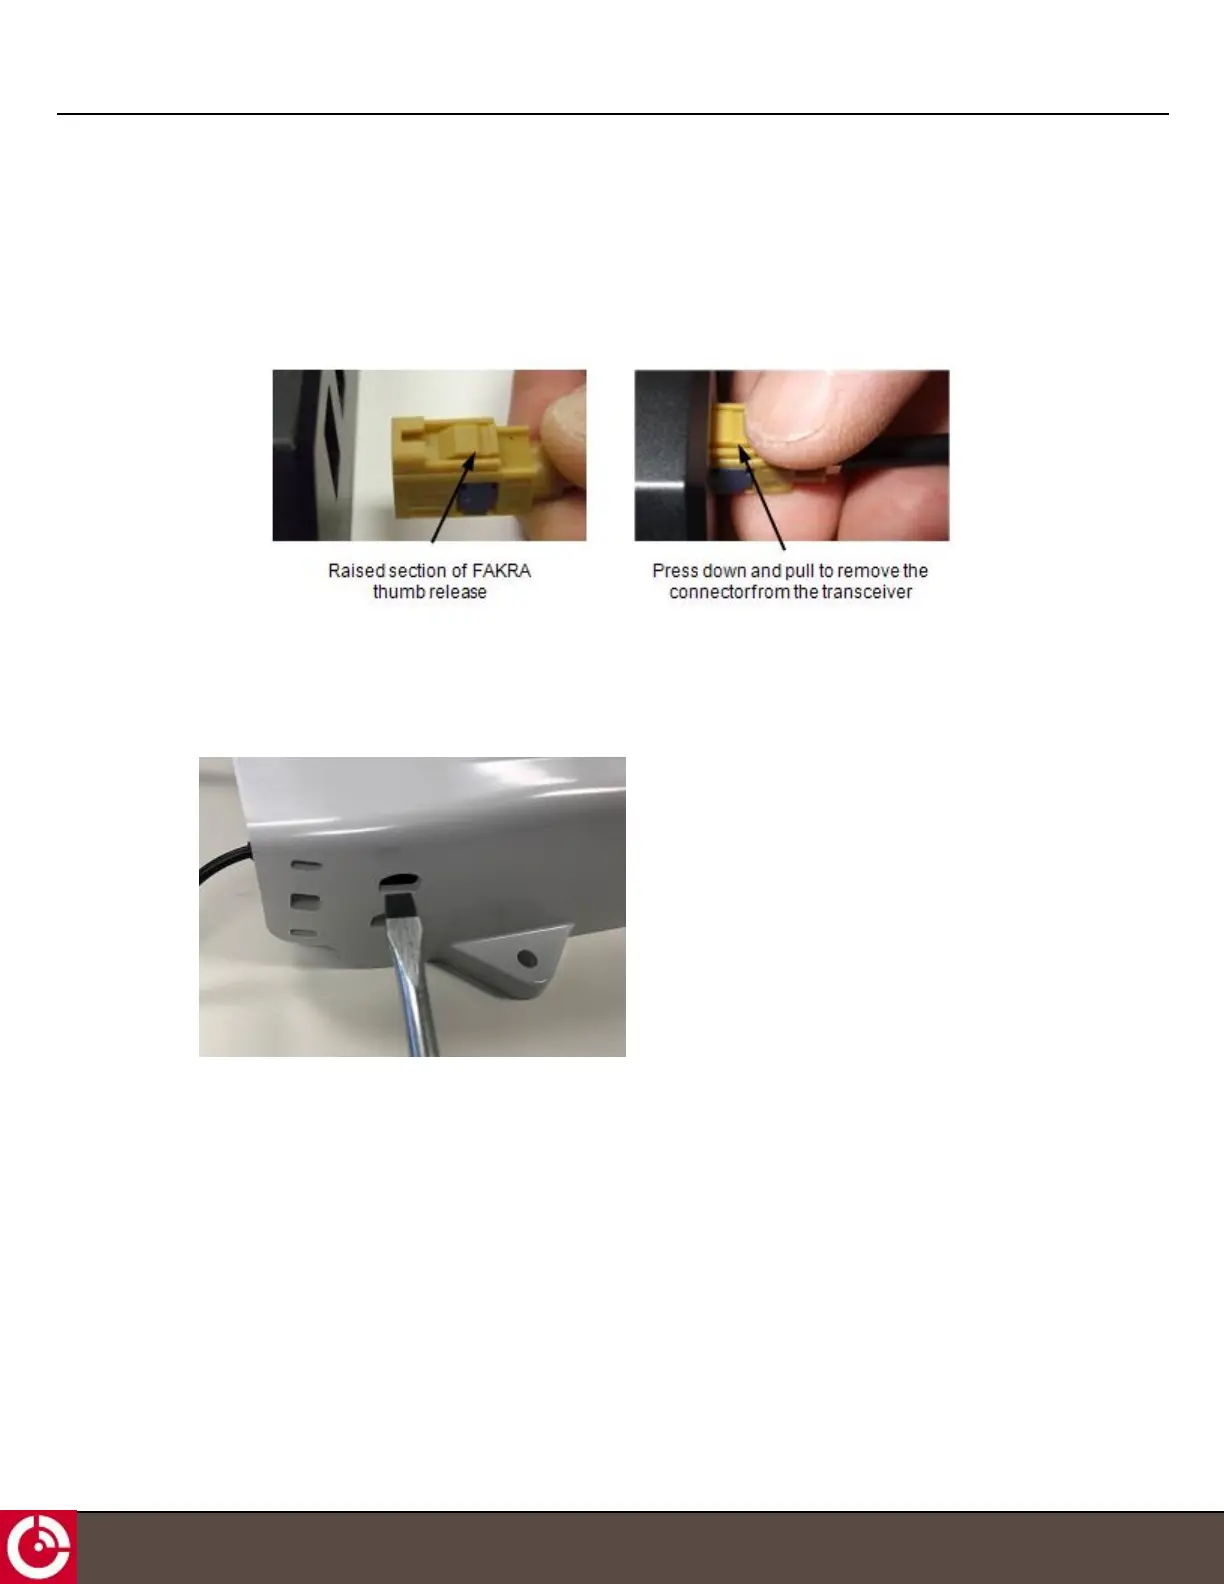
2. Press down firmly, with your thumb, on the raised section of the FAKRA thumb release (Figure 14) and pull the
FAKRA connector away from the transceiver unit while firmly holding down the thumb release (Figure 14).
You might need to hold the transceiver unit while removing the connector.
Figure 14: Disconnecting the FAKRA Connector from the Transceiver Unit
To remove antenna cables when the terminal shroud is attached, do the following:
1. Cut the cable ties securing the antenna cables to the terminal shroud.
2. Insert a flat head screwdriver through the cut-outs on the side of the terminal shroud to access the FAKRA
release.
3. Press down on the FAKRA release, and then pull on the connector to remove it from the transceiver.
Note: Remember to secure the cables with cable ties to eliminate strain on the cables when you reattach the
antenna cables to the transceiver.
1.9 Register the Terminal
Note: The terminal must complete registration to operate.
1.9.1 Activate the Terminal
Once you apply power, the terminal goes into satellite search mode to acquire the IsatData Pro network. This activity
may take a few minutes to complete. The terminals must complete registration to operate.
T414, Version 0.04 BETA © ORBCOMM
®
Proprietary
27