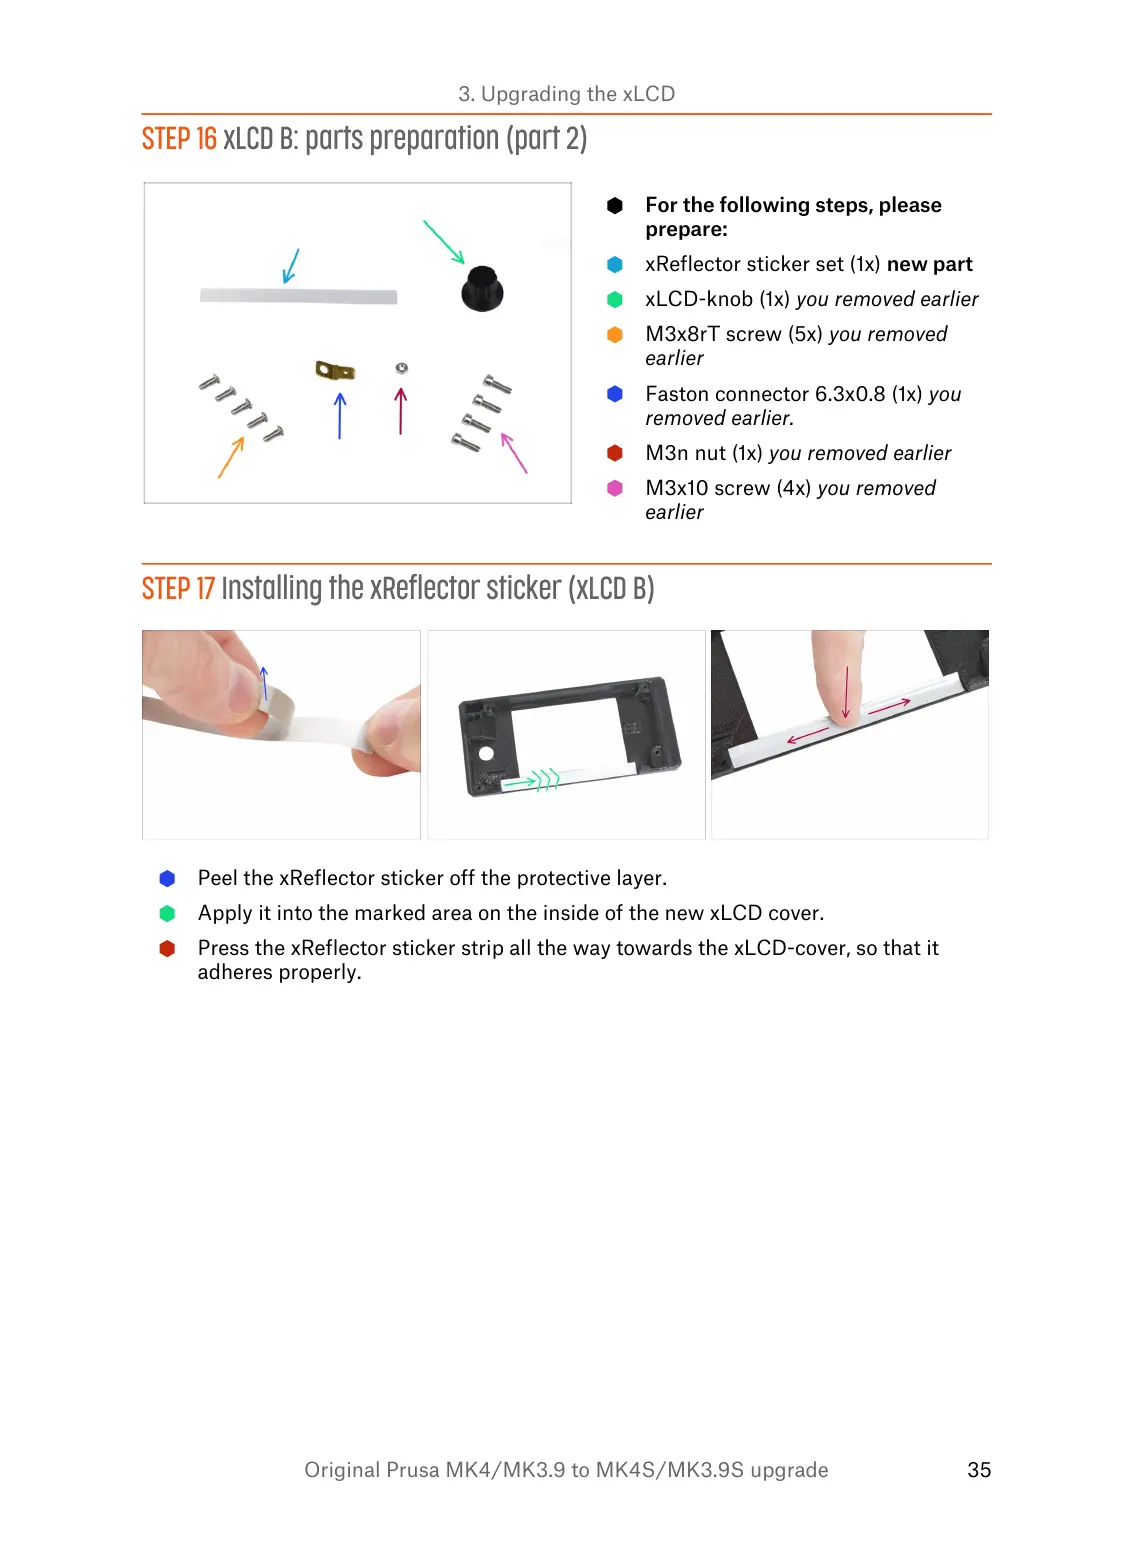
STEP 16 xLCD B: parts preparation (part 2)
For the following steps, please
prepare:
xReflector sticker set (1x) new part
xLCD-knob (1x) you removed earlier
M3x8rT screw (5x) you removed
earlier
Faston connector 6.3x0.8 (1x) you
removed earlier.
M3n nut (1x) you removed earlier
M3x10 screw (4x) you removed
earlier
STEP 17 Installing the xReflector sticker (xLCD B)
Peel the xReflector sticker off the protective layer.
Apply it into the marked area on the inside of the new xLCD cover.
Press the xReflector sticker strip all the way towards the xLCD-cover, so that it
adheres properly.
 Loading...